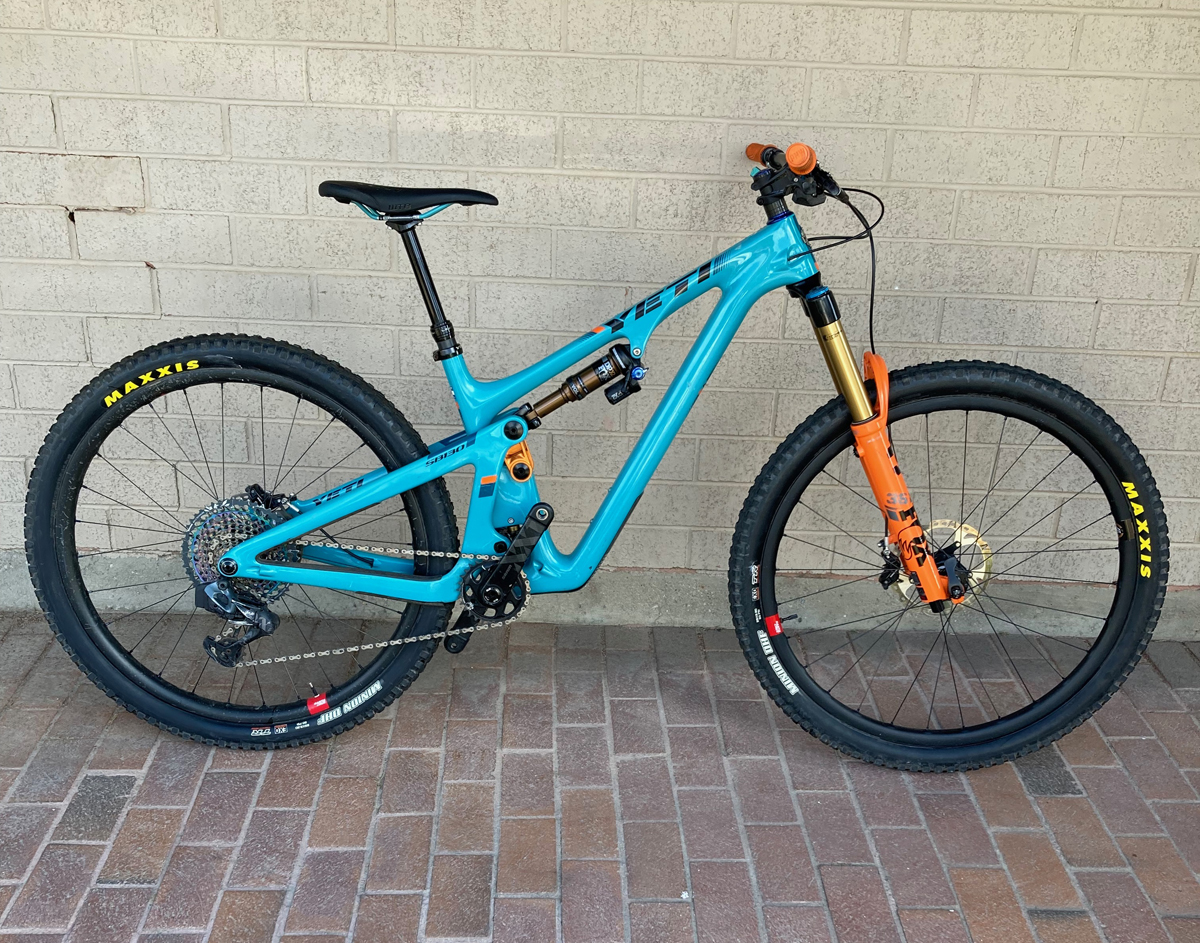
By Tom Jow — If you have been shopping for a bike anytime during the last few years, you know that during Covid it was nearly impossible to purchase one, new or used. How things have changed in just a couple of years. New bikes seem to be quite available now, with many manufacturers already (or still) offering discounts. In addition, some of these same manufacturers introduced new models just as the bike buying frenzy was winding down. What, we might ask, does all this mean? Well, considering that the high-end bike market rarely misses a chance to upgrade to the newest model, this means that a strong buyer’s market for used bikes could be on the way. But before we rush to the classifieds and test ride it’s important to have a plan. This plan includes research, inspection, and negotiation.
Assuming we already know what type of bike we want; the first step is to research new bikes and prices. Pay attention to year models and component build specifications. Year after year some bikes may have the same frame design with new colors and different parts. In addition to manufacturer websites, also visit some of the larger online stores. Many times, these stores will have in-house custom builds that may offer an even better price than the manufacturers.
With prices and specification notes it’s time to begin searching for a bike. Sources for used bikes include friends, local classifieds, online classifieds (Facebook Marketplace, Craigslist, KSL, etc.), and online resale (eBay, etc.). As a used bike shopper, one of the most important things is information about the item. Therefore, what we like to see in an ad is a good number of quality photographs of the bike, components, frame, wheels, wear points (i.e., drivetrain, brakes) and any scratches or damage to the bike. In addition, text that includes a brief list of the components and both use history and service history will make our decision to move forward easier (note to sellers: more info and more photos = less time-consuming questions). If the ad does not contain enough information be sure to contact the seller. Any seller unwilling to provide additional information should instantly be crossed off the list.
What are the characteristics of a good used bike? A low price, obviously, and in good condition but there is more than that. Ideally, we will find a relatively young bike that has not been ridden much. In addition to that, a bike that has been well cared for. Even if a bike is young and has a good service history there is a big difference between “raced every Saturday”, “it’s not my primary bike” and “I broke my leg skiing before I could ride it a second time”. Also, a bike that has not been used much, or at least not abused will show few, if any scratches. It should go without saying that a bike that has not been used much will have very little wear to the drivetrain and brakes. Something to consider for future service concerns is a bike that is equipped with current generation components (especially drivetrain).
With research done and questions answered it is now time for the inspection. Things to take with you are measurements (you did get a bike fit or measure your old bike, didn’t you?), tape measure, flashlight, hex wrenches, tire pump, shock pump (for mountain bikes) and helmet (for test ride). Before beginning the inspection keep this in mind: metal is much more tolerant of scratches, impacts and the force of over-clamping. If we did our due diligence during ad selection, then inspection shouldn’t be too difficult.
Wheels and Tires
Spin the wheels. Tires should be relatively straight and round. Tires that wobble may not be seated correctly, or the casing might be damaged. To evaluate the casing, straddling the tread with your palm, run your fingers around the sidewalls of the tire. Any significant bulges or deformations indicates a damaged tire casing and will need replacement.
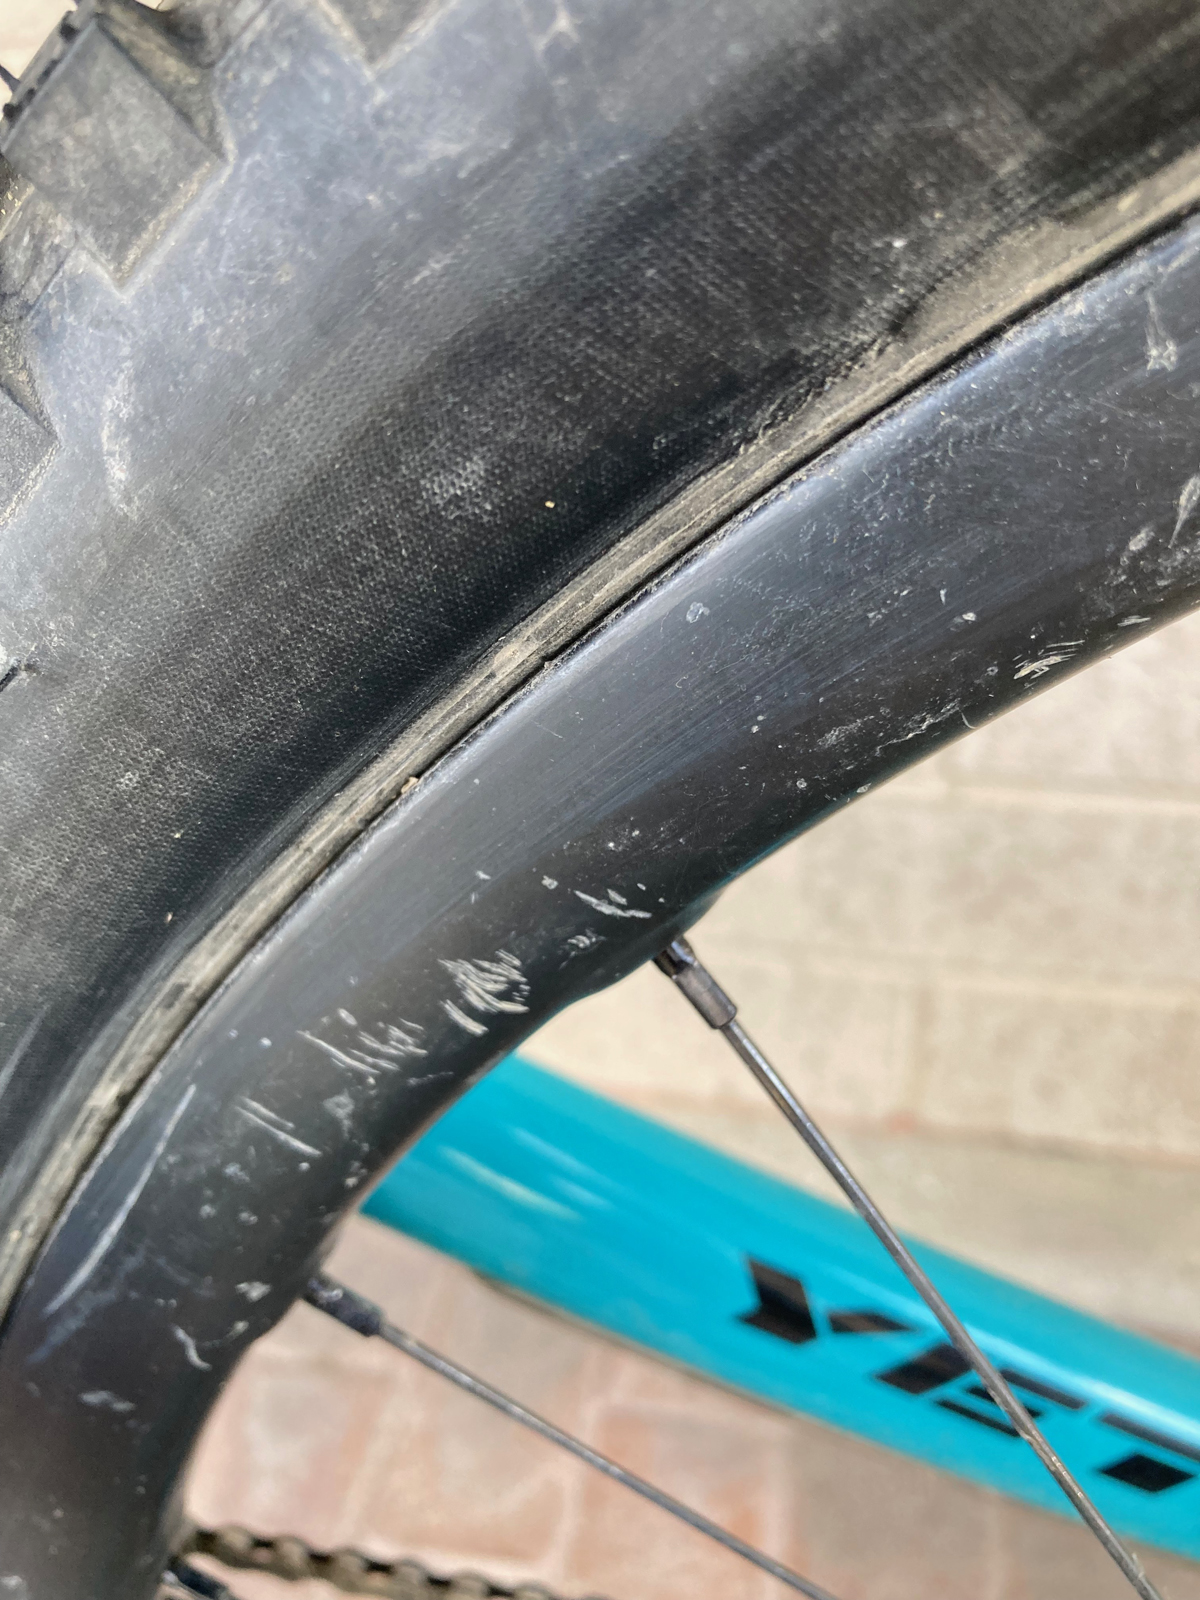
Watch for wobbles in the rim as it goes around. Visually inspect the rim for scratches, dents, and chips. Scratches aren’t so bad, but any significant dents or chips are a bad sign. Check carbon rims for cracks around the spoke holes. Test the spoke tension by going around the spokes and squeezing in pairs. The tension should be similar all the way around. A wheel that spins true with one or a pair of loose spokes may actually be bent beyond repair. Also, the wheel should spin smoothly, and for not a short period of time. In extreme cases, we may be able to feel vibration through the handlebars when the wheel bearings are dry.
Brakes and Handlebars
When the wheels were spinning was there a “ting, ting, ting” as the brake rotor spun around? If so, pay some attention to the rotors. They are rarely perfect, even out of the box but they shouldn’t be obviously bent. With the flashlight, look into the brake caliper. Is there visible clearance between the pads and rotor? How do the pads look? If the pad material (which is bonded to a metal plate) is less than a dime thickness they will require replacement. Scrape a fingernail across the lower edge of the rotor brake surface. If there is a significant ridge they probably need to be replaced. For those wanting an exact measurement, the minimum thickness is often printed on the rotor.
Inspect the brake levers. Are the lever blades free of damage? Are they in line with the lever body? Examine the brake lines. Are there any kinks? On flat bar levers, pull back the rubber boot where the line enters the lever. Damage can hide here. Actuate the levers. They should engage fairly quickly, and under pressure they should be firm. Spongy lever feel means a bleed may be necessary.
The handlebar tape or grips should be free of rips or tears. Torn grips or tape, along with scratched levers means crashes. Are the visible portions of the handlebars scratch free? More importantly, with carbon bars, is there any sign of over tightening in the stem clamp, and lever clamp areas? If necessary, use the flashlight for a better view. If necessary, loosen and move the clamp to get a better look.
Frame and Fork
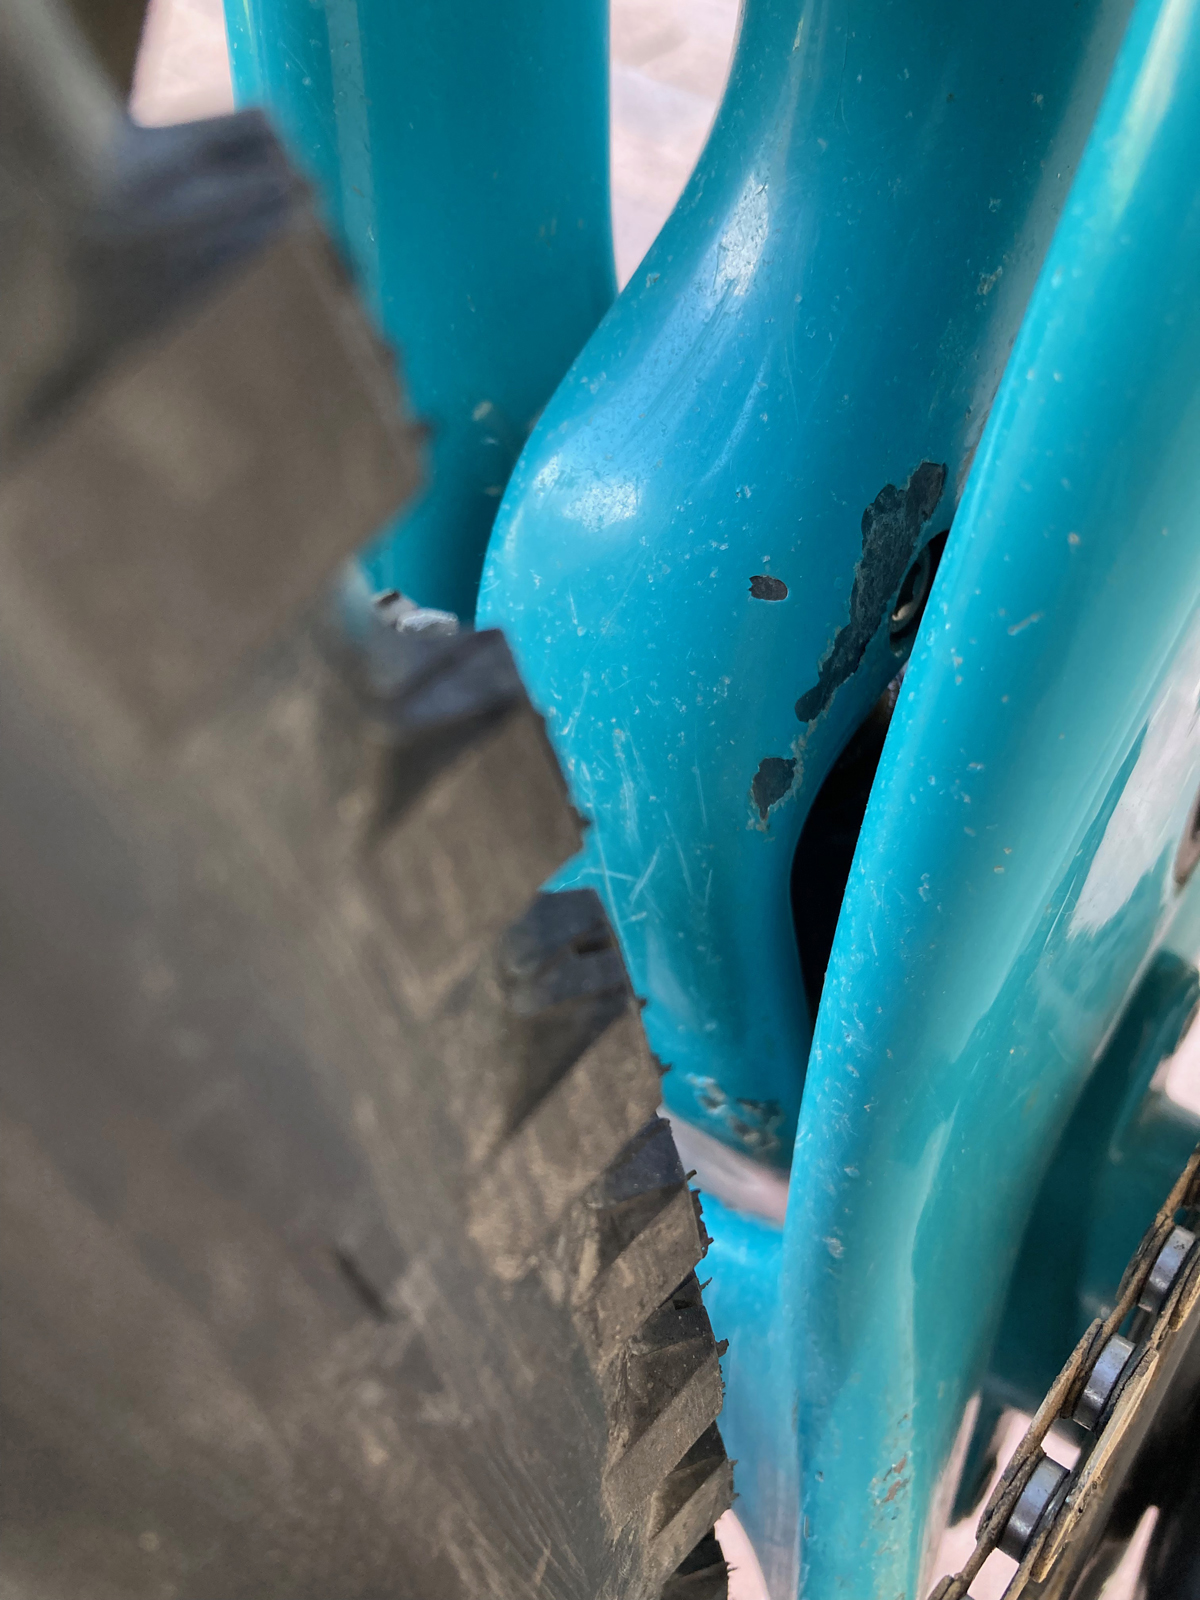
Every tube on a frame is subject to damage (if we did our homework well there shouldn’t be much to look at). As mentioned earlier, metal frames are much more tolerant of impacts and scratches. In most cases, a small dent is not the end of the world on a metal frame. Sometimes metal frames crack, usually along a weld or near the joint of two tubes. Carbon frames are much more susceptible to impact damage. Rocks kicked up from tires, crashing and landing on a sharp rock, or just falling over in the parking lot can crack a tube if it hits the wrong spot. Damage to a carbon frame may be split along a seam (rare), a spider web looking crack from a low-speed impact, or a tube may appear shattered from a high force impact.

Start the inspection at the top and front and check every tube. If the paint is a dark color, use the flashlight if necessary. Pay particular attention to the top tube where the handlebar might come in contact. Check under the downtube from headtube to bottom bracket. A mountain bike can have a lot of chipped paint under there. Look behind the chainring(s) where the chain may have fallen off inside. Down low behind the seat tube hides paint chips. And finally, the lateral facing sides of the seat stays and chain stays are easily damaged in crashes, or just falling over.
Inspect the fork on the outside, and inside between the blades. Remove and reinstall the axles to make sure they function properly.
Drivetrain
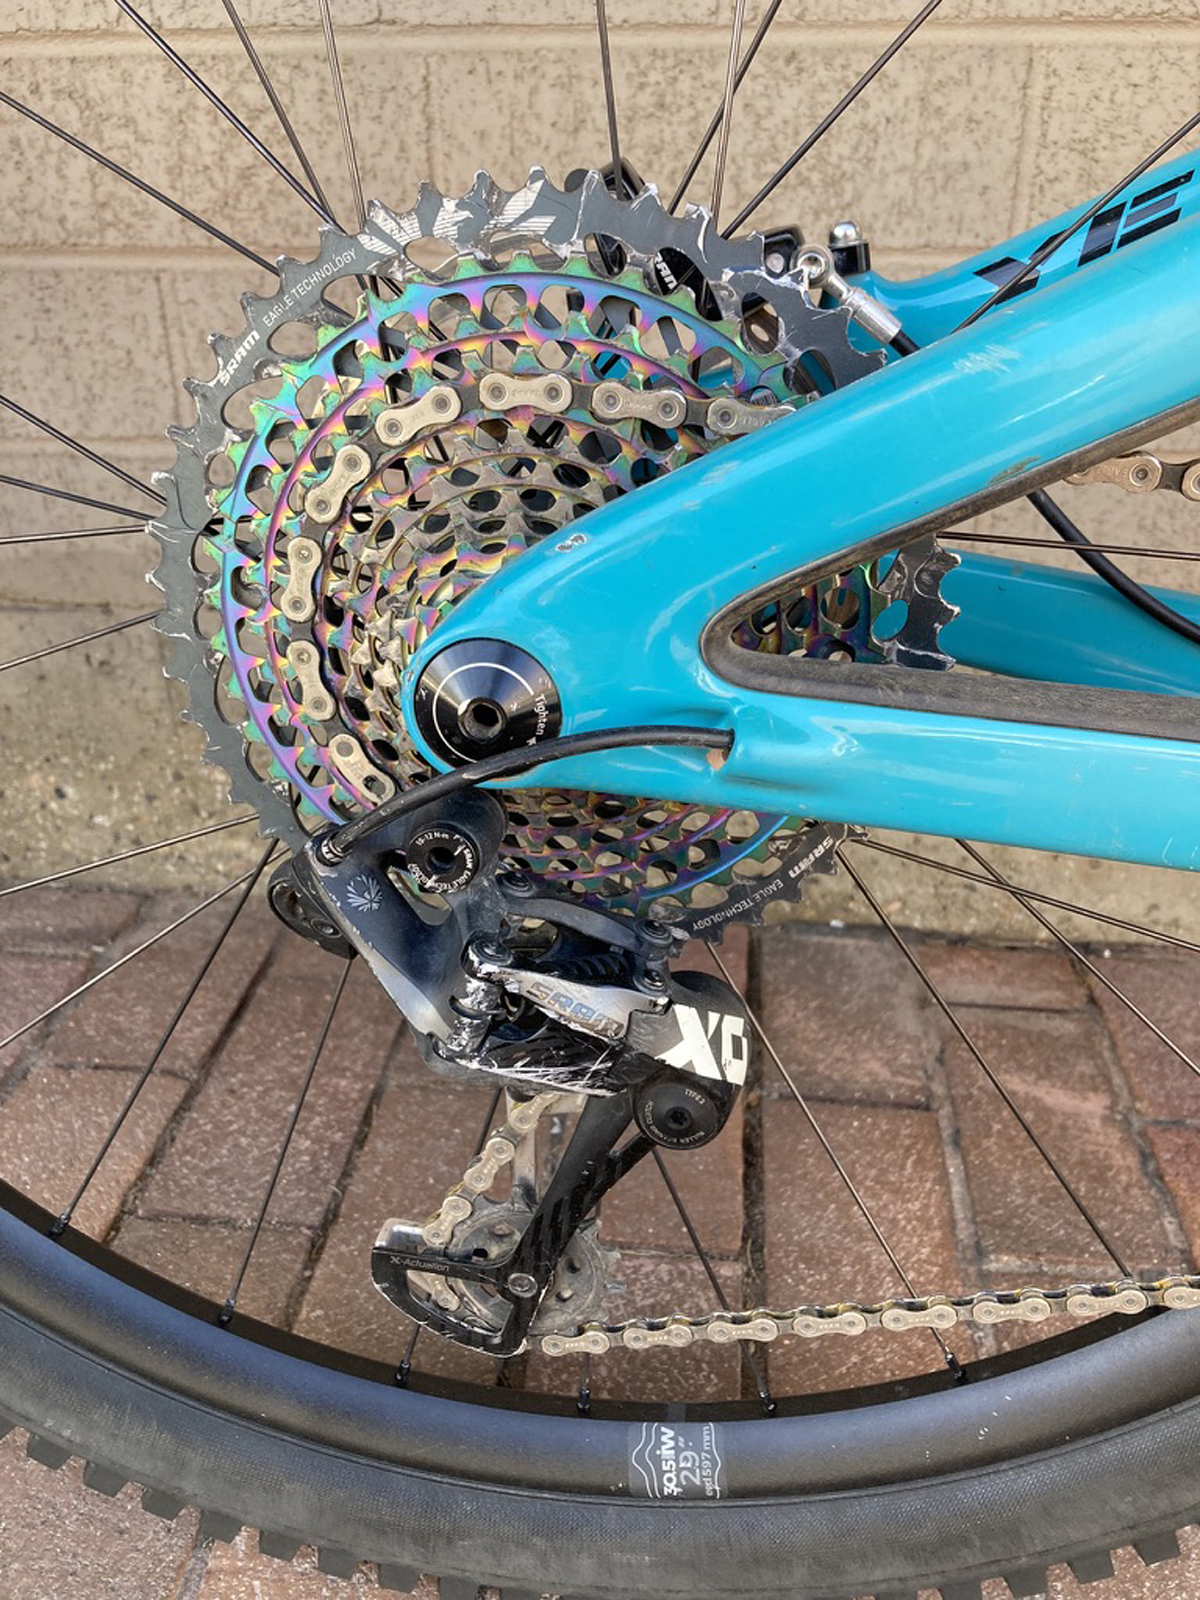
While looking around the bottom bracket and crankset, give the right crank arm a look. Is it scratched up on the face? If so, the chain could be coming off often on the outside. Inspect the ends of the arms near the pedal interface. Mountain bike cranks get scratched here from banging into rocks while pedaling. Not a huge problem for alloy cranks, but carbon fiber components do not like impact. Next, are the chainring teeth showing a lot of bright silver? If so, this is a sign of moderate to heavy use. Do the cassette teeth appear the same? The final part of the drivetrain is the rear derailleur. Is it heavily scratched? If so, another sign of heavy use, perhaps even crashes. Also, when the derailleur is scratched from crashes, it is possible that the right seat and chain stays in addition to the derailleur hanger may have been damaged. In that event be sure to give those things a closer look.
Seat and Seatpost
Remember to inspect the seat, seatpost and seat tube. Is the seat cover torn? Do the seat rails appear straight? Look at the seat from the back. Is it flat, without a dip on one or both sides? Torn seat covers usually mean some sort of impact. If the seat rails are carbon and the seat is torn, then the seat should be considered suspect. Loosen the seatpost binder bolt. Does the seatpost slide up and down easily? If the post and/or frame is carbon, it should feel a little gritty like sand. This would indicate a coating of carbon fiber assembly paste properly applied. Test the dropper seatpost. The upper tube should move smoothly down and up. Achieving full compression should require some force. The post should come all the way up with a firm snap. If neither is the case, ask if the air pressure of the seatpost is adjustable. Keep in mind not all brands have adjustable air pressure.
Suspension
For bikes with suspension, first visually inspect the components. Forks with small scratches to the lower legs may be fine, but scratches to the upper tubes are not ok. These scratches will greatly reduce the effectiveness and lifetime of the main seals. The same goes for the rear shock. The slider tube (the one that goes past the seal) needs to be scratch free. We also need to test the functionality of the component. Press down on the handlebars to compress the fork. If necessary, use the shock pump to let a little air out to be able to compress it about halfway. Does it move smoothly? Close the rebound adjustment and compress the fork again. Does it come back up really slowly? It should. Open the rebound adjustment and compress again. It should now come up fast. Next close the compression adjustment. Does it lock out the fork? Keep in mind that not all forks lock out. Generally, the greater the travel, and/or lower the cost, the less likely the fork has a full lockout. Repeat the procedure with the rear shock. Be sure to ask when the seals were (if ever) replaced.
Negotiation
If we like what we see, it’s time to negotiate. If the bike needs some work or parts, consider those costs when making an offer. How is the market? Are there a lot of bikes of this model for sale, both used and new? High used inventory equals better prices for buyers. What month is it? Sellers may be less motivated (desperate) in February than in August. We need to be fair to ourselves and (hopefully) not insulting with our offer. When I make an offer and the seller looks at me sideways, I just reply, “well, I have to ask.”
Being an informed shopper through research and paying attention to the details during the inspection makes the likelihood of an easy negotiation and successful used bike purchase very high. However, there is another factor not mentioned, patience. It may take some time before the bike we want appears in the ads. The first couple specimens may not be less than ideal. It can be difficult but keep your money in your pocket. In fact, when I make used purchases I leave my money in the car, or at home sometimes. So, with good practices purchasing a used bike can be fairly simple, and even fun. Happy hunting!
[Editor’s Note: It’s important to protect yourself against purchasing a stolen bike. If the price is too good to be true, it should raise red flags. If you are suspect, don’t feel an obligation to follow through with the purchase. You can also check the serial number against stolen bikes listed on BikeIndex.org. You can also ask for the owner’s original proof of purchase or receipt, although not everyone keeps those.]