By Tom Jow
With every new bicycle purchase, there is a period of time it takes to get comfortable. A session with a good bike fitter can shorten that amount of time, but being comfortable on a bike is an evolution of bike and body. Factors such as terrain type and ride length have an effect on how a rider is positioned on the bike. Even after a good fitting, it can still take some time to get the position of the handlebars, brake and shift levers, and saddle angle into just the right position. For example, I have been fine tuning the handlebar angle on my new mountain bike for most of the summer and it is just now starting to feel correct. In the following paragraphs I will explain the basics of how to customize the position of the handlebars, brake and shift levers, and saddle angle for the most comfortable position.
Saddle Adjustments
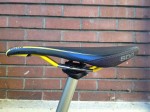
Starting with the saddle, there are three adjustments that can be made. The height and fore-aft position of the saddle can be easily transferred from the previous bike, or set by a good bike fitter. The angle of the saddle, however, can be a little trickier. The default adjustment for a saddle is level because it’s a good starting point and frankly, it looks good. But depending on where and how you ride, level may not be correct. Setting the nose of the saddle up a little bit tends to keep the rider in position on the saddle better but it can put too much pressure in the crotch if the handlebars are low or if the rider goes up steep grades for long periods of time. Adjusting the nose of the saddle down can relieve that pressure in the crotch, but too far down and the rider tends to slide forward, requiring a constant pushing back to stay on in place. It is a task that may necessitate on road adjustments over several rides.
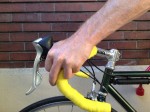
In order to be comfortable on the handlebars, one factor is placing the handlebars or controls so the wrists and hands can rest in a neutral position. On a road bike, rotate the handlebar up or down until there is a 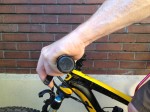 straight line between the forearm and knuckles. Be careful not to over do it. For example, during the late 1990’s and early 2000’s I noticed the pro peloton had begun to rotate their handlebars up in order to flatten the brake hood position of the handlebar. I then noticed many recreational riders doing the same thing with one exception: many were over rotating the bars so there was a sharp bend in the wrist. A similar condition occurs to mountain bike riders when the brake levers are not adjusted down far enough (see below).
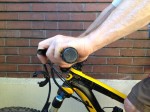
The positioning of mountain bike handlebars is also important in order to keep the wrists at a comfortable side angle. Narrow, flat handlebars are much easier to adjust because they have only one horizontal sweep angle. Riser bars often have two sweep angles; one back toward the rider in addition to one up toward the ends. Rotating a riser bar back tends to force the elbows in and place a lateral strain on the wrists while a 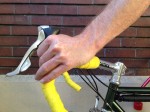 forward rotation moves the elbows up and out freeing up the whole lower arm. If it is not possible to find a comfortable position through rotation, it may be necessary to find a bar with more compatible sweep angles.
Properly adjusted mountain bike brake levers are positioned downwards near a 45 degree angle, allowing the rider to rest their fingers on the brakes with a straight line passing from the forearms to the large finger knuckles. When the wrists are are in a flexed position, the small space through which blood vessels and nerve pass through to the hands can be constricted. Combined with with unnecessary stretching or strain of the forearm muscles can lead to some cramping, pain or numbness in the wrist and hands.
Proper road handlebar adjustment with neutral wrist.
Road bike handlebar over rotated flexes the wrist.
Level Saddle.
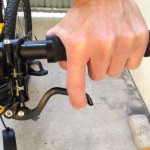
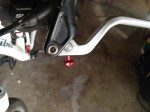
In addition the having the proper angle, brake levers are adjustable for reach, inward placement on the bar, and sometimes, lever movement. Road bike levers are adjustable for reach by the use of a small wedge placed between the body and lever or with a adjustment screw under the hoods. Mountain bike brake levers have either an external adjustment knob or a small screw which requires a wrench. While almost all mountain bike brake levers are adjustable for static reach, only the higher end models offer a lever movement adjustment. This adjustment allows the rider to fine tune when the brakes actually make contact. Another critical adjustment is the horizontal placement of the brake levers. They need to be far enough in so that the hand can grip the lever adequately without interfering with other controls or fingers.
Two contact points and a half dozen different angles. Seems easy to get set up doesn’t it? Keep in mind that factors such as the type of terrain (flat vs. mountainous) and the length of rides can make a big difference. What may be comfortable for an hour flat may be excruciatingly painful for 3-4 hours in the mountains. If your handlebar position or saddle angle don’t feel correct, they probably aren’t. Take the necessary tools on a ride and plan on stopping to make adjustments until it feels right. Every rider is different and requires a different setup. Take the time to customize your setup and you will be rewarded with more comfortable and more enjoyable rides.
Got a bike question? Email Tom at [email protected].

