By Tom Jow — During the first couple rides on my mountain bike this year the brakes felt different. They sounded different too. I noticed that under light to moderate pressure they felt a little rough. Under moderate to heavy pressure not only did they feel rougher, but they were also making a loud grinding sound. To me it was obvious, it was time to inspect the brake pads and rotors.
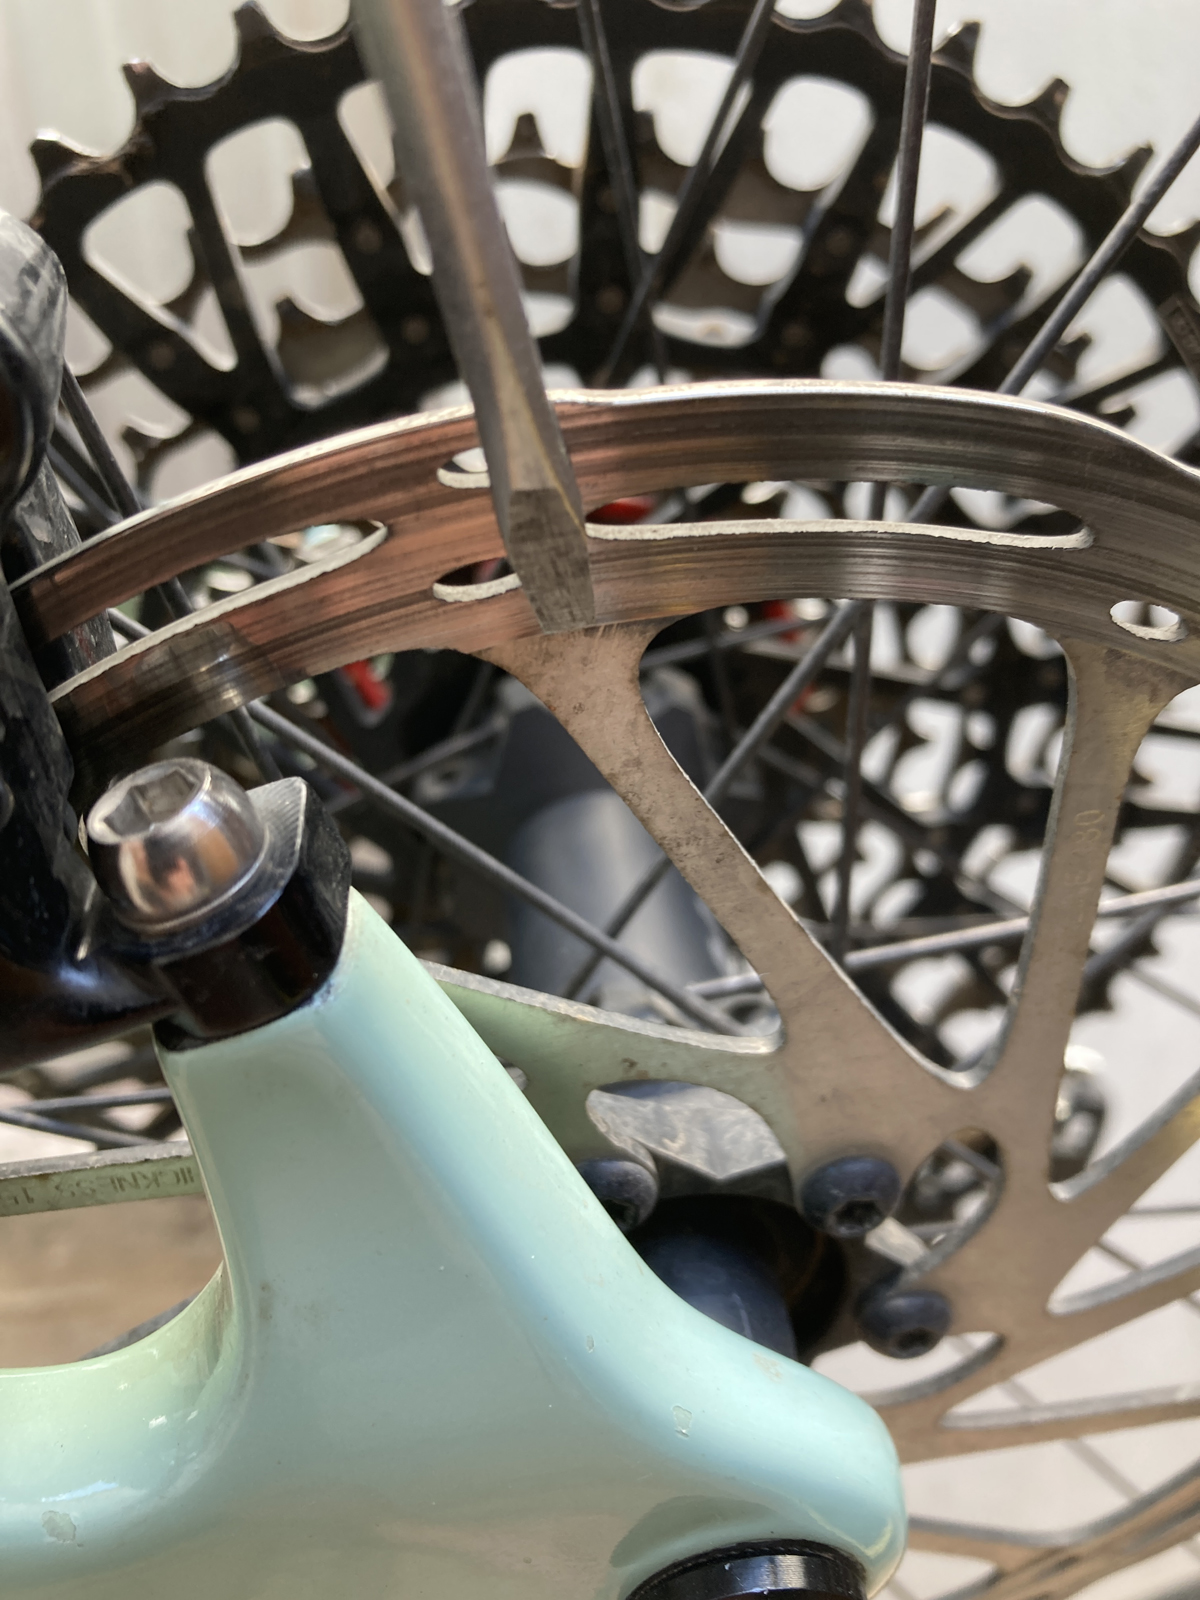
Inspecting disc brake pads and rotors is an easy thing to do and really, it should be done regularly. I start with the rotors. Visually inspect the braking surface, looking for deep wear marks and discoloration. It can be helpful to use a small (clean) screwdriver to feel the surface of the rotor. Especially on mountain and gravel bikes, dirt and small stones can get between the pads and rotors to damage and increase the wear of the components. After checking the brake surface, scrape the rotor toward the center at one of the tines. A well-worn rotor will have a noticeable difference of thickness here (photo 1). For a precise measurement of the thickness, use a metric caliper (photo 2). Manufacturers print the minimum thickness on the rotor. If the measured thickness is anywhere near the minimum the rotor should be replaced.

Should the rotor need to be replaced, it is important to identify the mounting type. One uses six bolts that thread into the hub and the other, called “centerlock” slides onto a splined mount on the hub (photo 3). While it is best to have the exact type for the hub, it is important to know that six-bolt rotors can be adapted to use on centerlock but not the other way around.

In terms of absolute wear, it is easy to inspect the brake pads also. Looking into the brake caliper, we can see the rotor, some light on each side (hopefully), and the brake pads (photo 4). The brake pads are made up of friction material bonded to a metal plate. When the friction material is one millimeter or less, replacement is necessary. Whether or not the brakes are grinding like mine were, it is also a good idea to remove them and inspect the surface (photo 5). To do this, carefully remove the brake pad pin retaining clip. Then, unscrew the brake pad pin and remove. Grasp the tabs of the brake pads and gently pull up (photo 6). If the pads are of a reusable thickness, keep fingers off the brake pad surface.

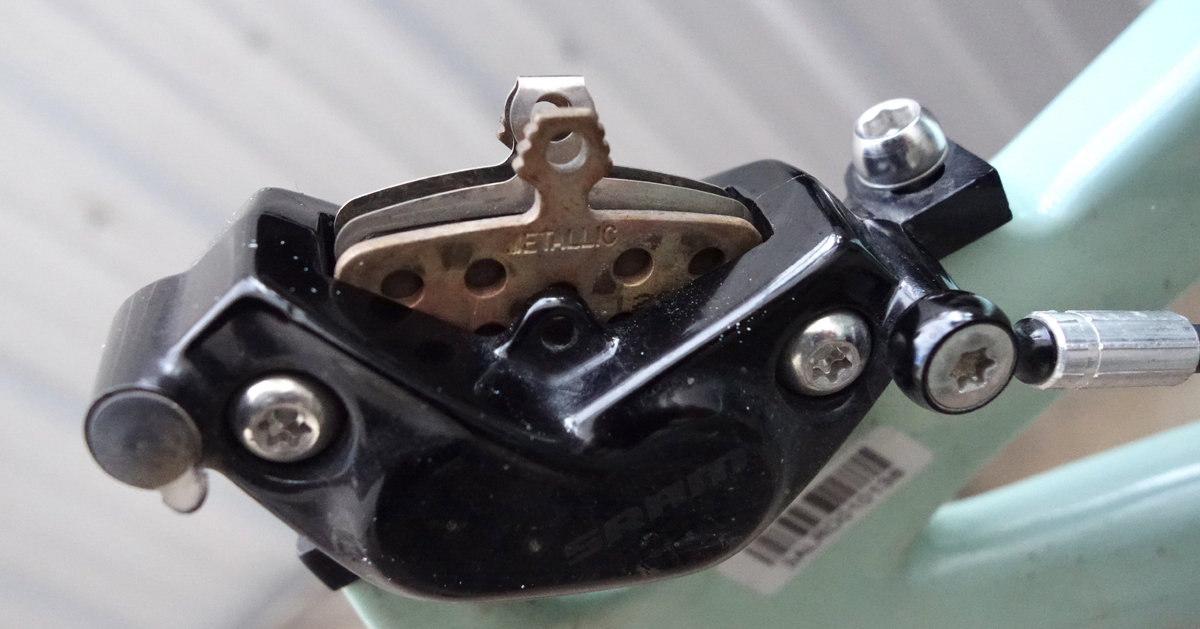

With the pads out, we can also identify the friction compound. This is printed on the back of the pads. This is especially important in the event we want to replace our pads only. The reason for this is that friction material “embeds” itself into the rotor. Mixing the two materials greatly diminishes braking performance.
To ensure having the best braking performance possible, replace the pads and rotors together. It may be a little more time and expense, but it is so nice to have brakes that feel like new. There’s a joke at the bike shop, “brakes just slow you down”. When you need to slow down though, you want to be able to.
Next time: a step-by-step guide to brake pad replacement.