By Tom Jow — During the first couple of rides this season my brakes let me know it was time for inspection. The loud grinding and screeching was a telltale sign. They are easy to neglect because they self adjust, never letting on that they are wearing out until it is too late
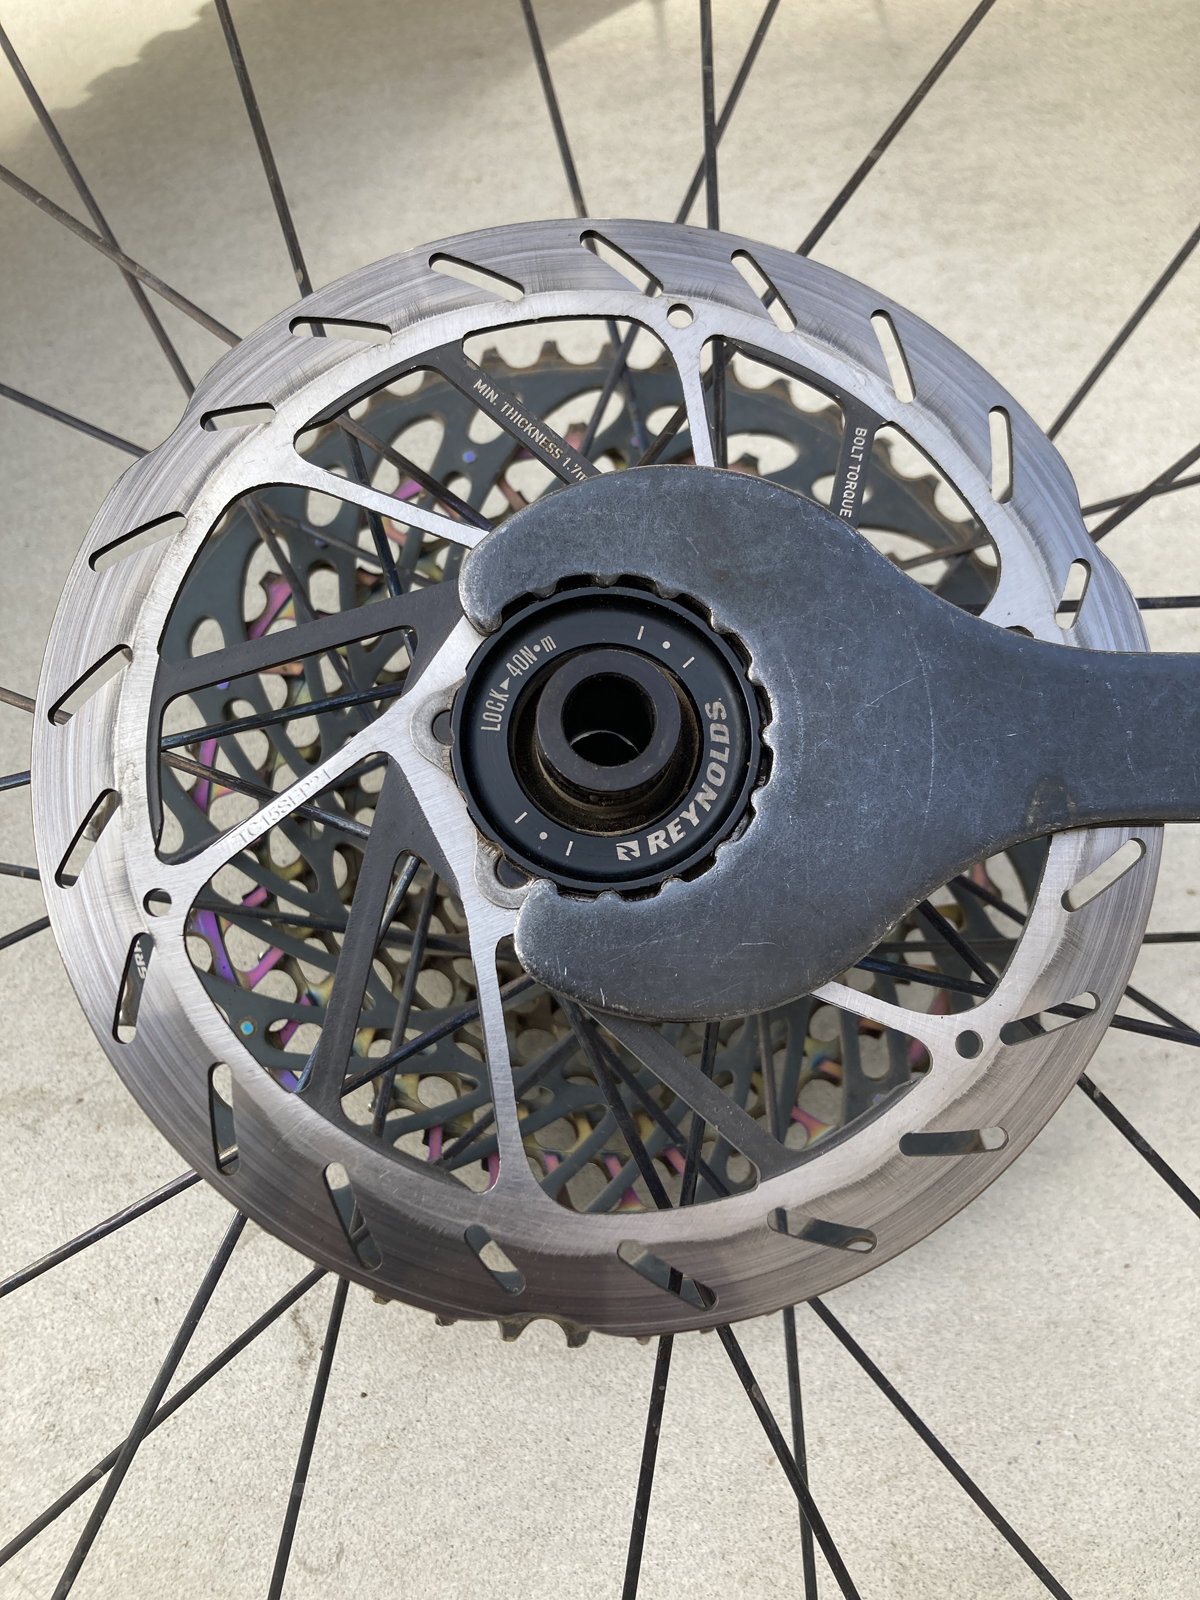
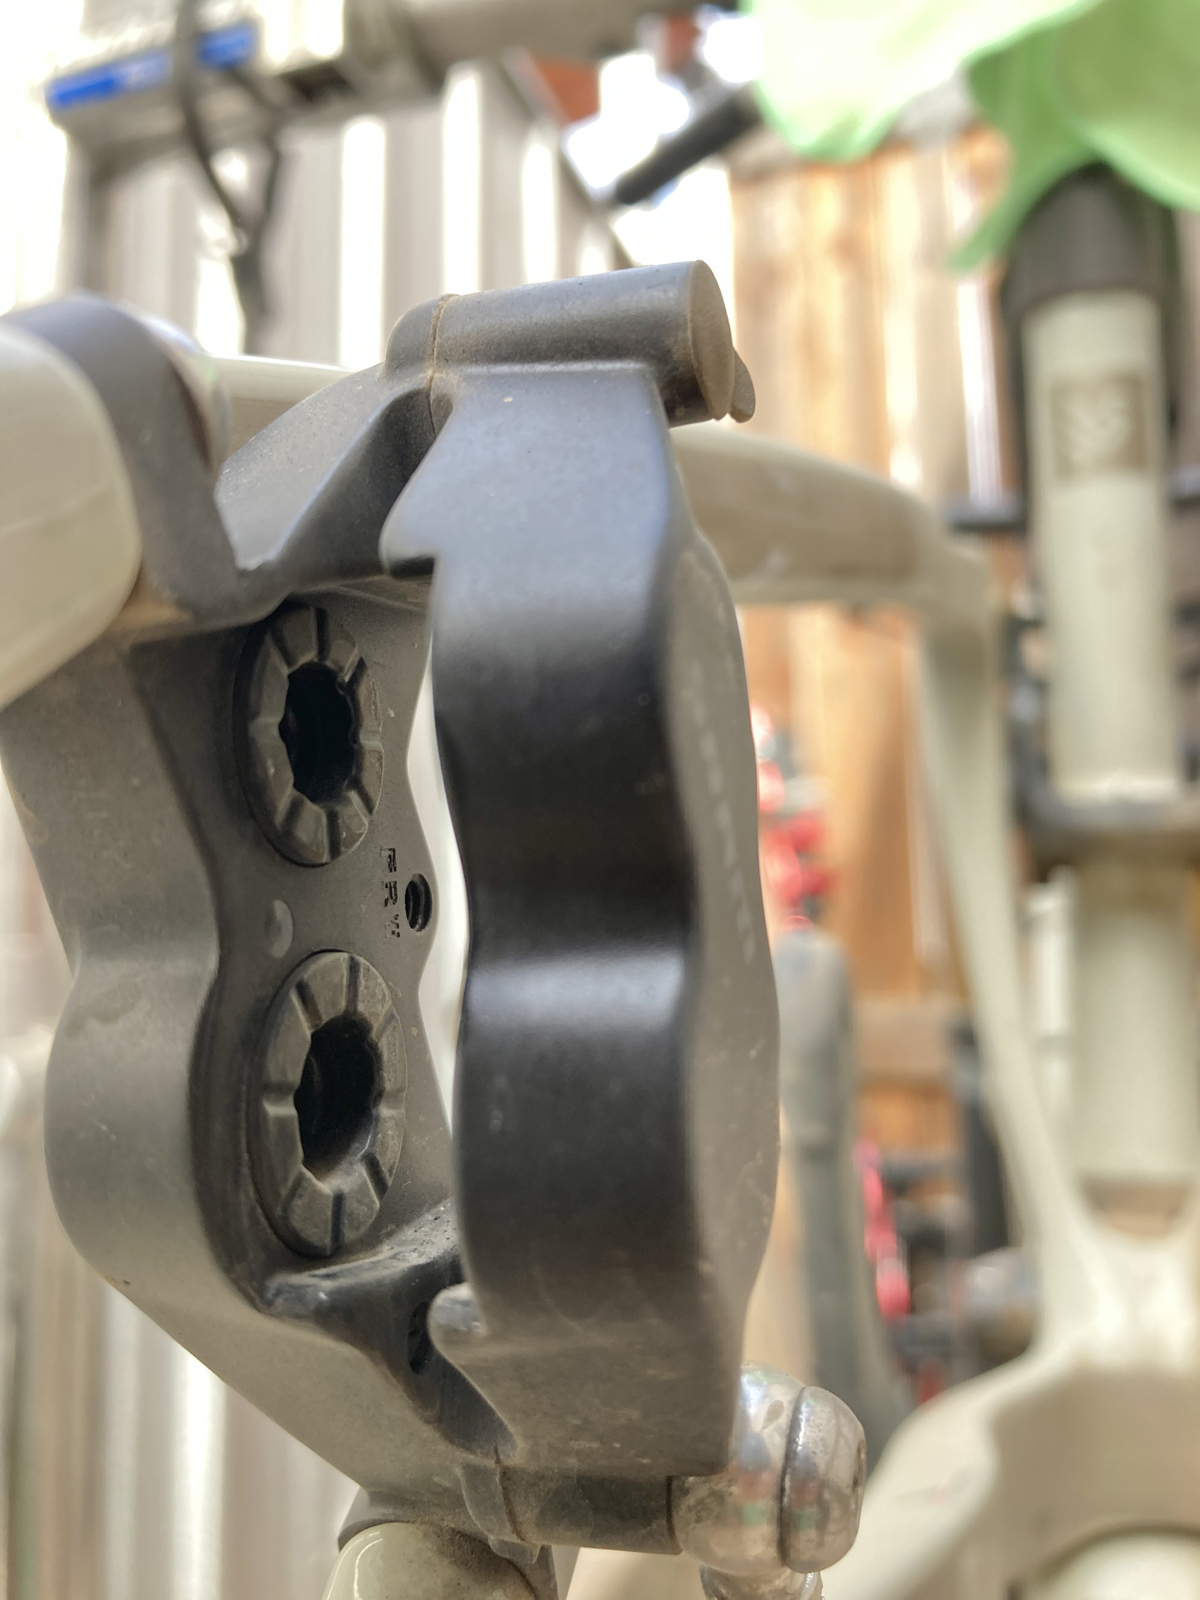
It is easiest to begin with the rotors, as they are out in the open and easy to see. First, visually inspect the brake surface. Does the brake surface have any deep gouges or scratches? What color is the metal? Braking generates a lot of heat. Heat that can turn the color of the rotor various shades of blue. A rotor exhibiting either of these conditions is a good candidate for replacement. We also want to inspect the rotor for wear. Using a clean, small screwdriver, scrape across the braking surface of the rotor toward the center. If there is a significant ridge at the inner diameter of the brake surface, rotor replacement is probably necessary. A more precise method of measuring rotor wear is with a metric caliper. Measure the thickness of the brake surface and compare this with the minimum thickness printed on the rotor. If the thickness is near or less than this dimension, replace the rotor.
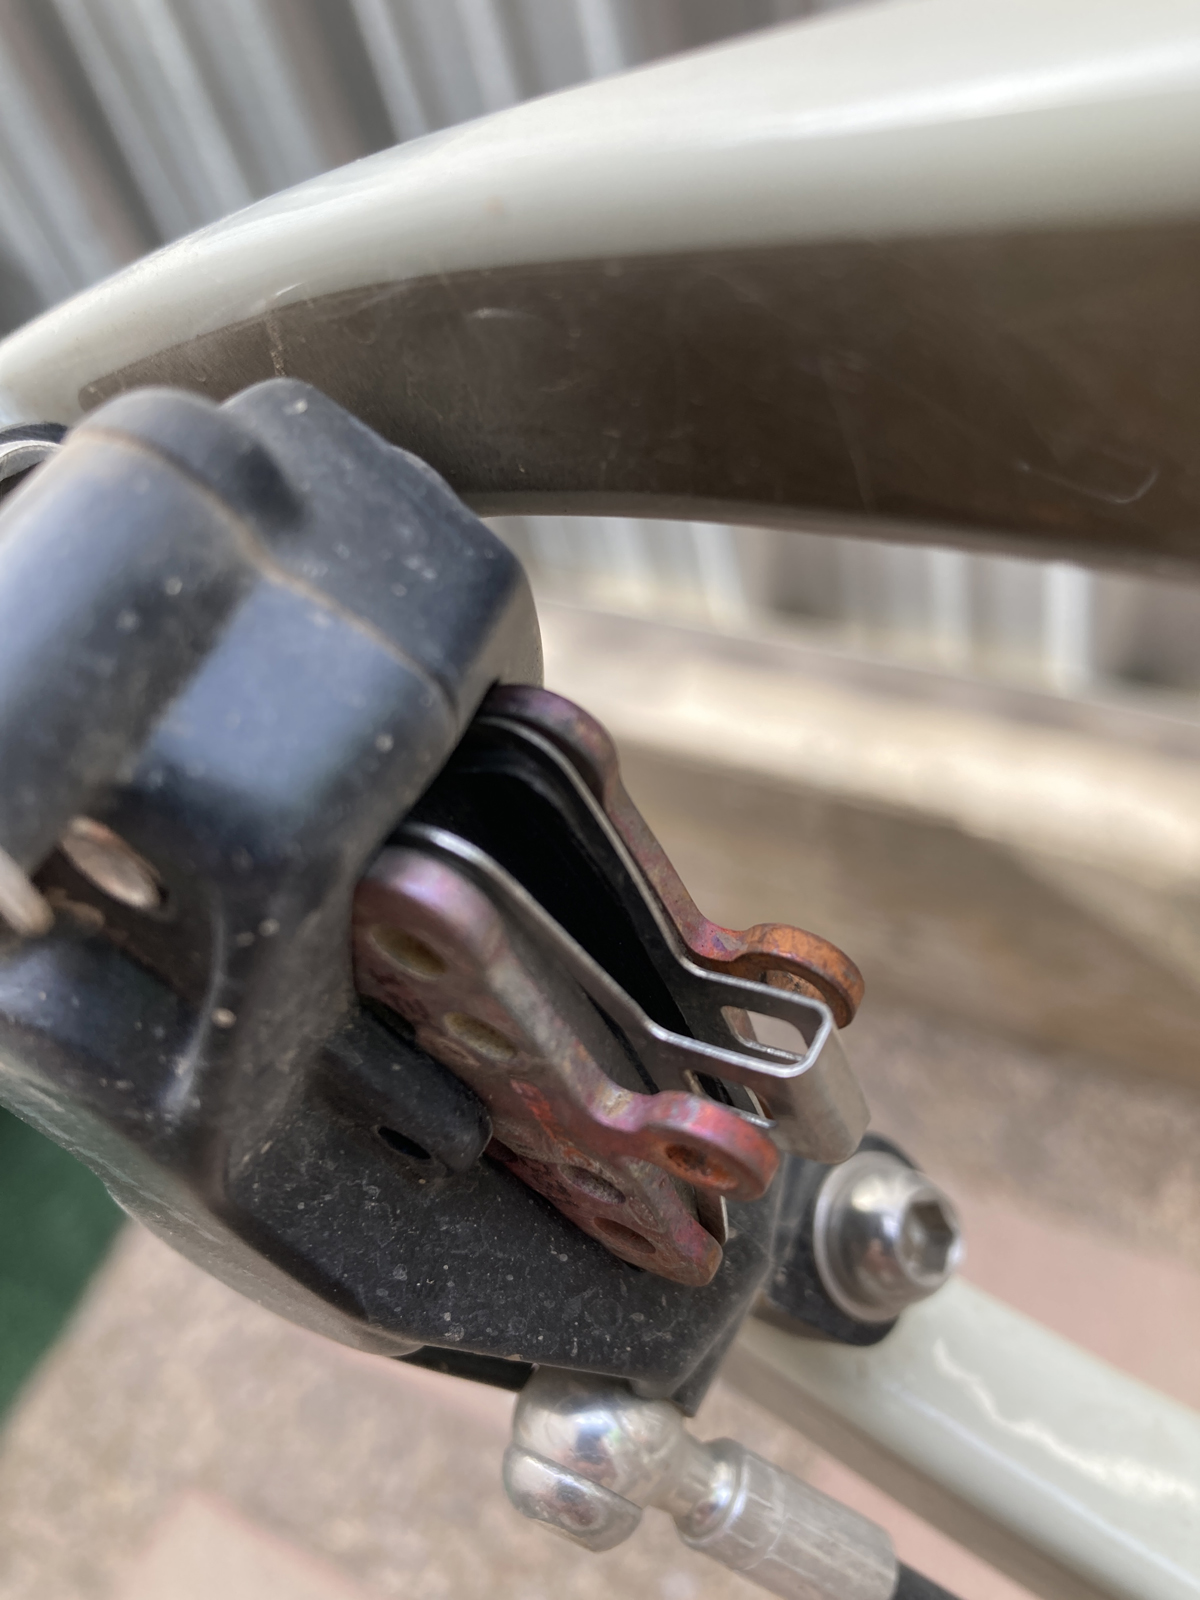
Next, inspect the brake pads. In a well lit area or with a flashlight, peer into the top or bottom of the brake caliper. What we will see is the rotor in the center, a gap of light (hopefully!) on each side of that, and then the brake pads. Most obvious is the brake pad backing plate, to which the brake pad material is bonded. When new, the brake pad material and backing plate are about the same thickness, approximately 2.5mm. When the pad material is 1mm they should be replaced immediately.
If the brakes are loud or not gripping well, it is a good idea to remove the pads and inspect the pad surface. Not only is the pad surface susceptible to damage or overheating, they are also easily contaminated. Dirty water, bike wash soap, degreaser, or errant chain lube can greatly reduce the effectiveness of the brake pads
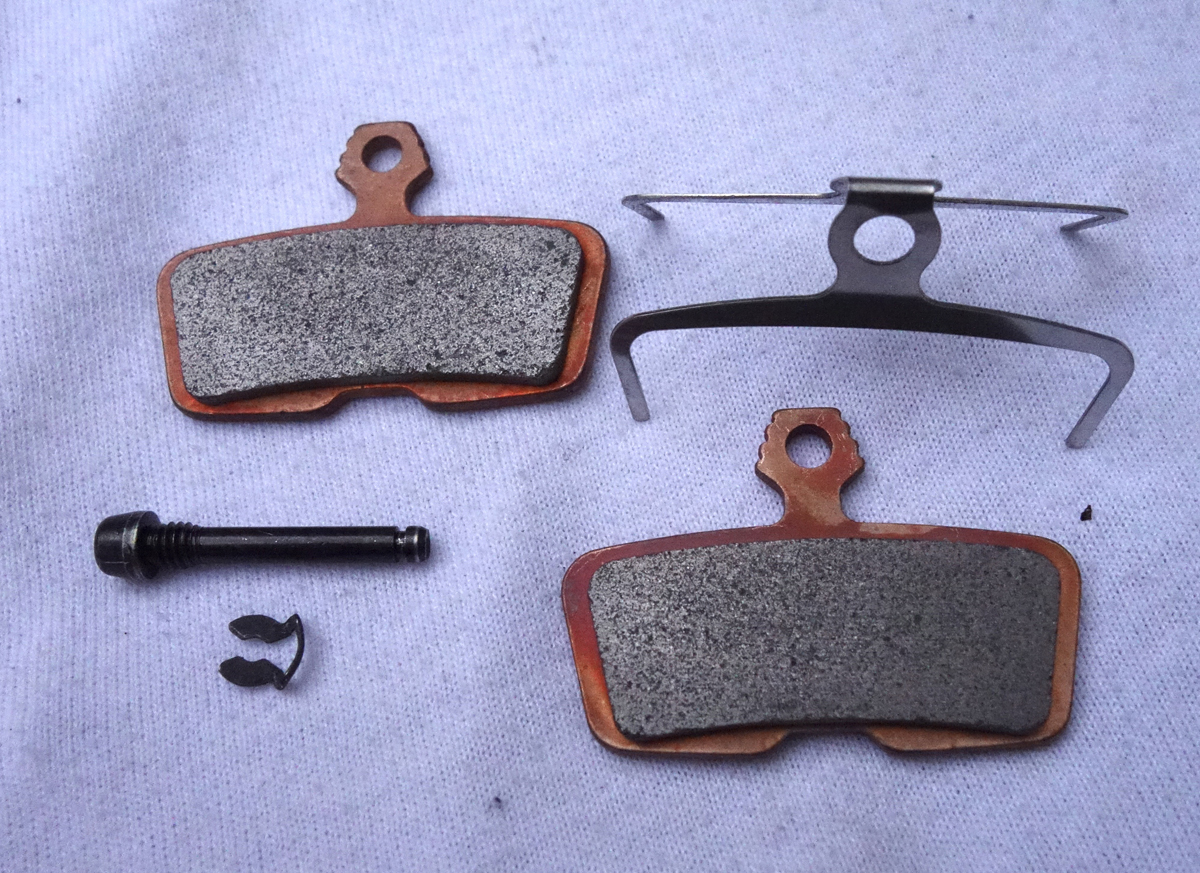
Provided the brakes are otherwise operating properly, replacing the brake pads is normally a straightforward procedure. Before we get too far, we must identify the parts we need. Again, beginning with the rotors, inspect the face of the rotor for any printed information. Most rotors have the size printed right on it. At the same time, turning our attention toward the center, look for a pattern of six bolts or a round lock ring. Be sure to inspect both front and rear rotors as they may not be the same. Following are the steps required to install new disc brake pads.
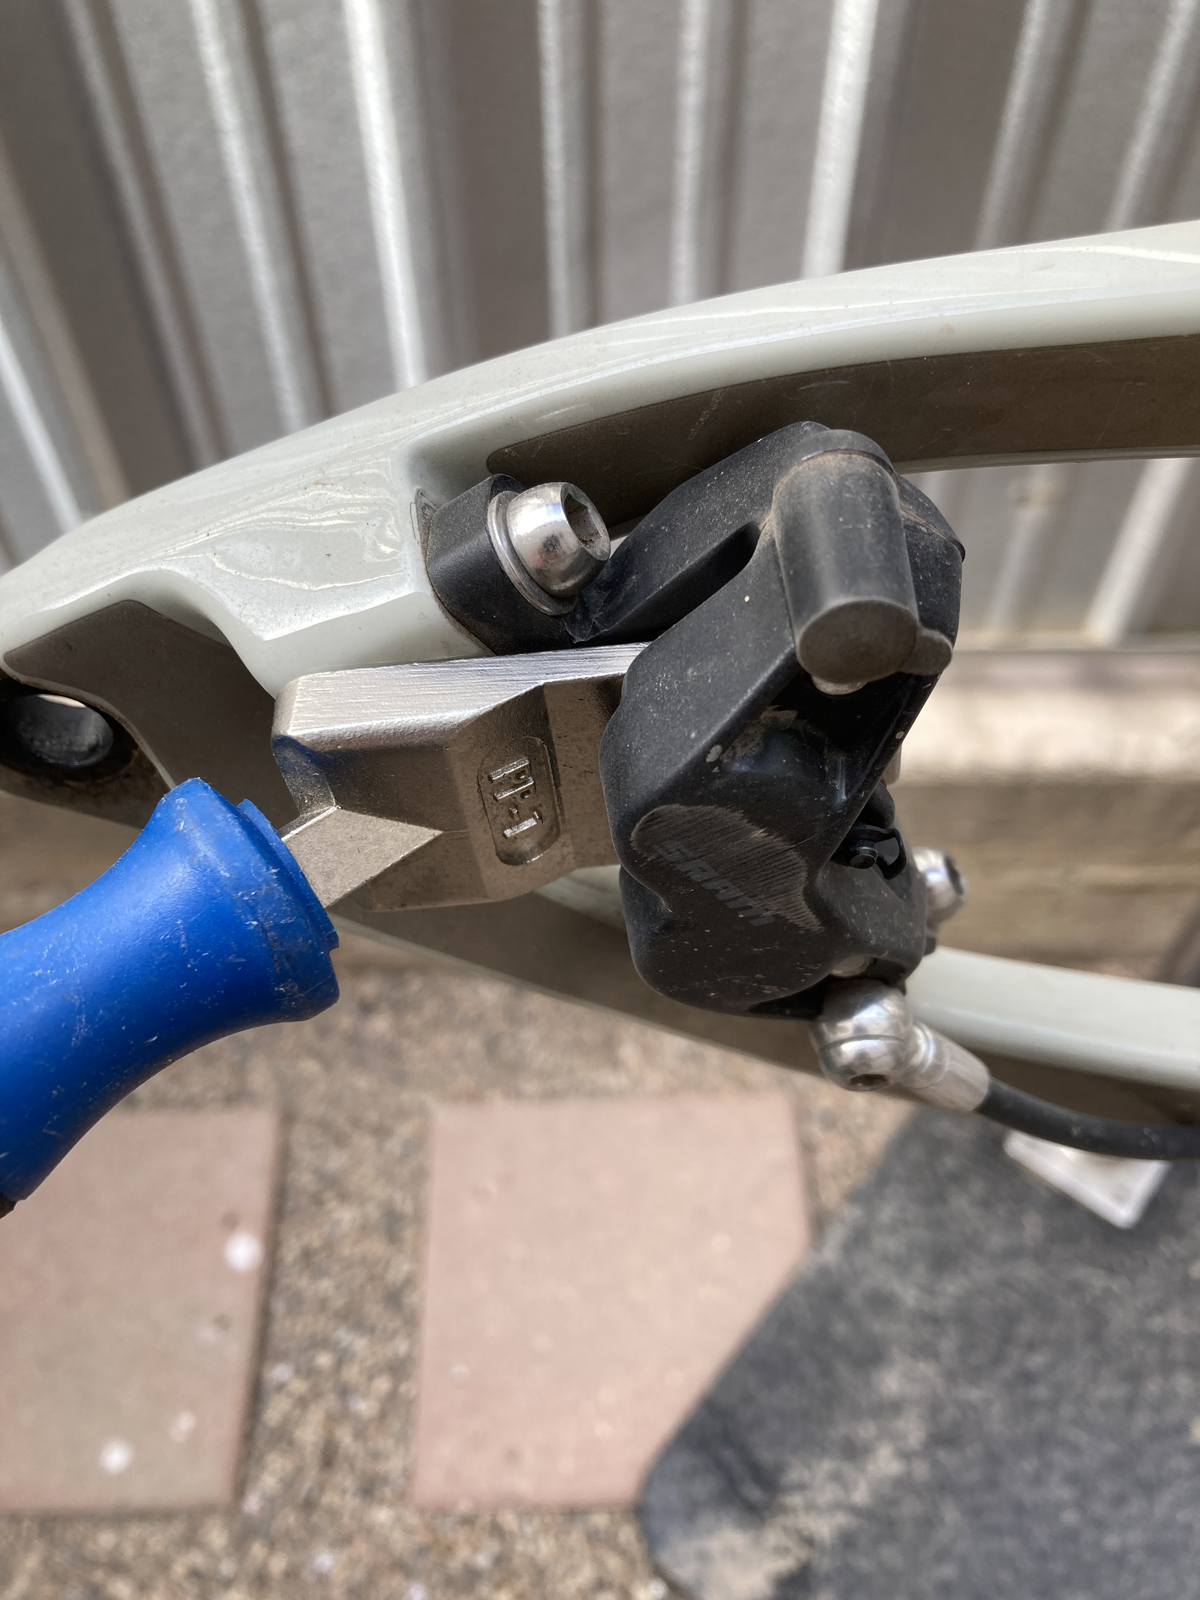
One: After removing the wheel, reset the brake pistons by spreading the brake pads with a tool such as the Park Tool PP-1. Use caution with this tool on road disc brakes as it may be a little thick. If this is the case most brakes are shipped with a plastic spacer that can do the job. As a last resort, a thick bladed screwdriver can do the job.
Two: Carefully remove the brake pad retaining pin clip. Don’t lose it, we might need it later. Next, remove the pad retaining pin.
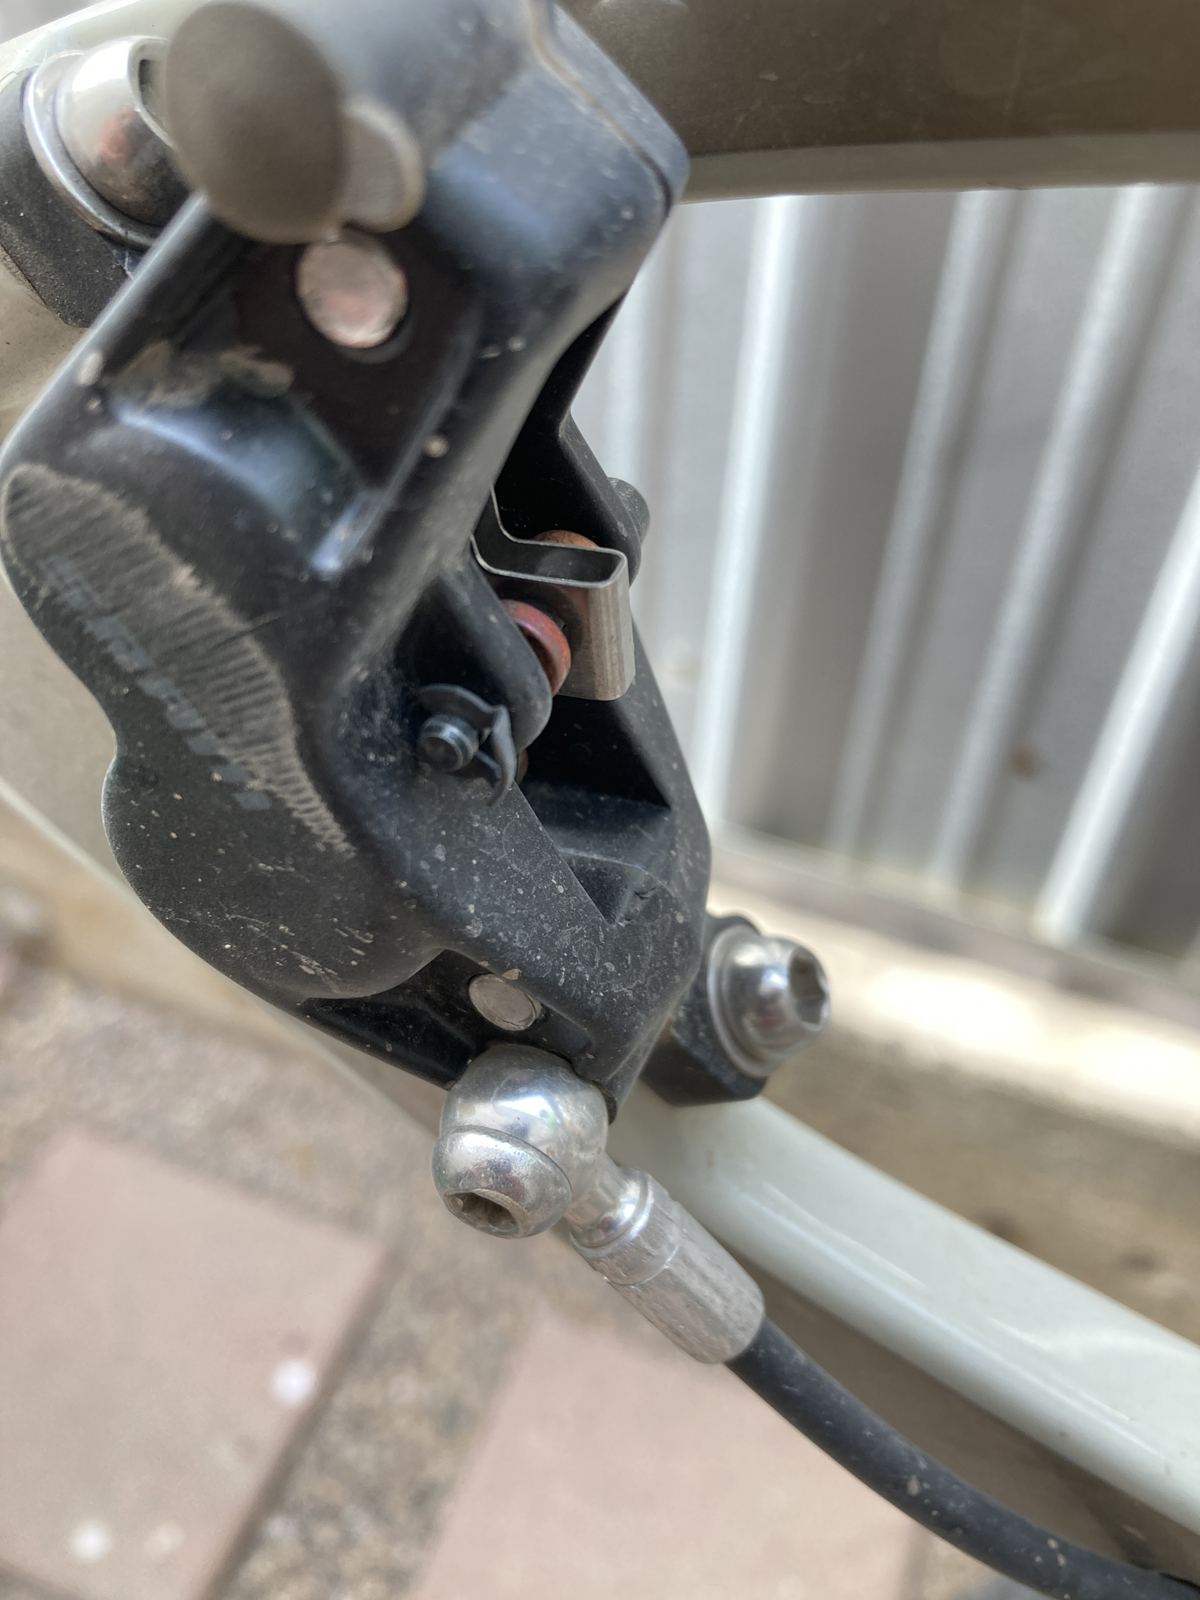
Three: The pads can now be removed from the top. Press up from the bottom and/or grab the tab of the pads and gently pull up. Inspect the backing plates for any sign of brake fluid. Any signs of fluid indicates possible leaky piston seals. These seals are generally not servicable, requiring caliper replacement.
Four: With a small flashlight, inspect the inside of the brake caliper. Again, any wetness may indicate leaky seals. Using a clean rag (or custom toothbrush!). floss the inside of the caliper. If the dirt is really stubborn, add a little isopropyl alcohol to the rag or brush.
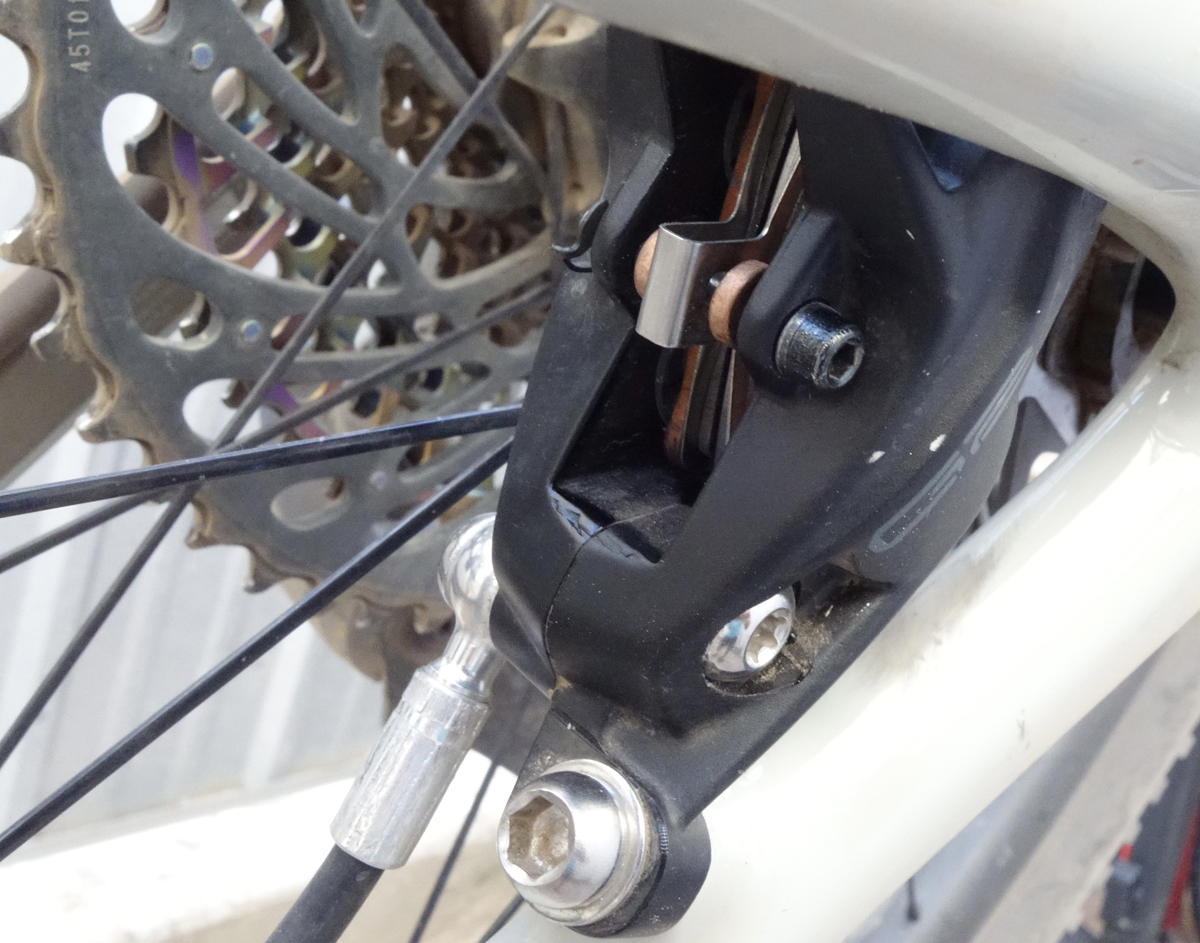
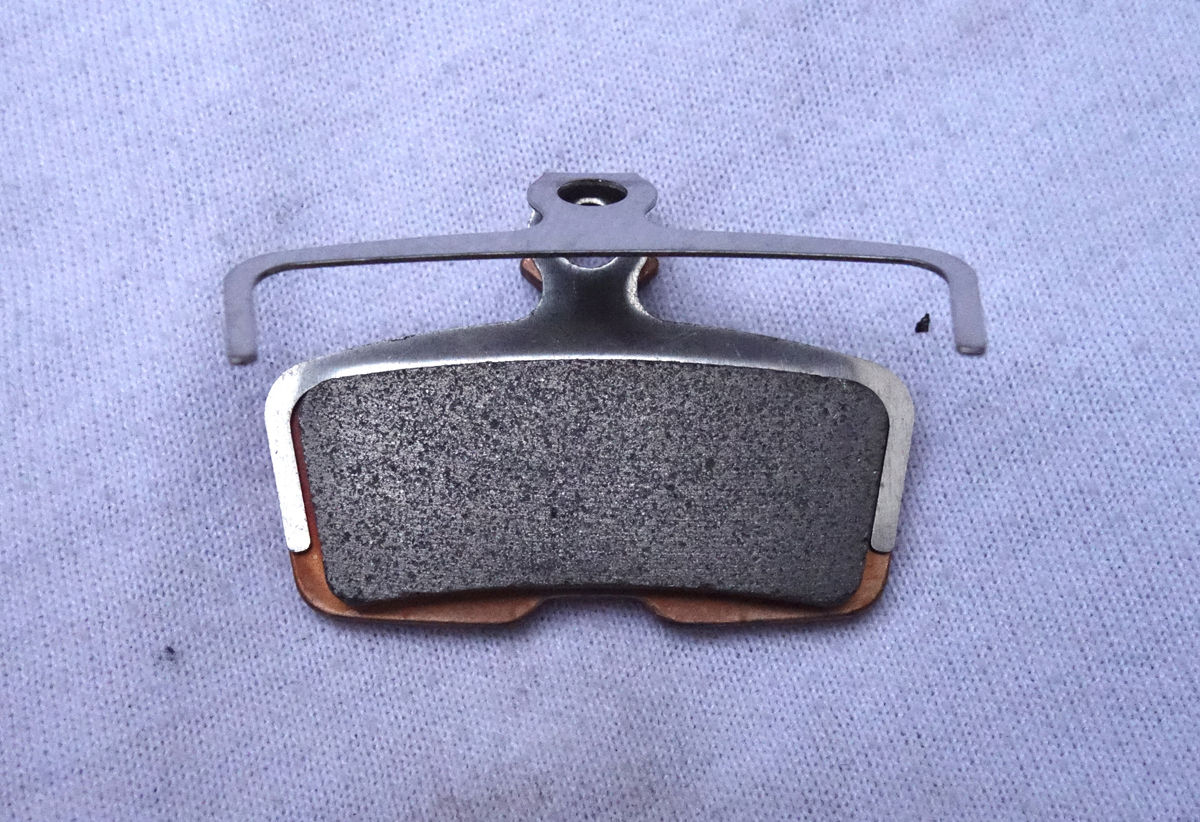
Five: With clean hands, install the new pads. Orient the spring between the pads straddling the pad material. Caution: do not allow any oil or grease, including from our fingers to come in contact with the brake pad surface.
Six: Install the brake pad retaining pin and clip. If the pad kit came with new ones, use those. Align the hole in the pad tabs and the spring. Insert the brake pad retaining pin through the pads and spring. Tighten firmly and install the clip.
Seven: Reinstall the wheel. Use a little upward pressure, to set the axle, and tighten to the manufacturer torque setting.
`
Eight: Squeeze the brake lever several times. The first couple pulls might go to the handlebar. If it firms up, do not be alarmed.
Final: Spin the wheel. With luck the wheel will spin smoothly and silently. If there is a small “ting, ting, ting”, it may reset itself after riding. More than that and the caliper alignment will need to be adjusted. Double check first by placing the bike on the floor, loosening and retightening the axle.