
By A.J. Turner — I’ve always wanted to make my own custom bike, and when I spotted a damaged carbon frame headed for the trash, I decided to save it and repurpose it into a balance bike for my daughter. This felt like my chance to build a custom bike somewhat from scratch, and I jumped at the opportunity. I started the project when she was only about a year old, and I’m hoping she’ll finally be tall enough this summer or fall to really ride it.
After cutting up the frame and removing the unnecessary and damaged sections, I started sanding down the head tube and upper downtube sections so they would slide perfectly into the bottom bracket area and lower downtube. I didn’t want to reinvent things like the headset, seatpost, or axle interfaces if I could avoid it, so I did my best to reuse the existing interfaces—just shrunken down a bit.
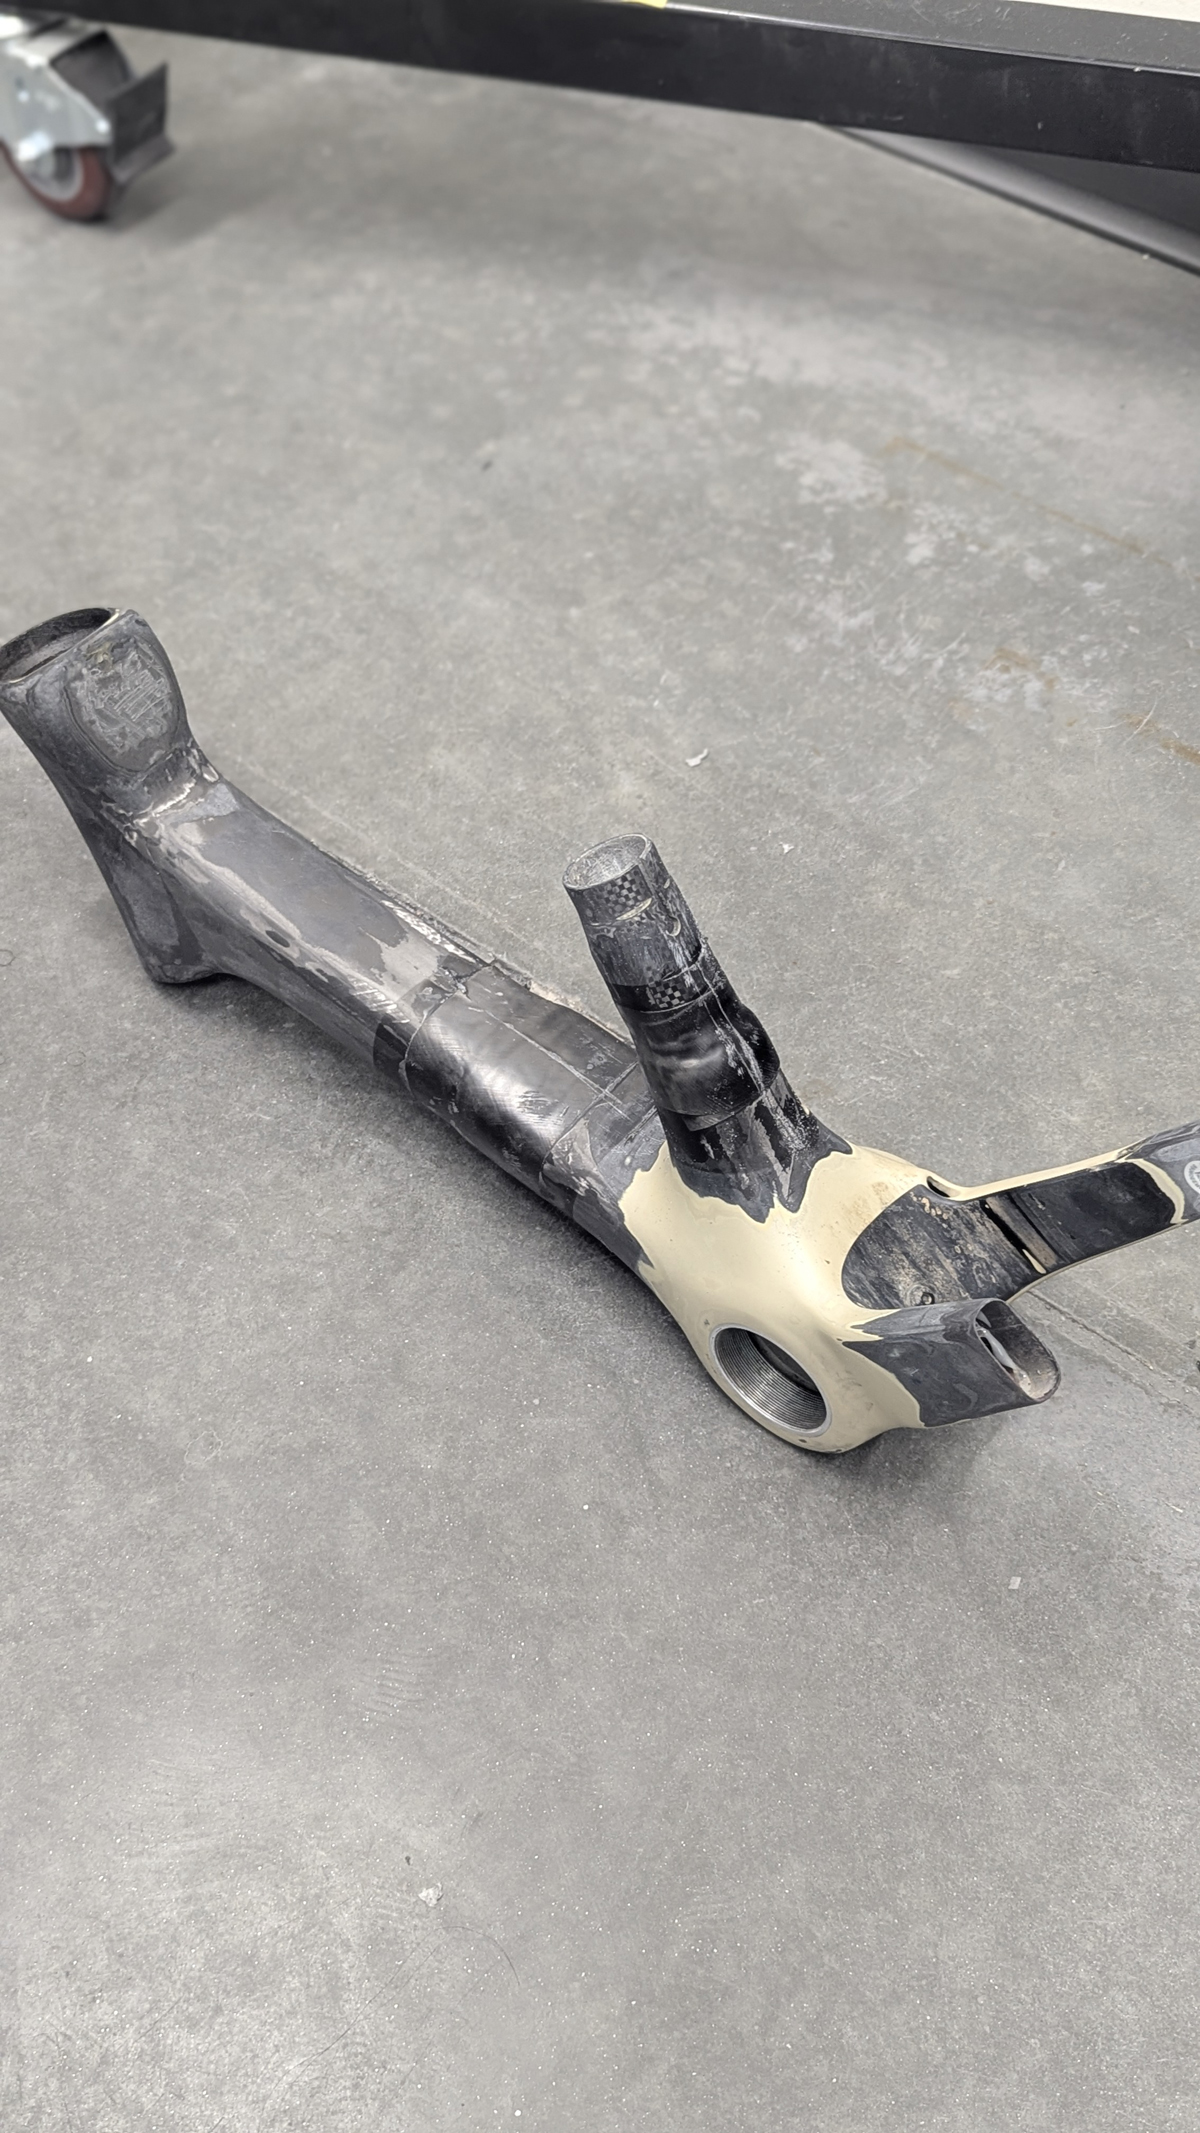
I fabricated a carbon plate to fill the top tube opening, then bonded and sanded everything smooth. From there, I cut the seat tube as low as possible so it would slide into the upper part of the bottom bracket area and still work with an existing seatpost. I shortened the chainstays as much as I could as well, allowing them to slide together without recreating any axle interfaces.
To keep everything aligned, I built a small PVC-pipe jig that worked with the wheels I sourced for the bike, although I unfortunately forgot to take photos of it. I also managed to save some scrap prepreg carbon sheets from the trash and used them as overwrap reinforcement around all the frame junctions.
The fork followed a similar process. I cut it apart, slid the smaller sections into the larger ones, then glued and overwrapped everything so I could continue using the original axle interfaces. Reusing the existing headset, seat collar, and front axle saved me a huge amount of time and effort.
The only parts that required machining were the wheel endcaps, which I enlarged from 10mm to 12mm. I also had to shorten and re-thread the rear axle. The trickiest part of the entire project was figuring out a clean solution for the bottom bracket area. I designed a closed-end T47 bottom bracket cover in Fusion 360 and 3D-printed it to clean up the appearance. Eventually, I’d like to redesign it with integrated foot holds.
Right now, the bike runs 12-inch wheels, but I built in enough clearance to fit 14-inch wheels later so the bike can hopefully grow with her a bit.
The best part, of course, is the paint.
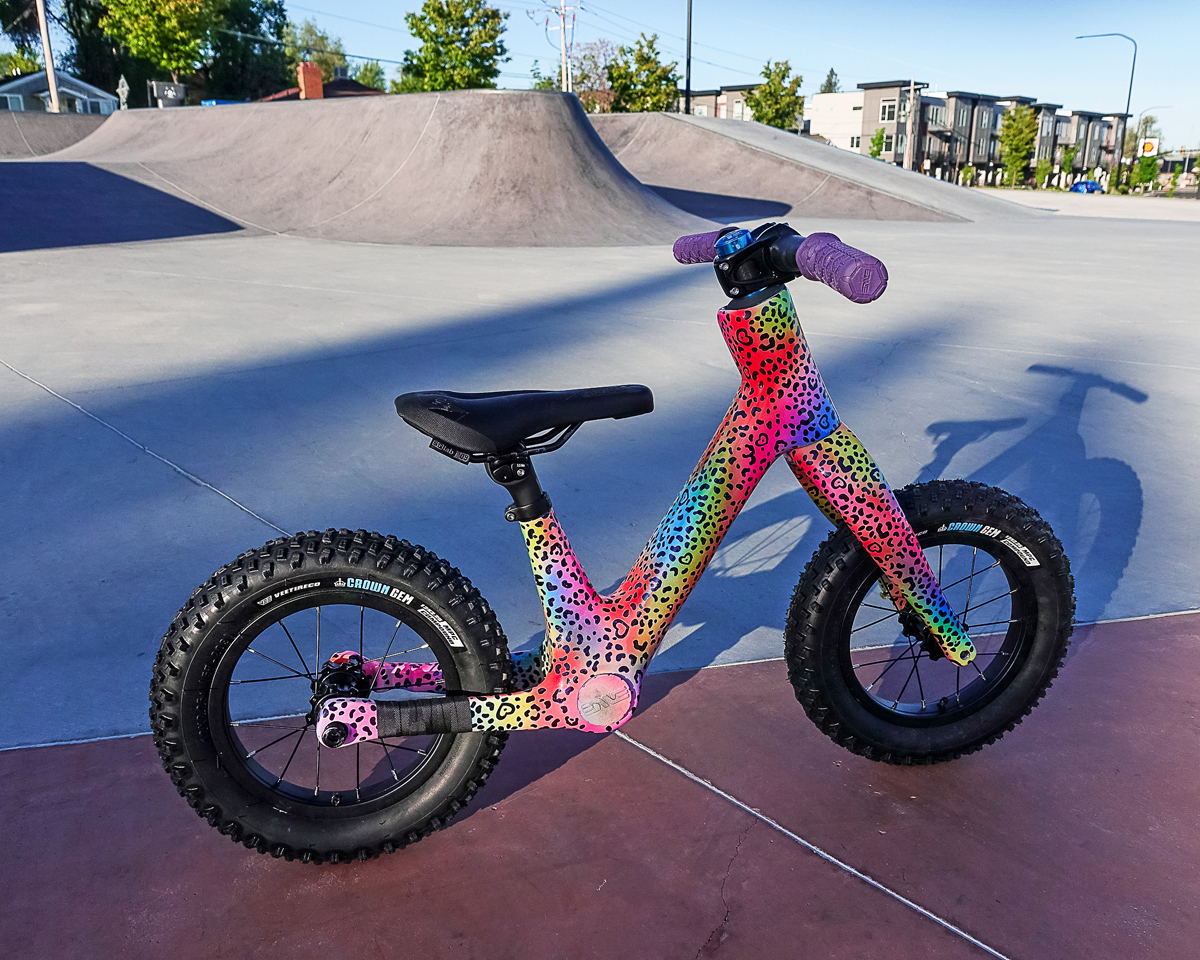
My good friend Mike Swim at Crasheur (Instagram: @Crasheur) knew about the project from the beginning and probably became my biggest motivator—besides my wife—to actually finish it. My wife wanted a “Lisa Frank-style” paint job, and Mike came up with a series of concepts that all looked incredible. Between the two of them, they dreamed up the final design you see today.
Mike absolutely nailed the execution. The paint turned out better than I ever imagined, and I love all the hidden details he incorporated—skulls, hearts, flames, and other little surprises throughout the frame. I honestly don’t even know how he pulled some of it off. You’d have to ask him. He even laser-etched one of my daughter’s favorite cartoon characters onto the headset top cap and spacers. He’s basically a painting wizard.
Overall, I’m incredibly excited with how the project turned out. As a new dad, finding time to work on something like this isn’t easy, especially when you only get an hour here or there in the evenings or on weekends. The amount of measuring, sanding, gluing, sanding again, tinkering, and then even more sanding felt endless at times.
But now that the bike is finished, I can already picture my daughter ripping around on it, and I know every hour of work will have been worth it. Unfortunately, she’s still just a little too small for it at the moment—but hopefully by this summer she’ll finally be ready.