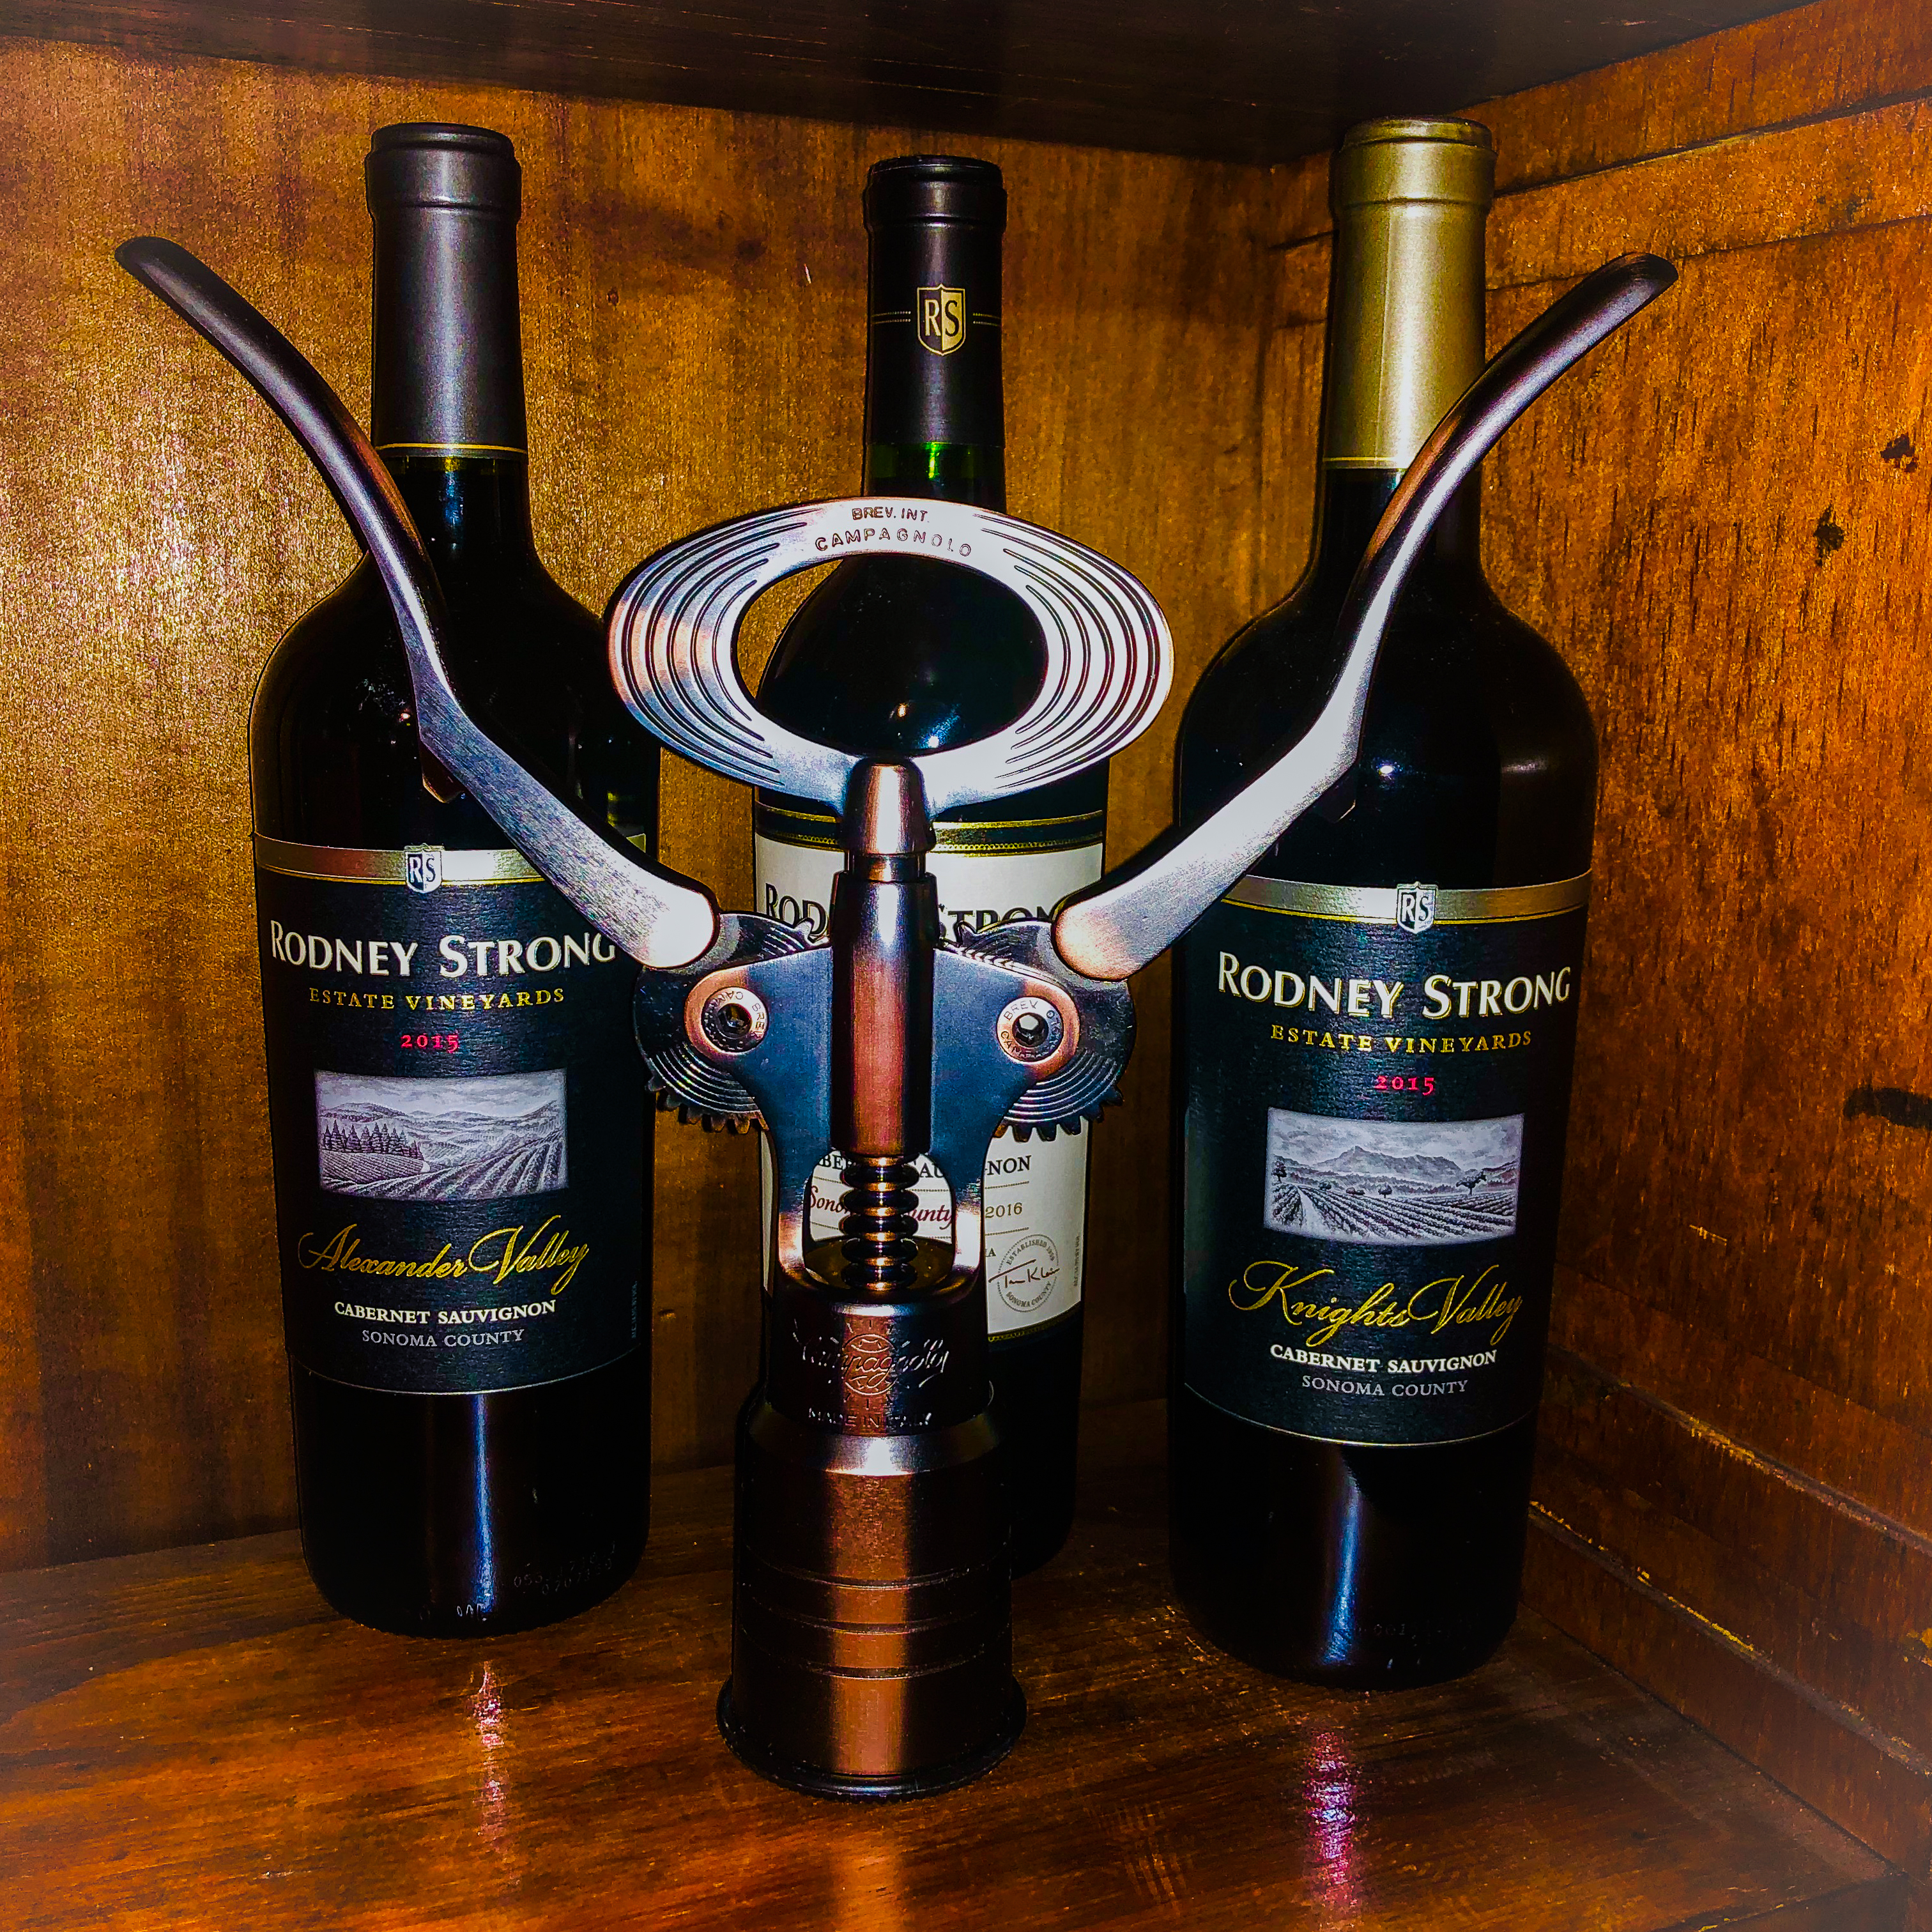
The Campagnolo Cavatappi “BIG” Corkscrew. PC: Steven L. Sheffield
People may ask which of Tullio Campagnolo’s inventions are the most important; the quick release allowing gears to be changed more easily in the pre-derailleur days, or the Gran Sport (and later Record & Super Record) rear derailleurs. One may even debate who has had a bigger impact on cycling, Campagnolo or Shimano … and the best way to do so, is over a fine bottle of wine.
While the Campagnolo vs. Shimano debate may never be decided, one area where Campagnolo definitely has the edge is with their Cavatappi or “BIG” corkscrew, inspired when old Tullio once again hurt his hand … this time in 1966 when opening a bottle of wine.
A self-centering telescopic bell positions the vermillion (the actual corkscrew) in the center of the cork, and the two levers draw out the cork easily and gently. No more broken corks leaving pieces floating in your wine from a poorly centered vermillion, no more wrenching the cork back and forth to get it out of the bottle. As befitting any tool created by the Italian master, the levers are affixed to the main body of the corkscrew with bolts derived from those used to attach chainrings to a Super Record crankset.
Quite simply, the Campagnolo Cavatappi is the best corkscrew ever made, and remained virtually unchanged until 2013, when it was updated; not to improve the way it works, but with new plating to ensure a top-quality, attractive, and even longer-lasting finish so that it retains its character for a lifetime.
All this, and 100% Made in Italy.
The Campagnolo Cavatappi can be found at (or ordered from) finer bike shops. MSRP is $250.00.
The state of bicycling in America leaves a lot to be desired, according to the latest biennial benchmarking report. The number of cyclists killed or mortally wounded while riding has increased by 14.7 percent since the first benchmarking report in 2007. And according to data from the National Highway Traffic Safety Administration, the share cyclists and pedestrians composed of the total number of traffic fatalities increased from 12.9 percent to 18.2 percent from 2007 to 2016, the latest year for which complete data are available.
This is highlighted in Bicycling & Walking in the United States: 2018 Benchmarking Report, released this spring by the League of American Bicyclists, which took over the project from the Alliance for Biking & Walking after they closed in 2016. The Centers for Disease Control & Prevention funded the study (https://bikeleague.org/benchmarking-report).
The bad news doesn’t end there. The report tracks four chronic diseases it says can be controlled by exercise such as bicycling and walking: asthma, obesity, diabetes and hypertension. “Unfortunately, for each of these four chronic diseases, at least 42 states saw an increase in the prevalence of each disease over the course of the Benchmarking project,” the report says.
When it comes to biking to work, increases tended to be concentrated in a handful of cities. And no national surveys provide enough data to judge how many people bike to work in any given area. Census Bureau surveys on commuting tend to undercount the role of bicycling anyway, because they ask people about their primary mode – so if you ride your bike to the train station, you get counted as a train commuter, not a bike commuter. The League complains that the bureau hasn’t tried hard enough to improve data.
“Data present a pretty poor picture right now at the national level. Some states and cities are doing a good job,” League Policy Director Ken McLeod said at the group’s recent National Bike Summit. “We think biking hasn’t been increasing since 2014 but data are incomplete.”
On the plus side, however, the number of states with Complete Streets policies jumped from nine in 2007 to 34. Of the 50 largest cities,the number jumped from eight to 40. But it’s not clear how thorough the plans all or or how well they are implemented.
Freeing shared bikes from docks does wonders for increasing use. Or so experience in China shows. Docked bicycle systems became popular in China back in 2008. Dockless ones weren’t introduced till 2016. In the first year since then, they took off so rapidly in more than 200 cities that they made docked systems “appear insignificant,” reports To Be or Not to Be Dockless: Empirical Analysis of Dockless Bikeshare Development in China, a paper from the Institute of Transport Studies in Clayton, Australia.
Dockless systems grew so fast, however, that they overwhelmed cities and caused some to start regulating. Most trips are by young riders to and from work, with an almost equal number of males and females.
The authors conclude, however, that docked and dockless systems come with their own advantages and disadvantages and one might work better than another in a given city. Larger cities with plenty of transportation choices probably prefer dockless. Docked systems tend to work better in medium-sized cities where a higher proportion of people drive to work.
Find the report at https://www.sciencedirect.com/science/article/pii/S0965856418309844.
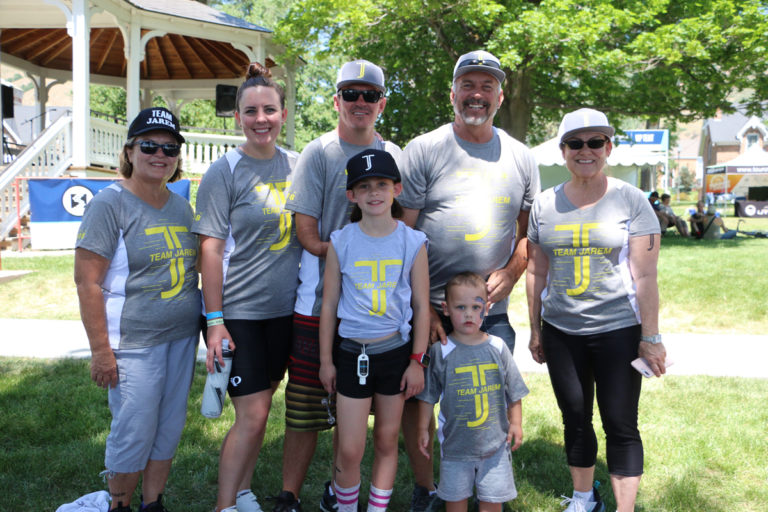
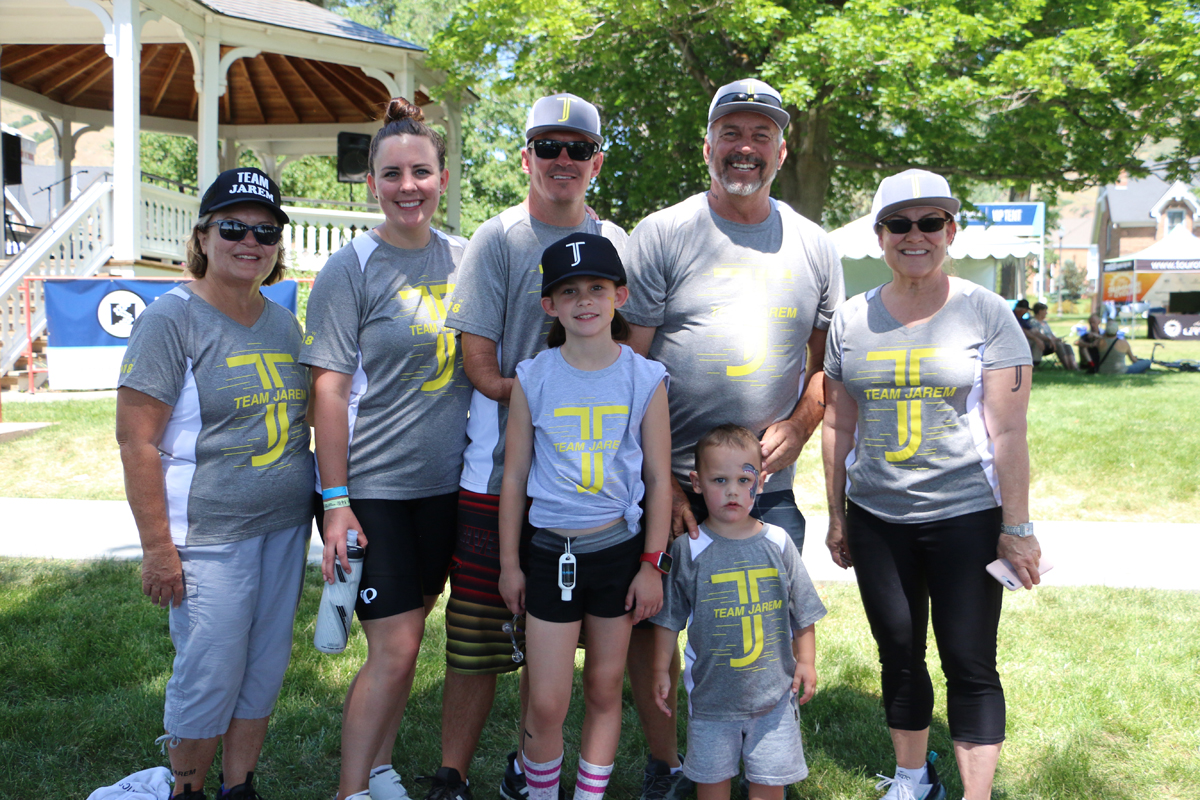
By Porter Sproul – Jarem Hallows had been in remission for a year when his tongue cancer came back in 2016. His family and friends quickly looked for ways to show support. They discovered Huntsman Heroes, a training and fundraising program, and the Huntsman Sports Festival, which includes the Huntsman 5K running and Huntsman 140 cycling events. The group created a fundraising team in 2017. Jarem knew the importance of research and its impact on cancer outcomes, so #TeamJarem designated their dollars to support the Head and Neck Cancers Disease Center at Huntsman Cancer Institute (HCI).
Team Jarem rides in honor of Jarem Hallows, who passed away in 2018 from tongue cancer. Photo by Dave Iltis
In 2018, #TeamJarem raised more than $26,000 at the sports festival. It was the largest fundraising team at the event—almost 250 walking, running, and cycling team members. It is also the largest gift of support ever received for the Head and Neck Cancers Disease Center.
“Winning” didn’t have anything to do with how long Jarem lived, but how he spent the time he had. He told his loved ones he defeated cancer “by courageously enduring it well.” He meant what he said. Continuing to live with dignity and grace, he strengthened every person who supported him during his difficult journey. Jarem passed away in November 2018, surrounded by his family—his wife, Camilla, and their five beautiful children.
#TeamJarem is participating in the 2019 Huntsman Sports Festival on June 15, continuing to support HCI research in memory of their dear friend.
You can join #TeamJarem and this incredible cancer fighting community by registering to run or ride at huntsmansportsfestival.com.
The Huntsman Sports Festival returns for its third year of bringing cyclists and runners together to raise funds for research at Huntsman Cancer Institute. Huntsman Cancer Foundation (HCF) combined its iconic Huntsman 140 cycling ride with its 5K and kids’ run in 2017 to create the Huntsman Sports Festival, a single-day event that provides participants with more ways to get involved. HCF has added a 10K trail run to the 2019 event. The Huntsman 140 includes distance options of 25, 50, 75, and 140 miles with a relay option for the 140-mile courses.
To date, the Huntsman 140 and the Huntsman 5k have raised a combined 3.8 million dollars for cancer research. This year’s fundraising goal is $750,000, with one hundred percent of funds raised going to vital research for all types of cancer.
Huntsman Cancer Foundation’s sole purpose is to raise funds to support the mission of the Huntsman Cancer Institute (HCI): To understand cancer from its beginnings, to use that knowledge in the creation and improvement of cancer treatments, to relieve the suffering of cancer patients, and to provide education about cancer risk, prevention, and care. Huntsman Cancer Foundation is dedicated to ensuring excellence in these endeavors through the development and prudent stewardship of private resources. All HCI fundraising initiatives happen through Huntsman Cancer Foundation, which is a public, functionally integrated, Type 3 501 (c)(3).
Event Details:
June 15 — Huntsman 140, Delta, UT, A road cycling, non-competitive ride that raises funds for cancer research at Huntsman Cancer Institute. Participate in the 140-Mile Founder’s Ride from Delta, Utah (with a new relay option) or 30, 55, 75, and 140-mile out-and-back from Salt Lake City, Utah, Jen Murano-Tucker, 801-584-5815, [email protected], Porter Sproul, 801-584-5882, [email protected], huntsman140.com
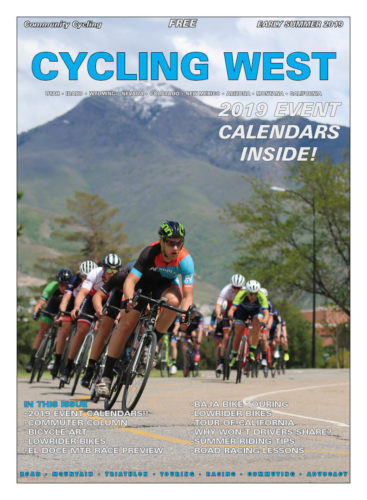
Cycling West and Cycling Utah Magazine’s Early Summer – June 2019 Issue is now available as a free download (8 mb download), Pick up a copy at your favorite Utah, Idaho, Wyoming, Nevada, Montana, W. Colorado, N. Arizona, and N. California bike shop or other location!
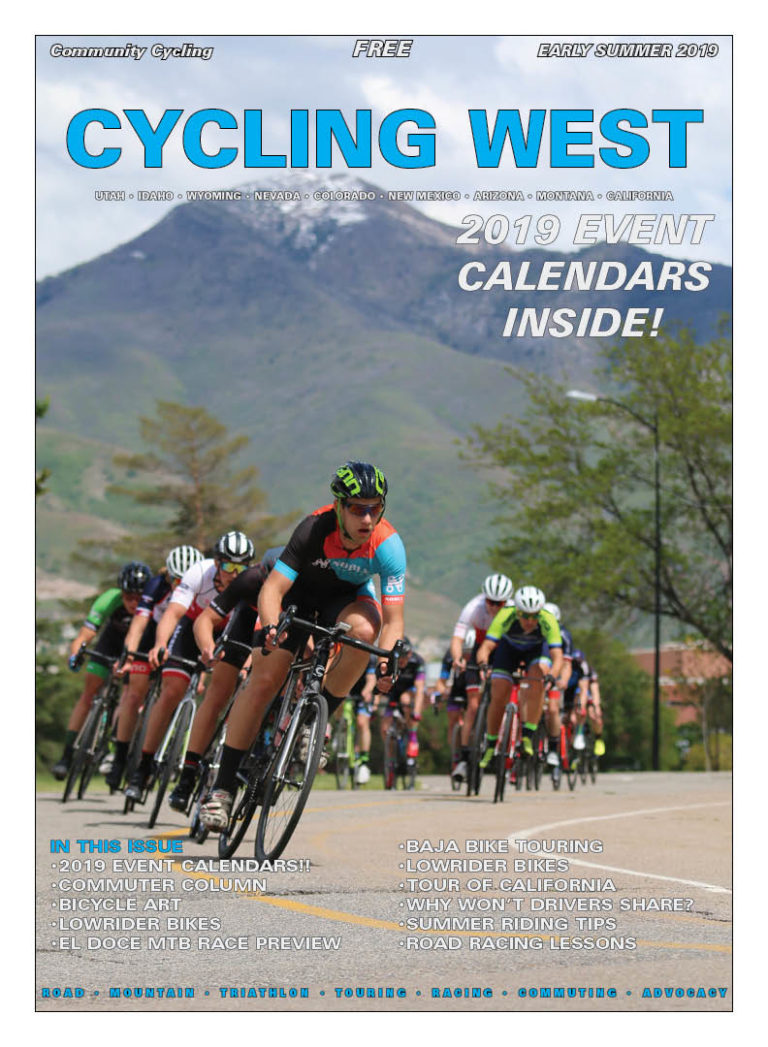
Cycling West Early Summer 2019 Cover Photo: The Sugarhouse Criterium is a mainstay for road racing in Utah. This year’s event saw over 400 racers. Here, the category 3 field dives into a corner. Photo by Dave Iltis
Contents
Team Jarem: Honoring a Friend, Making History at the Huntsman 140 –page – 3
When Commuting Goes Wrong: Concussion Confessions –page – 4
Great American Rail-Trail Planned for Cross Country Cycling–page – 6
Why are Some Drivers so Reluctant to Share the Road? –page – 8
Summer Safe Riding Tips –page – 9
Be a Defensive Rider this Summer! page – 9
AASHTO to Update Bikeway Design Guide –page – 10
Sen. Lee Reintroduces Bill to Allow Bikes in Wilderness page – 10
Montana Trails to see New Trail Grants page – 10
Every Kid Outdoors Act Helps 4th Graders and their Families Bike in National Parks –page – 11
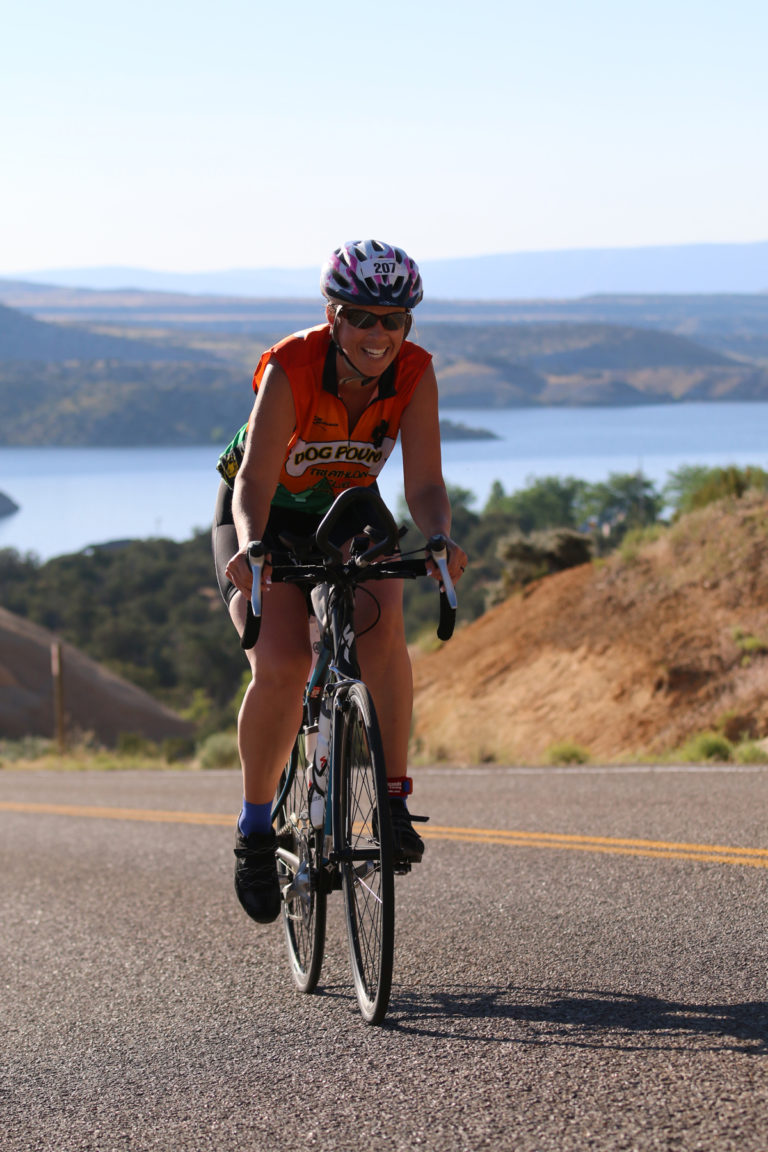
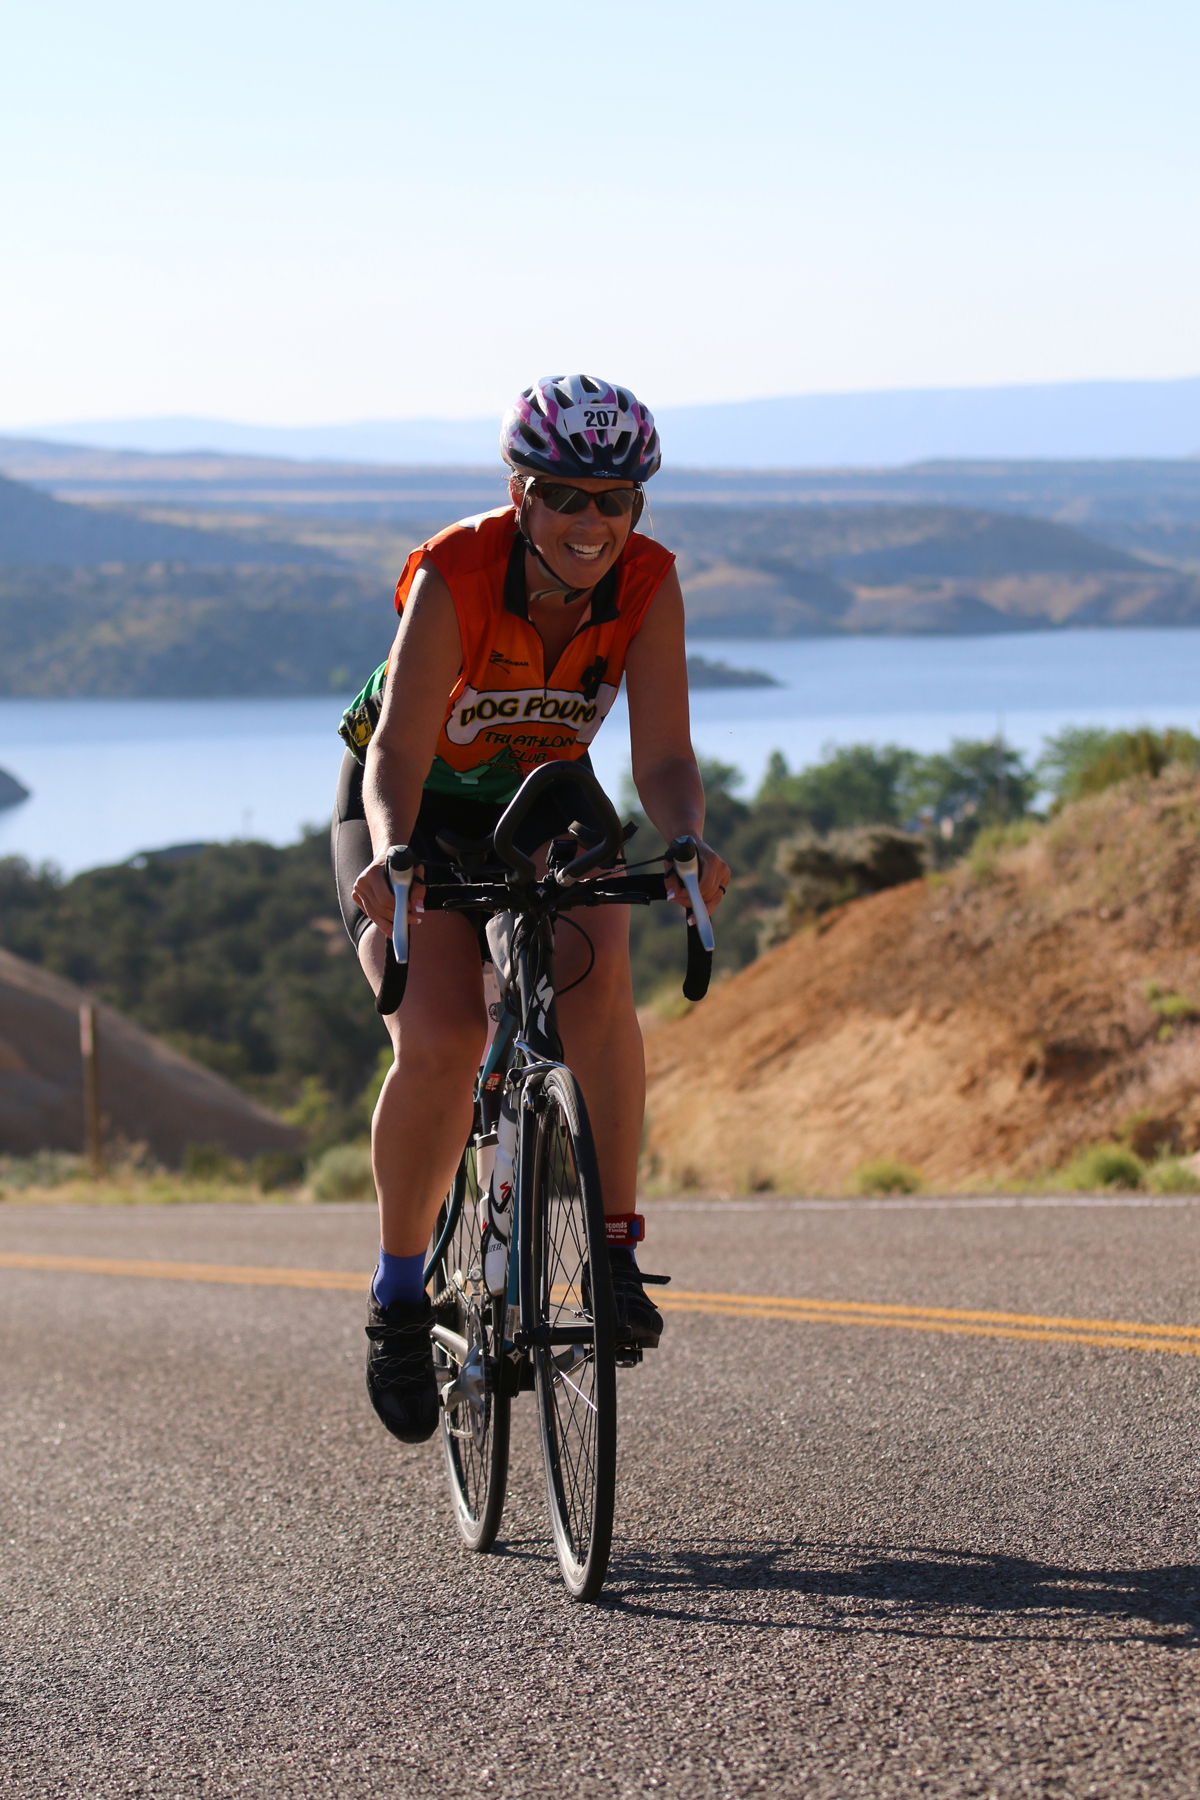
The climb out of the Red Fleet Reservoir is a tough way to start the bike leg of the DinoTri. The course flattens out a bit afterwards, but the beautiful scenery continues throughout. Photo by Dave Iltis
The DinoTri is one of Utah’s classic triathlons. Held each June in Vernal, it draws racers from around the West. No wonder. The course is incredibly beautiful, and the event is very well run. This year’s event will be on June 29, 2019.
We asked Brogg Sterrett of TriUtah who is the new organizer of Dino Tri to tell us about the event.
Cycling West: Tell us about the DinoTri course. What are the three sections for the sprint and Olympic?
DinoTri: The race starts at the stunning Red Fleet State Park. Olympic swims the 750-meter circle twice, the Sprint swims it once. Then you bike a steep hill out of the park before hitting the canyon where you’ll glide downhill into town. The sprint will go 13 miles to the transition and the Olympic will take a turn in town and go up Dry Fork Canyon before coming back to the transition for a total of 24 miles. Then everyone runs around the neighborhoods with the Olympic doing two loops for a 10K and the sprint doing one loop for a 5K.
CW: What is the scenery like? What are the highlights during the event?
DT: The scenery is amazing. Triathlon magazine called it one of their top 10 destination races because you can’t beat the brilliant red rocks of Red Fleet or the amazing views as you head through the canyon into town.
CW: Where can people stay in Vernal? Is there camping too?
DT: The Marriott Hotels have offered a discount to anyone that mentions Vernal DinoTri when they call in for a room. There is camping at the KOA in town or at Steinaker State Park.
CW: What are some of the options for families when the race is over, or for the rest of the weekend? Tell us more about the region.
DT: It’s a great place for a full weekend. There is a dinosaur museum in town, and Dinosaur Monument just outside of town where you can see actual fossils still in the rock. You can also hike and camp and see petroglyphs and a historic cabin. There is hiking and mountain biking throughout the area. There are also beaches at Red Fleet and Steinaker State Parks if you want more water fun.
CW: Is there anything else that you would like to add?
DT: The DinoTri is a great race where the entire community comes together and makes it happen. TriUtah is so excited to be a part of this great long standing Utah Triathlon.
Event Details:
June 29, 2019 — DinoTri, TriUtah Points Series, Vernal, UT, Sprint and Olympic Distance Triathlon. Race starts with an open swim at Red Fleet state park. The bike starts with a crazy hill climb out of the park and heads into town for a run and finish at Utah State Extension. One of the most beautiful triathlons in Utah!, Brogg Sterrett, 702-401-6044, [email protected], triutah.com
By Christine Dern — So your brave adventurous soul has decided to venture outside the USA to mountain bike. Exciting!! Whether this is your first time or you are a seasoned traveler, here are some simple things to consider to make your traveling experience flow as smoothly as your mountain bike will flow over that international dirt.
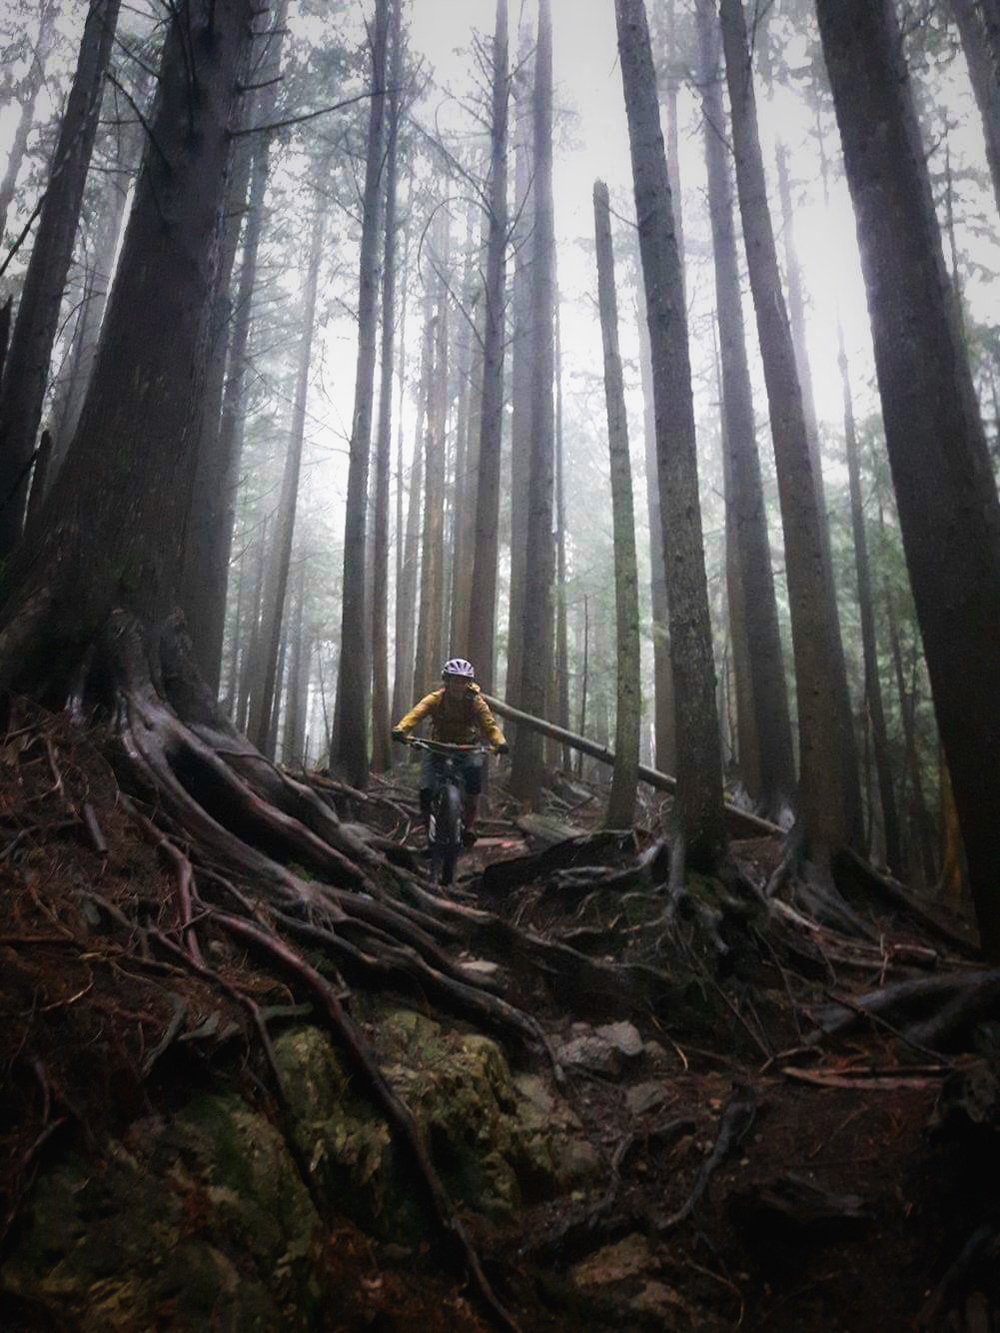
Christine Dern riding. North Shore, British Columbia. Photo courtesy Christine Dern
I have found the secret to easy traveling is a little pre-planning. This seems like a lot of work initially but I assure you it isn’t as bad as it seems and doing it all prior to departing is much easier than once you arrive at your destination… or are stuck at the airport rearranging. Prior proper planning can make a huge difference in how the trip unfolds so check them off as you go and let my anxiety induced last minute packing moments reduce yours.
Passport
First things first… your passport! Think of it like your passport to adventure and far off lands… either find yours, get one, make sure it is still valid and never let it expire again.
Visa
Some countries require a visa for visiting or for extended stays and working. This can easily be found via a quick google search or by visiting your destination country’s immigration site. Most of these are either not required or can be done online with a quick form and fee.
If you are traveling to multiple countries during your trip, or exiting the airport, look up all of your destinations. Otherwise you could be standing at the check in counter with your friend, attempting to check your bags while the ticket agent says, “your passport doesn’t seem to be working…”
Language
This can end up being a pretty big deal if traveling to a country where you don’t speak the language. If this is the case I would recommend looking into guides, drivers, or pre-planned trips. Many places have great options for guided excursions, fully planned trips which in some cases is almost mandatory for getting around, covers your transportation, accommodations and keeps you and your friends and bikes safer along the way. While traveling in Peru and Mexico we had a driver who was able to ensure our bags and bikes were safe along the way while we enjoyed the trails without extra concerns and played tourist.
**Pro tip – When attempting to order coffee when you don’t speak the language, americano seems to be universally understood and gets ya something close enough to what you are looking for.
Money
Cash vs. credit cards. Consider prepaid travel cards, especially if you are concerned with theft. For cash, look up the conversion rate and decide if you want to bring cash and convert it upon arrival or withdraw from an ATM. Converting money is easily done in the airport upon arrival with a reasonable conversion rate. I also found running around to find a bank can be one more hassle. The airport is very convenient for getting everything you need when you arrive.
**Side note: if there is a language barrier, the bank teller doesn’t necessarily know English and won’t know what you are asking for.
WiFi/Internet/Phone
Does the thought of being detached from social media send you into a full blown panic attack? Well even if it doesn’t, not having a phone and simple means of communication can make things complicated upon arrival. When I first arrived in Mexico, I hadn’t really done too much planning. I had a hotel booked for a few days until my friends arrived and jumped on the plane and left, dreaming of warm sunny beaches. Upon arrival I realized I hadn’t planned how to get money out with my ATM card and how to contact the US and a ride to my hotel. I had assumed I could just use a credit card, which wasn’t the case. But I have found luck is on my side everywhere I go, so prior to leaving the airport I was able to find an ATM that would accept my card and set up an international plan for North America on my phone. Then to top it off I was able to get a free taxi, a bottle of tequila, some cash for my return taxi and a lot of perspective on time shares.
Some amazing apps to help while roaming around the world. Google Hangouts allows for free phone calls anywhere in the world. WhatsApp is a great option to replace texting and calling with friends both old and new and imo is a better option for sending photos and having group chats.
Outside of an international North America phone plan, I found picking up a SIM card in the airport is a fantastic way to get a prepaid plan for your stay and get a local number and have more access to internet. Save your SIM for when you get back to the States.
Travel/Trip Insurance
What do you do if something goes wrong?
Mountain biking has the potential to be a dangerous sport. We all know this and assume this risk whenever we get on our bikes. Being on foreign ground brings up even more unknown issues. Consider getting travel and trip insurance to cover you medically in the unlikely event of a crash and injuries. The level of coverage is up to you and depending on how much you have invested in booking for your trip, many fees are non refundable so trip insurance can cover you if you are not able to make your trip at all or if your bags and/or bike get lost. It happens. Usually bikes turn up but I have been on trips where people didn’t see their bags and bikes until about 4 days in.
Solo vs Guided Trips
Depending on your location and length of time of your trip there is the option to wing it and go solo vs hire a guide or jump on a pre planned trip. After doing both, I think they both have their pros and cons and I lean towards a mix of the two. I like running mostly solo and planning my own transport and accommodations and schedule, however hiring a guide and arranging for shuttles can maximize the limited time you may have and the experience of following a local down a series of trails with less stopping and more flowing is worth the price of the guide.
Bike Bags
I think this is one of the number one things to make traveling with a bike easier. I would suggest looking into investing in a nice protective bag if you plan to travel frequently. There are many great options though depending on what you are doing so I will give a rundown of a few of them.
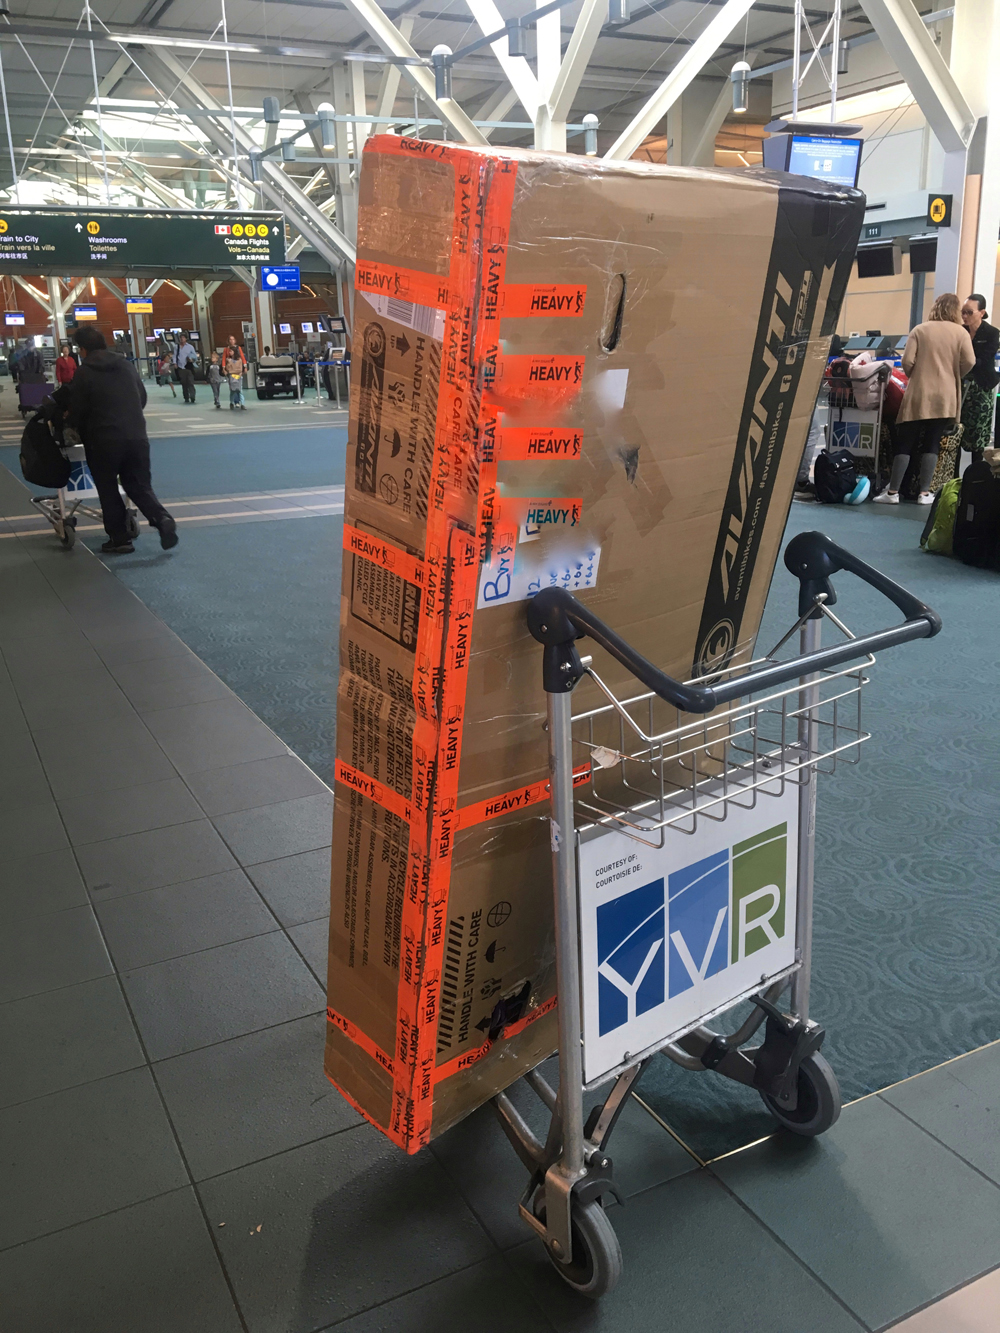
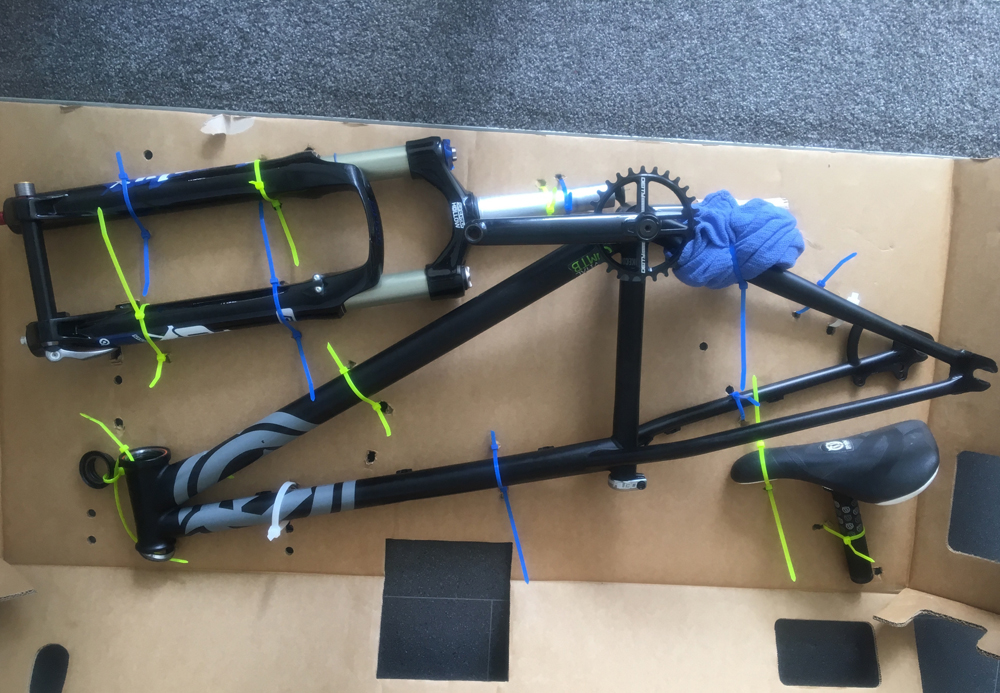
Cardboard bike boxes can be great and easily found at most bike shops for free or for very little. They don’t require storage and can be made a little tougher by using gorilla tape around the bottom edges and handles. Your bike can also be zip tied to an inside cardboard so it slides in and out easily and doesn’t slide around in the box. Then the wheels slide in and you are good to go. This tends to also be a lighter option so you can probably pack some gear and clothing in with your bike too. Getting around the airport or other areas without a cart with wheels can be tough though.
Golf, hockey, or cricket bags can be a great light option as well and may be the least expensive for traveling since most airlines don’t charge a bike fee when using one of these bags. I would recommend planning out your padding though because the bags are not always as padded. I also found I had to disassemble my bike a lot more to get it to fit. If you are concerned about your bike or have carbon I don’t recommend this option as much. I used a cricket bag for my dirt jumper and loved it however would not be as inclined to put my carbon trail bike in the same bag.
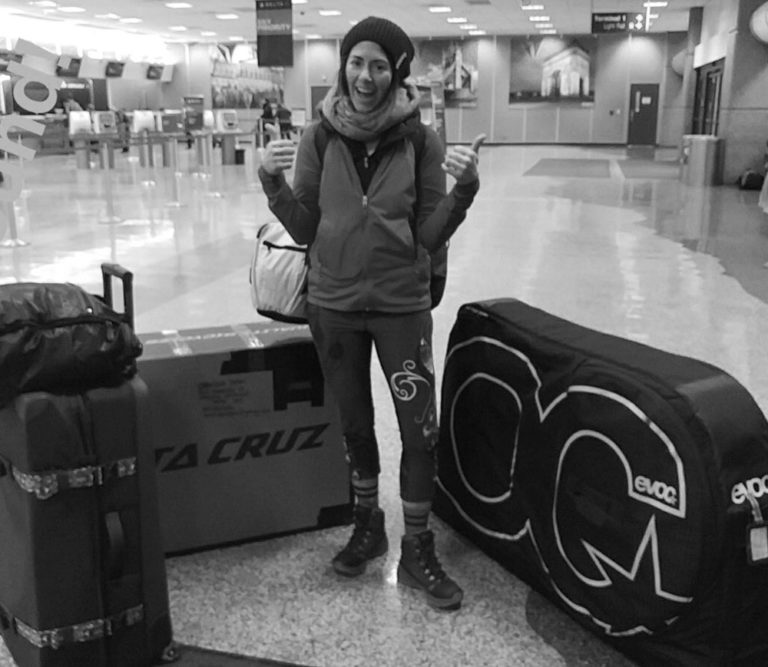
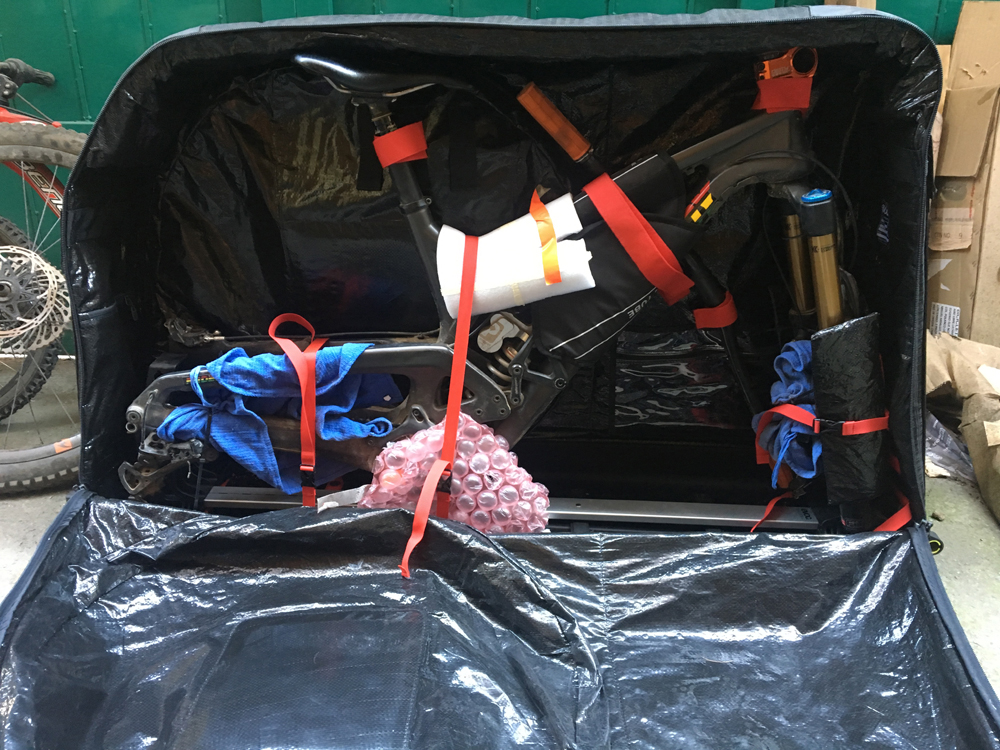
Bike specific bags are everywhere now so lucky for us we have a lot of options. I have used the hard shell versions which can be very protective but awkward to get around and a little tough to store. The key things I look for are lots of handles for lifting and loading, well padded wheel areas, and being able to wheel it upright behind or to the side of me. My favorite bag to date is EVOC’s Pro Travel Bike Bag. I took advantage of their add-on aluminum stand so I can attach my bike to it via the thru axles and the bike stays upright and is easy to assemble once I arrive and easy to pack up for departure. I can fit gear in and around the bike as well to free up some space in my other bags. The downside with adding this aluminum stand is it does add some extra weight. The main difference in the pro option is the aluminum handle which allows for an extra wheel to attach so instead of the need to lift the bike bag, I can roll it next to me.
But look around and find what works for you. Bike bags have come a long way.
Bike Baggage Fees
Airline bicycle fees can vary greatly. I have been charged nothing, just an extra bag and I have also been charged upwards of $150 per flight. That is definitely the highest where normally it floats around $75 each direction. Consider charges arising for any domestic flights taken as well. Bike boxes and bags will generally be charged a flat rate. Golf or hockey bags are usually charged as oversized unless you tell them a bike is inside.
Tools
Bring what you need to pack and build your bike and do any minor repairs on the trail. I have brought enough tools to rebuild my entire bike and do any repairs or bleeds necessary, along with extra parts in the event something breaks. This can really end up weighing a lot and airlines have max weights they allow. Also consider that you may swap from a higher amount on the international flight to a smaller allowed amount on domestic flights.
Consider the accessibility to local shops in the area you are traveling. Some locations are remote but most biking destinations have a lot available for mechanics and spare parts.
Customs – Entering and Exiting
The number one thing I have found to make traveling easy is to be clean and organized. Keep your bike clean. Super clean. They will check it. They will search it, mostly for bugs, spiders or dirt that could contaminate or become invasive in the area. Departing the US they also search it for bombs or other various items. Bike bags have the potential to get opened numerous times and if you want to pack clothes and other gear with your bike, the cleaner it looks the happier the airline agents will be. Make their job easier. You are entering their country as a guest, they don’t have to let you in but you also don’t want to repack all your gear or clean your bike at the airport. Just remember – prior proper planning prevents problems later.
Once off the plane you will travel through customs once with just yourself and carry ons. This can sometimes take a while but is becoming automated in many countries so things are flowing a little faster. Then on to baggage and baggage security. Look for SIM cards and money conversion at this point but there are also options once you are through security. Baggage security is fairly easy but this is where having a clean bike and being organized comes in handy.
Travel by Car
Driving by car is actually pretty easy so I am just going to provide a brief rundown but since most mountain bikers seem to have bike racks and have gone on a variety of weekend bike trips, the general idea is the same. So here’s how it goes….
Decide how many bikes you can fit in your car.
Consider bringing all of them and some good locks.
FIND YOUR PASSPORT
Pack up your clothes and gear.
Pack up camping gear and food or plan to stay at a hotel/Airb&b/friend’s home/etc.
Load up the bikes.
DO YOU HAVE YOUR PASSPORT?
Start driving
Arrive at customs – make sure everything looks nice, you look nice, take off sunglasses, make eye contact, be respectful, answer their questions but keep your answers simple, know how much alcohol and food you can bring over. Fruit with seeds is generally not welcome but prepared food is usually fine.
Ride
Have so much fun you never want to leave
Leave anyway because “work”, “reality”, “family”, “obligations”, or whatever else in your life is calling you back.
Get home, talk about it nonstop and plan to go again.
And so the cycle goes. It’s actually very easy to lead a life of international travel. Hopefully you now feel more confident to never leave your bike behind again. Happy Trails and Traveling and I hope I run into you on the trails in some far away land sometimes soon.
Christine Dern is currently teaching mountain bike lessons to women with Women in the Mountains. She was a pro downhill racer and loves sharing her love of biking with others. She splits her time between working as a mechanic at Competitive Cyclist, teaching skills clinics with women in the mountains, and exploring the world on her mountain bike.
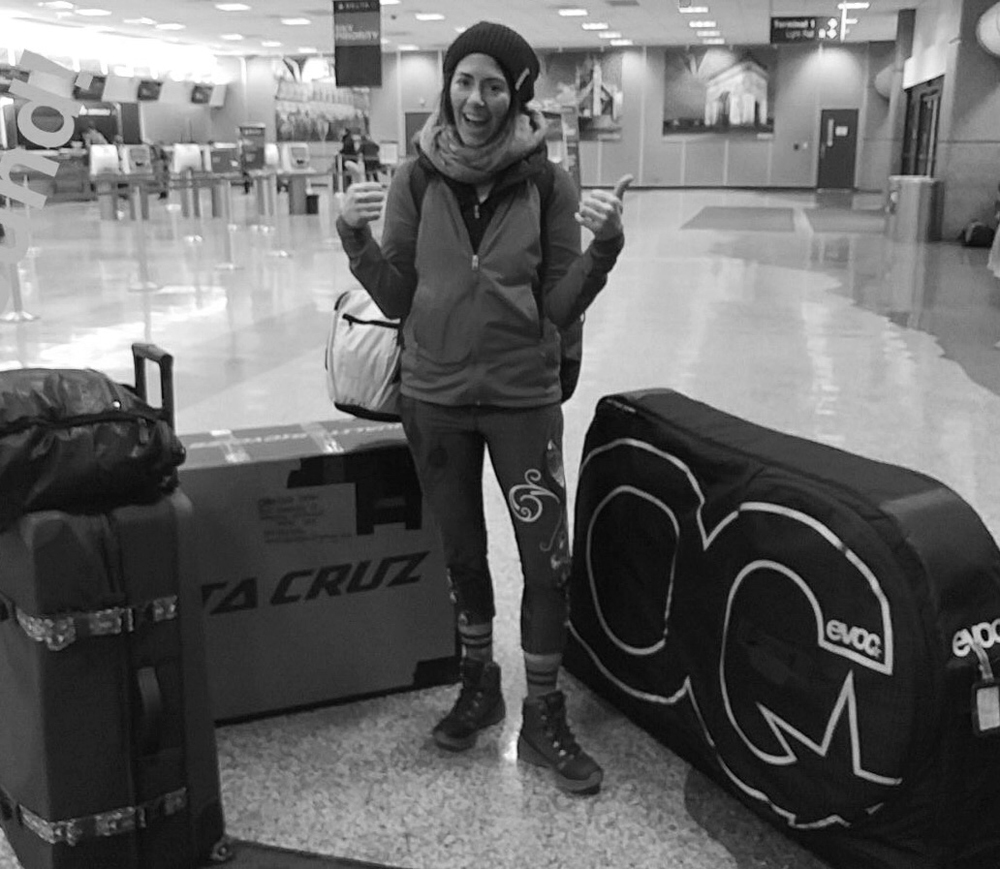
Christine Dern traveling with multiple bikes. Photo courtesy Christine DernCardboard bike boxes are usually free from your local bike shop, but can be awkward to cart around. Photo by Christine DernThe EVOC bike bag is a solid way to travel with a bike. Note the aluminum stand at the base. This s an add on but makes assembly and pack up much easier without a bike stand. Photo by Christine DernZip tie your frame and fork to a piece of cardboard that will easily slide into the bike box and add extra protection. Santa Cruz complete bikes ship this way so I used one of their boxes. Photo by Christine Dern
A major mountain bike park is being planned in Bridger Teton National Forest in Wyoming. Snow King Mountain Resort in Jackson is planning a major renovation and is seeking permission from the national forest, which accepted the master plan and is planning to hire an outside consultant to perform an environmental review. The plan includes front-side mountain bike trails and a back-side mountain bike zone, according to the scoping letter from the national forest.
The plan also includes a yurt camp where bikers could stay. The Jackson Town Council approved a recreational plan for the area in 2013 that includes mountain bike trails. The Forest Service hopes to complete the analysis by next July.
The resort in Bridger Teton already features year-round recreation from skiing to biking to paddleboarding to paragliding to hiking, plus scheduled events. Use of the trails is free and bike rentals are available (https://snowkingmountain.com/activities/biking/).
The Forest Services scoping letter states lift-served downhill mountain biking is arguably the fastest growing summer activity at mountain resorts in the U.S. and abroad. Not surprisingly, demand for this activity is particularly high in the Jackson area. So the plan calls for a system of about 6.5 miles of lift-served trails on the front side and more conventional mountain bike trails on the back. The downhill trails would include tracks for beginner, intermediate and advanced riders.
The other side would feature a 110-mile mountain bike zone with a skills park and trails for all abilities. Planners have yet to determine the exact routes.
Helmet laws do not reduce riding nor encourage recklessness. So concluded a metaanalysis by the University of New South Wales in Australia. The study examined 35 studies of laws in 28 countries.
It reported that 13 studies found that helmet laws don’t reduce riding, eight reported mixed results and two said they did — but only in certain circumstances. In Australia, for instance, fewer children were seen biking to work when required to wear helmets — but that likely resulted from other factors, such as an increase in busing and even a New Zealand campaign to discourage kids from riding.
Regarding taking increased risks, a review of 22 studies found 17 said helmets don’t encourage dangerous behavior, three found pro and con evidence and only two supported the thesis. But the studies contain some limitations: some dealt with risky behavior in general, not entirely bicycling.
Experienced cyclists know that the opportunity to spend money on their chosen pastime is boundless, some driven by want and some that is needed. Novice cyclists in many cases have not come to this realization, and think that once they have outlaid a substantial sum for a bicycle that cycling is a free sport. Let’s put a thorn in that tube right now. Buying a bike is just the start of a long journey of cycling expenses, some of which you may expect and many of which you won’t. Let’s get on the audit trail….
Sensible Accessories
When I worked in mainstream bike shop land, I was always surprised by the number of new bike purchasers who flatly refused to think it would be in anyway beneficial to have a waterbottle cage, waterbottle, seat bag, spare tube, patch kit, tire levers, multitool and chain lube. You can get away without some or all of these things for a while, but there is no fun cycling with a parched throat or being stranded by the side of the road with a breakdown that could have been repaired – especially if you are in a cell phone deadspot. Boy scout motto: “be prepared”. Allocate some new bike budget to sensible accessories.
Attire
You can ride in whatever you like. But cycling shorts, gloves and helmet enhance the experience. It only took my first case of saddle sores on my first long distance tour in cotton shorts to gain a true appreciation for the potential value offered by padded cycling shorts. Buying once is not enough though. Helmets have a life span, and need replacing. Gloves wear out, and cycling shorts wear out. Ride, wear out, replace.
Maintenance
A bicycle is a machine, with mechanical moving parts, and increasingly hydraulics and electronics as well. Machines need maintenance. Cleaning, lubing, greasing. Maintenance has a cost – your time or someone else’s in return for dollars, but it can help extend the lifespan of the moving parts on a bicycle, and those things cost even more money.
Parts
Brake pads, chains, chain rings, cassettes, bearings, cables, batteries, tires. All of these things have a useful life, and the more you ride (and sometimes when you don’t), theses things wear out and need replacing. Let your chain get too worn out and it’s going to take the chainrings and cassette with it, turning a low cost part replacement into a high cost part replacement. Last weekend my mountain bike shifters decided they were done with performing a thankless task. Broken internals. Time for new shifters. Not an expected repair, but one that made its need known suddenly and effectively.
Contact Points
You might have expected all of the previous categories, but this one catches out many people unaware. Stuff that doesn’t move also wears out, due to its important role connecting you to the bike. Saddles for example. The rails bend, the padding breaks down, the outer fabric gets scuffed or torn. Saddles are a consumable item. Expect to replace your saddle at some stage because it wont last as long as the bike as a whole, and that’s even if it’s comfortable (or was comfortable).
Using cycling shoes and pedals? When is the last time you looked closely at your cleats? These things last about a season or two, not a lifetime. And the shoes they are attached to will also wear out.
Handlebar tape breaks down from pressure and UV light, and can get manky from exposure to your grubby, greasy hands. Is it time for new tape or grips?
Events
How about going in a charity ride, gran fondo or race? Now you are up for event registration fees, fund raising, travel and accommodation. Not to mention food – lots of food! And of course, to do your best you will no doubt want some sports bars, gels, electrolytes, recovery drinks and maybe even a post event massage. Still think cycling is cheap? Yes! Time to add a coach, training plan, indoor smart trainer, power meter and a Zwift subscription.
Upgrades
Now we venture into the realm of want, and your susceptibility to cleverly constructed marketing campaigns designed to imply that your bike is not good enough, or you are not good enough, or you’re not keeping current unless you buy X. Beware the smoke. Beware the mirrors. But heh – it’s your cash. Spend it how you like!
N+1
The ultimate upgrade. A whole new bike! Woo hoo! Now we are back to square one. That new bike needs some new accessories. And you need a new kit to ride in, and now an extra bike needs maintenance, and parts and contact point items, and upgrades. You can see where this is going right? It’s a journey. There is no end to the spend!
John Higgins is a professional bike fitter and purveyor of unique and boutique bicycles and fit-related components and accessories in Salt Lake City. More info on bikefitr.com
By Breanne Nalder-Harward and Dave Nalder-Harward, PLAN7 Endurance Coaching — Endurance sport breeds some of the best types of athletes. Hours and hours, day after day, in extreme conditions, and all of the other things that go in to training and racing lead to fitness that most people in our society don’t even comprehend. With all of that also come consequences. We train our muscles and cardiovascular systems to their limits, and in doing so our hearts essentially develop overuse injury. The purpose of this article is to shine light on what can happen to our hearts, even when we are being healthy, and how proper training and nutrition can help prevent long term complications that can accumulate after years and years of endurance sport.
This topic is especially close to us. Breanne has dedicated her career as a dietitian to help athletes determine their nutrition needs in order to prevent long term problems that occur in the body, such as female athlete triad — eating disorders coupled with bone mineral density loss and amenorrhea in cyclists. She actually has osteopenia and multiple hormone problems that resulted from years of intense training and poor fueling. Dave, on the other hand, was living with Atrial Fibrillation (AFib) for who knows how many years before he was diagnosed and underwent an ablation to correct the damage that had been done to his heart tissue due to years of abuse to his cardio system. Essentially, he had an overuse injury to his heart tissue. The point of telling you our stories is to show that all of the training can add up, so we must take care of ourselves every day to maintain a happy, healthy heart.
On the nutrition side of things, some things to consider include eating foods high in omega 3s, consuming plenty of carbohydrates before and during training, staying hydrated (which includes electrolytes), recovering after every workout, and getting your essential supplements. Let’s break those topics down:
Omega 3 Fatty Acids: healthy fats from Extra Virgin Olive Oil (EVOO), avocados, salmon, almonds, seeds (chia, flax, hemp) and other plant sources are essential, as they act as lubricant for every cell in our body. They are nature’s anti-inflammatory agents, and they keep our HDL levels high and LDL level low (what we want!) when these foods are chosen over saturated fatty foods.
Carbs: our main energy source, they are not the enemy! We need 30-60 g per hour on the bike in order to keep our muscles firing and our brain functioning.
Hydration: seems like a no-brainer, but we need 2 bottles per hour, at least one of those bottles containing a high level of electrolytes (1st Endurance EFS is our favorite).
Recovery: you have a 30 minute time window to get recovery into your system so you can get your muscle tissue (including your heart tissue) repairing and be ready to train again tomorrow. [Contact Breanne for specific recommendations and help with planning your recovery nutrition.]
Supplements: the mains ones to focus on for heart health are Calcium, Magnesium, and vitamin D, as well as omega 3s if you don’t eat enough of the foods listed above. A fish oil and/or flax/chia/hemp seed oil supplement can be a great way to up the intake of those important fats.
On the physical side of this equation, please consider your overall workload. Keeping yourself healthy is much more than hammering away at your training. You need to recover as hard, if not harder, than your most challenging training sessions. Overuse is real and you will acquire injuries. Those injuries can be simple and course can be reversed with some rest and recovery. However, there are plenty of ways you can abuse your body through overuse and see some dramatic and catastrophic results.
Training with joint pain can cause overuse injuries. Pay close attention to all the major joints you would think of like knees, ankles, hips and shoulders. I’m also talking about your back and neck. Overtraining/overuse can result in your body making compensations that for the moment seem solid yet over time can create some serious issues like disc compression, IT Band Syndrome, knee and hip misalignment injuries and plenty of others.
Your heart can also be overused. If you pay attention to the cycling media outlets you’ll definitely find discussion about heart arrhythmias. Your heart is a muscle and you can take things too far, even with a super healthy heart. The idea of exercising as a benefit is a great one to follow. However, you need to pay attention to warning signs just as you would with a sore hip, knee or back. Take your resting heart rate every morning. If you have multiple days of your resting HR 10-15% above your baseline resting HR it’s time for a day off or at most some Active Recovery. Active Recovery is super easy effort. Imagine pedaling your bike with an 8 year old. Small chainring only. Minimal hills.
The best ways to avoid overtraining and overuse are to pay attention to your fatigue levels. Following a periodized training plan you definitely want to put yourself into a fatigued state to coax your body into physiological adaptations to make it more efficient. A big part of that is allowing for recovery. Err on the side of recovering more. Over-fatigue can derail a season and possibly the following season in a blink of the eye if you’re not following a solid recovery schedule. Take some easy days, take some days off. Assess your fatigue. Tell your coach you are tired. Have a discussion about it. Be objective when you don’t feel well. Missing a day of training when you are worked over will only help you come out stronger.
Breanne Nalder, MS, RDN has a Master’s degree in nutrition with an emphasis in sports dietetics from the University of Utah. A recently retired professional road cyclist, she still competes in road racing and gravel. Dave Harward is a level 1/Elite USAC certified road and MTB coach and the owner of PLAN7 Coaching.
The beaver seemed unusual for a beaver as it splashed around in the water 200 yards away and then started zooming in my direction. One creature turned into several, and they weren’t beaver. What were they? I was standing on a small bridge over a backed up creek, somewhere in Montana. I quietly shouted to Tony who hurried over to the bridge from our adjacent campsite, where we were packing up to start the 11th day of our 2 week bikepacking trip. We gazed down, marveling as five Northern River Otter fished their way upstream, zooming right underneath us. One leapt out onto the bank and gazed up at us. It was hard to say who got the biggest surprise, and it was one of many we savored during this journey.
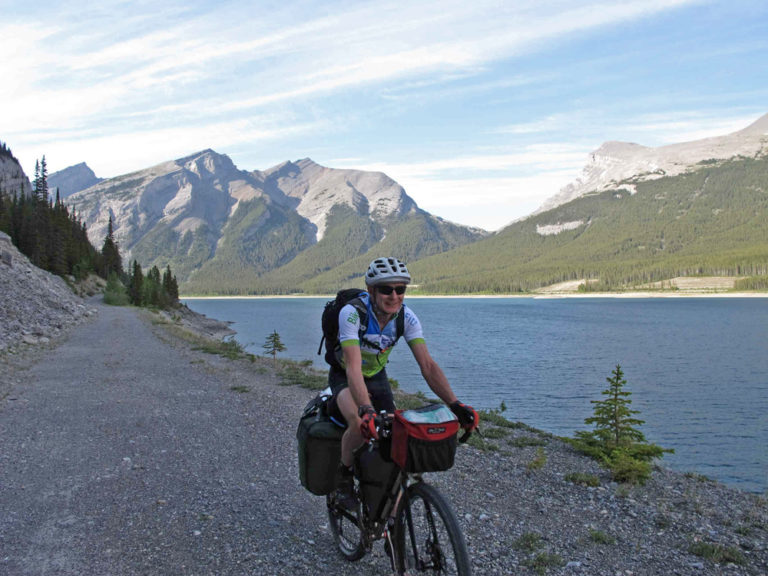
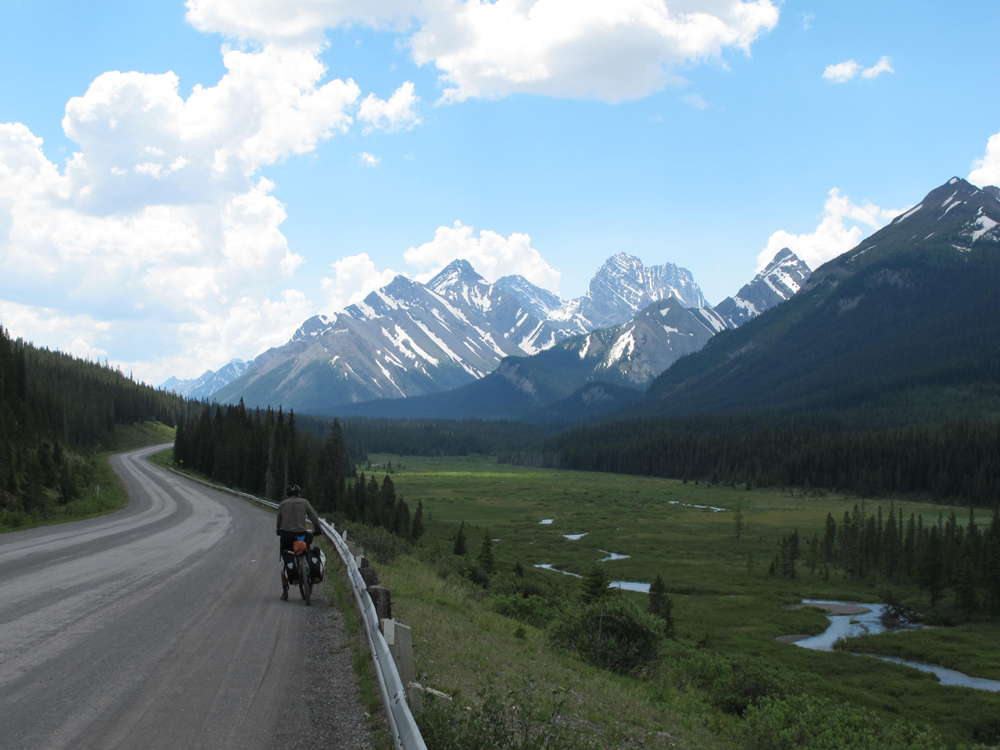
Fine roads and scenery in Alberta. Photo by John Higgins
Celebrating its 20th year, the Great Divide Mountain Bike Route stretches the length of the United States, and was researched and mapped by the Adventure Cycling Association to provide a non-paved cycle touring route for those who are so inclined. The route has become internationally famous and we encountered other riders from New Zealand, England, Holland, and Germany, as well as homegrown citizens of the USA and Canada. The original start was extended to Banff, Canada, and has recently been extended even further north, while the southern terminus is at Antelope Wells on the US -Mexican border. Cyclists might attempt the whole journey in one go, as do those participating in the Tour Divide race each year, and others bite off manageable sections. We choose a bite, starting in the north to pedal our way south for 2 weeks. Some might race all the way to the Mexican border in that time, but we wanted to savor the sights and surrounds and enjoy the journey.
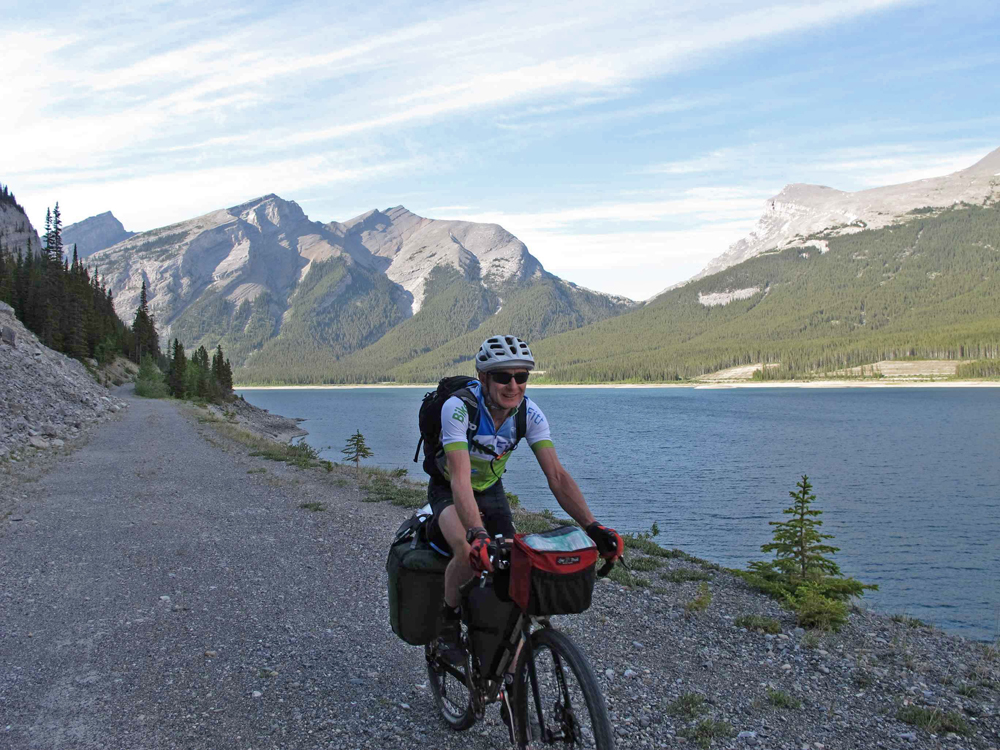
Rendezvousing in Calgary airport, we used Uber to go grocery shopping and then sorted gear and food in the hotel, prior to getting a shuttle from the airport to Banff the next morning. Two hours after arriving in Banff we had our bikes unboxed, assembled and loaded. A quick lap around Banff for “buy there” supplies like bear spray and camping gas, and we rolled out of town celebrating the start of a trip we had been considering for years, and that had already been postponed several times due to the circumstance of life. With the summer solstice providing ample daylight we got underway at 3pm and logged 4 hours of pleasant riding before settling into a lakeside camping spot to enjoy the spectacular scenery of the Canadian Rockies.
The route is well described in “Cycling the Great Divide” by Michael McCoy and in the map series published by the Adventure Cycling Association. What became quickly apparent was that although this is called a mountain bike route, it is primarily a moderate gravel road touring route and not a gnarly bikepacking sufferfest. The hyperbole warning about steep and infamous sections of trail are cautionary for those venturing off asphalt for the first time, but are barely worth a mention for experienced dirt trail cyclists. The guidebook is written from the perspective of road tourers seeking to hop from town to town to take advantage of restaurants, and campgrounds or hotels with hot showers. Our intention was to avoid “services” unless needed, and free-camp in the wilderness as much as we could. We have logged some adventurous backroad and no road touring together in the past, and were bikepacking in the wilderness well before the current surge in popularity.
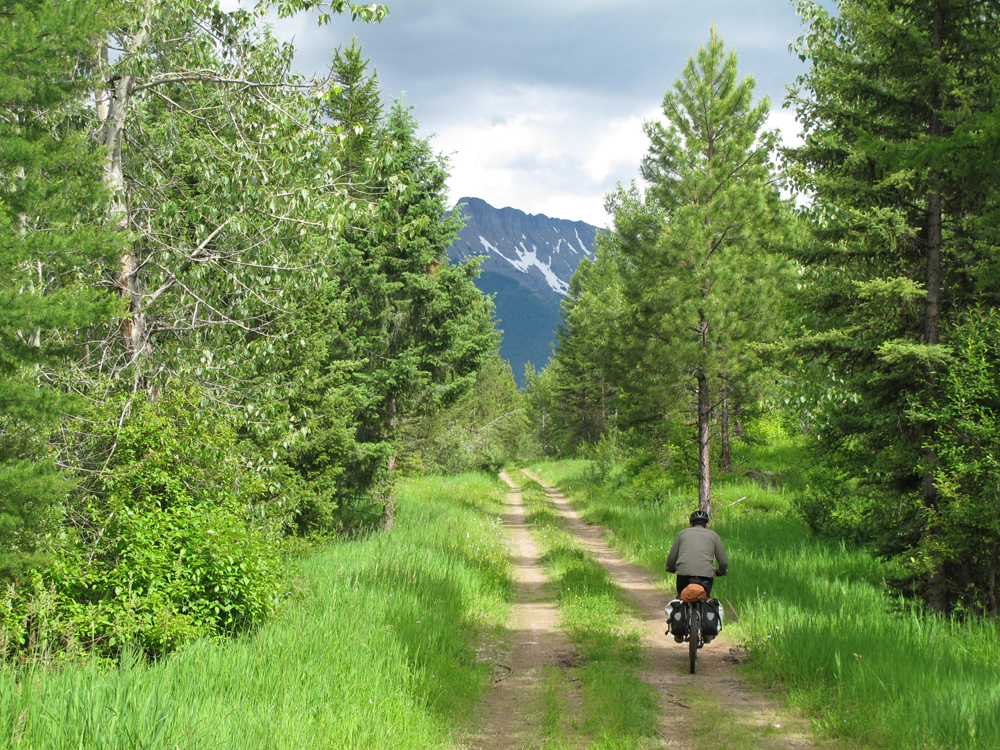
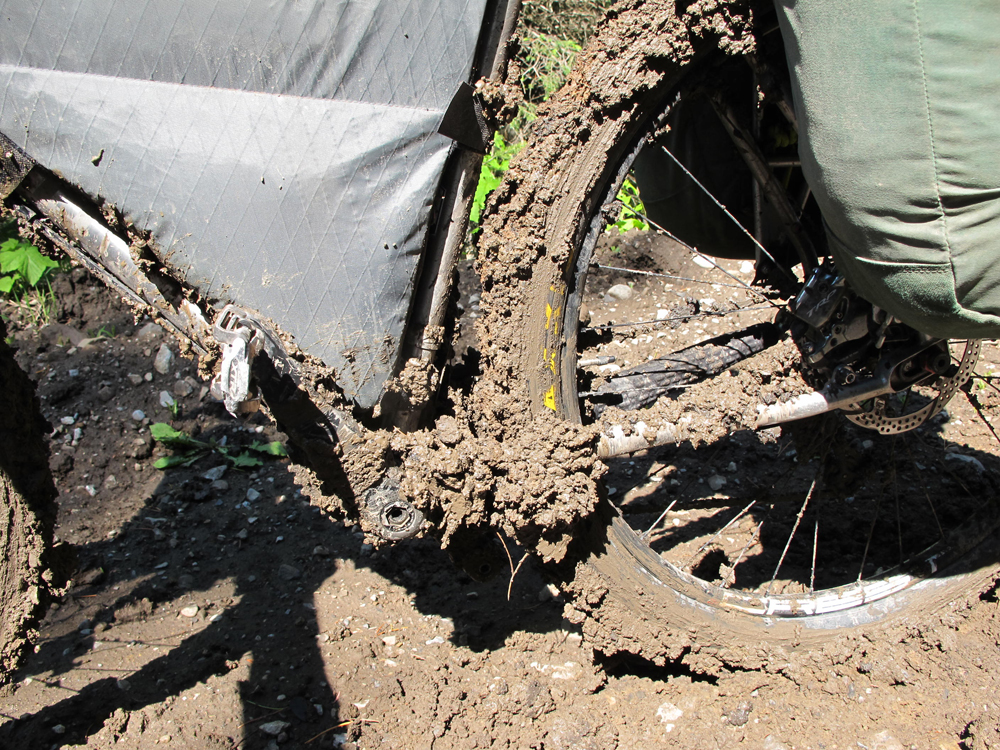
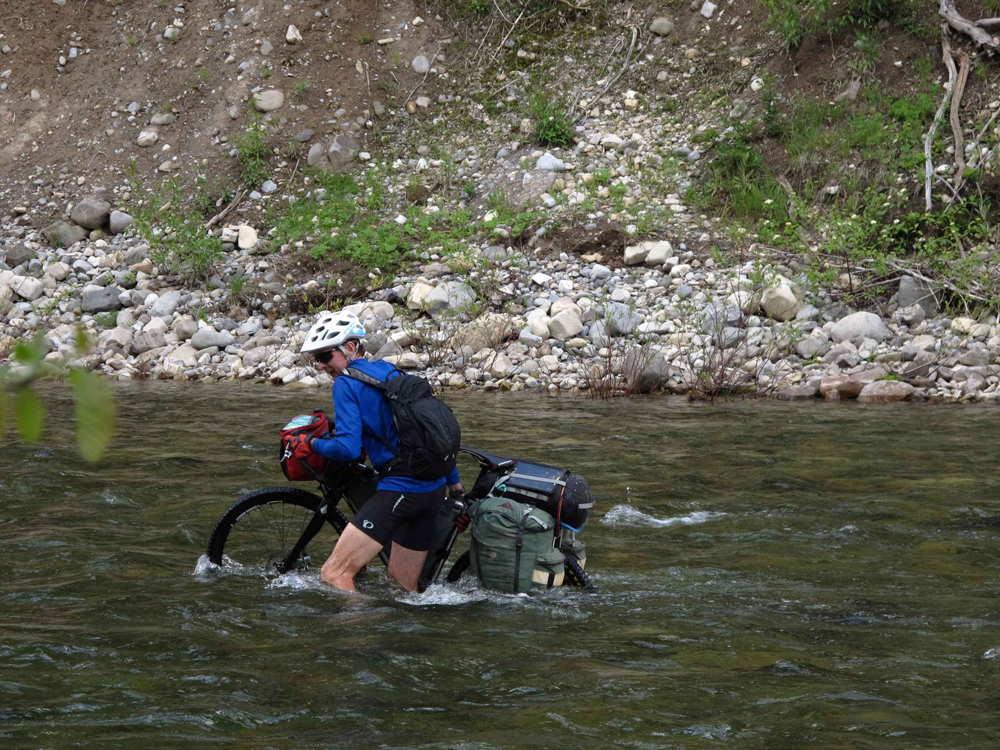
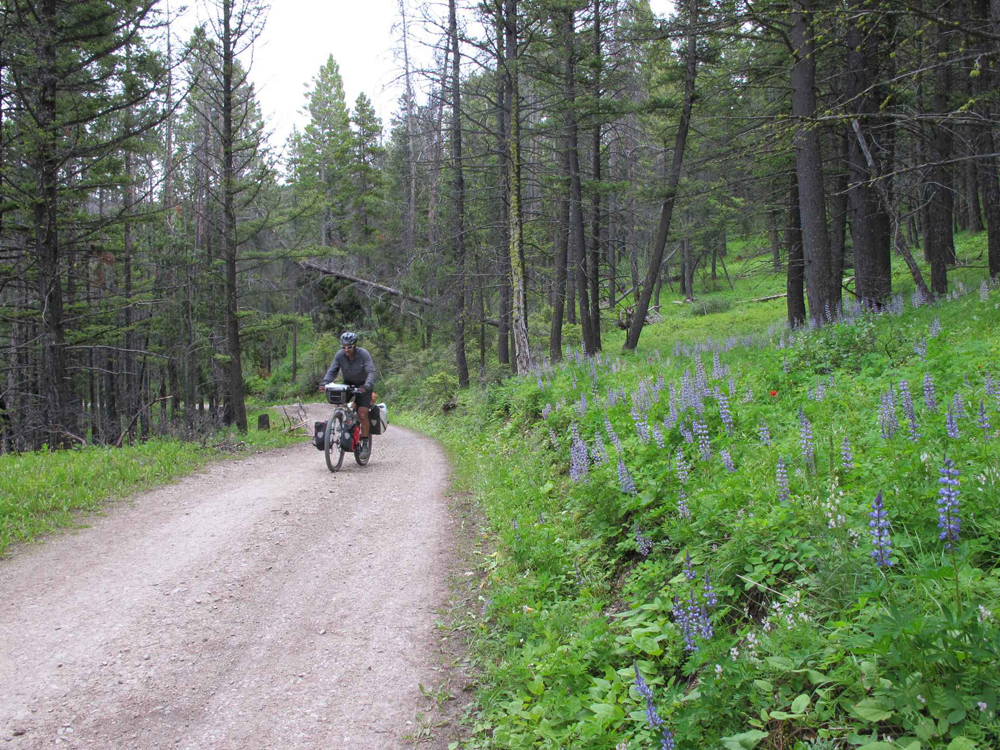
Road conditions varied from wide, well graded and travelled gravel to seldom travelled backcountry forestry roads, but our favorite were the smooth and grassed over “closed to motorized vehicles” sections. Singletrack is virtually nonexistent on the route, but the trail was livened up with some streams and rivers to negotiate. There were enough paved highway sections linking the gravel to remind me why I had quickly given up road touring and turned to gravel touring 30 years ago. The speed limit on these paved sections appeared to be AFAP. “As fast as possible”, or so it seemed to us emerging from the woods at a bicycle touring pace. We were grateful for mostly paved riding during a day of light rain, but that set us up for a wheel blocking, chain breaking mudfest ascending to Flathead Pass. The locals could have bagged and sold this stuff as adhesive. It did make spotting bear prints a lot easier though, and there were some big ones!
Speaking of bears…. two Australians biking in the North American wilds are as paranoid about bears as Americans are about poisonous snakes, spiders and crocs when they visit Australia. We did our best to warn bears of our presence via tinkling bells and loud hollering in beary areas. This strategy obviously worked well, because other than a small black bear beside the most trafficked gravel road of the trip on our second day we had not seen any, although there was plenty of evidence in the form of prints and excrement. We wanted to see a bear, preferably from a respectful distance! We’d met other riders who’d seen plenty. Finally we chanced upon a mother with 2 cubs way down the road in front of us. Most likely smelling us she quickly disappeared into the woods. In fact, wildlife sighting was not as frequent as we had expected. We traversed the Flathead River valley, regarded as the Serengeti of North America for its wildness and populations of grizzly, moose, elk, deer, wolves and much more. Our wildlife sighting tally in this region: 2 deer and 3 squirrels. The otters and second bear came later. But we did camp next to a beaver dam, complete with beaver.
Although the route takes in a lot of wild country, it also passes through towns and villages every few days, and my visiting Aussie touring companion was keen to experience small town America (including Canada). First stop, Elkford in British Columbia. We had two objectives: have a second breakfast, having hurriedly packed up in the rain from our camp near town that morning; and resupply with camping gas, which we were about out of, having only bought a couple of small cans in Banff (I scoffed at buying the large canister, assuming resupply would be easy at each town). The well-stocked supermarket had everything – except camping gas. Note: we are talking iso-propane butane for backpacking stoves, not propane in green bottles. Ok then, how about second breakfast? We settled into a small diner inside a gas station and eyed the enticing menu. The server came over and informed us the kitchen had closed at 10.45am. It was 10.50am. What diner closes at 10.45am for the day? Seeking an alternative recommendation we were directed to a pizza place that apparently served more than pizza. On the way we detoured into the two other stores in town looking for camping gas, to no avail. Inside the pizza place we noted with enthusiasm the big breakfast platter being devoured on the table next to us, but the menu showed no such feast, just pizza. After pondering this for a while we made enquiries with our server. “Breakfast is over at 11.00am.” It was 11.03am. With our best foreign accents we cajoled a breakfast time extension out of the cook. This town seriously needs an all-day breakfast option!
With rain dripping on us we pedaled the pavement to Sparwood just down the road. The staff in the visitor center told us the camping ground had no store, but we could refill our gas bottles at the gas station. Wrong type of gas! No one there had ever heard of the other type. Both towns seemed oblivious to the fact that bicycle tourers have been passing through and seeking resupplies and services (and breakfast) for 20 years. Their local economies are defiantly holding on to their coal mining and logging heritage, and banking on these industries for the future as well. Good luck with that!
Lack of a functional camp stove (no gas until Eureka, Montana) caused us to dust off our campfire building skills, and enjoy an open fire each morning and evening to prepare meals. Given the precipitation and damp verdant forest, starting a wildfire would have been challenging to do, so we rose to the campfire challenge with some pride, aided by having both learnt campcraft skills before lightweight camping stoves were a thing. On this northern section of the route surface water is abundant and informal but very adequate campsites could be encountered every 5 or 10 miles. Our choice pick was by a bridge where we had easy access to water and could hang our bear bag with ease from the structure, versus a time consuming throwing competition into some tall narrow pine tree.
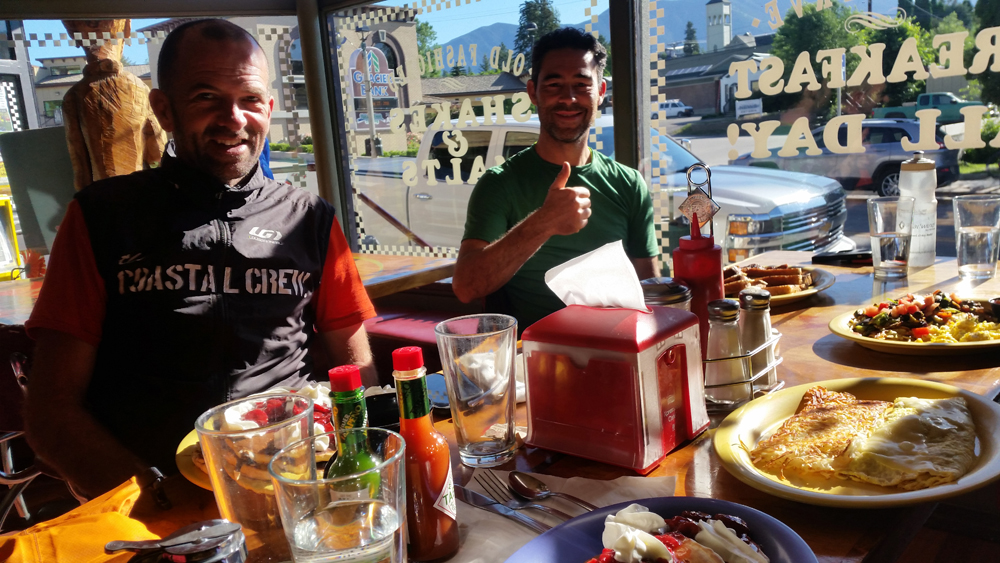
Crossing the border into the United States at Roosville was a mellow affair compared to the bureaucracy and procedure at the airport. No cameras, finger print scans or shakedowns. Very civilized and welcoming. And the small towns that we encountered in Montana made a point of welcoming cyclists with information, services and even camping gas! Eureka offers up a free campground, shower and toilet at the Chamber of Commerce, and there are a couple of outstanding eateries a short stroll away, with one serving ALL DAY BREAKFAST. However the bucolic charm of this small town took a turn for the worse at night, earning it a new marketing tagline: “Exhaust noise capital of Montana”. Apparently the louder your exhaust system, the greater your manhood, and there was a lot of audible testosterone from dusk to dawn, rendering sleep a scarce commodity. We fled back into the wilds, cresting the Whitefish Divide and then cruising down the west side of Glacier National Park before camping high up next to an alpine lake. Bliss.
Suspect play in Tony’s bottom bracket led us into Whitefish in search of a bike shop for a diagnosis and replacement. Glacier Cyclery took in the bike on the spot, assessed and replaced the bottom bracket, and had us rolling again in an hour and a half, while telling non-tourers looking for repairs that they were booked a week out. The priority service was much appreciated, barely giving us enough time to do justice to the fine offerings at Loula’s Café and pie shop a few doors away.
Back in Eureka we had encountered two New Zealanders taking their winter off to bikepack the full route, and we teamed up for a few days. A shared highlight was an overnight stay in the backyard of Great Divide route hosts Tom and Patty. Here and there along the route are kind and generous souls who open their door, fridge, yard, cabin and lives to random strangers who happen to be riding past. Their reward is meeting people from around the world without leaving home, and as tourists we gained insight and perspective into the lives of other people who we normally wouldn’t encounter. Further down the trail we stayed with Barbara and her husband, who actively practice a “pay it forward” philosophy of doing good for others. These encounters enriched the experience of the tour and varied our diet of riding and camping solitude.
The town prize however, must go to Ovando, Montana. You can ride through it in 30 seconds, it’s that big. What’s far bigger is their enthusiasm for welcoming and catering to bike tourers. There is a big sign outlining all the amenities for cyclists, including a bar, café, a tepee to camp in, power strips to feely recharge your technology, and a fly fishing shop stocking spare bike parts and camping essentials – like camping gas. Take note, Canadian towns!
When we set off, we weren’t sure what our rate of progress would be and where we would end up in the allotted time. Progress exceeded expectations and the finish line kept moving south, keeping my wife on edge as to where she was going to be travelling to for the pickup rendezvous. A stiff tailwind was helping us along, and we realized that Helena was within our reach if we put in a bit of extra effort over a couple of days. Our last day on the route reminded us that stuff happens, and be prepared. We missed a key turn and were rewarded with a couple of hours extra riding off route, with a bonus of two extra crossings of the continental divide on the coldest day we had experienced (complete with a few snowflakes), while figuring our way out of a maze of trails, and then a 2 inch nail provided the only flat tire of the trip an hour out of Helena.
However we rolled into town before dark, celebrated with a cold beverage, and reflected on what a truly fabulous couple of weeks it had been. The riding was easier than expected, the scenery was ever changing and interesting, the weather was generally kind, and we were simultaneously tired and refreshed, and eager to do another section, or even the same one again. It was that good.
Equipment
There is a lot of advice, information and opinion about what rig is suitable for this route. It may depend on what you have and what your experience and preference is. As far as a bike goes, you can do this route on a fully rigid gravel bike or a full suspension mountain bike, or some variation of the two. We are old school tourers who like rack and panniers, which we used. No issue at all with this and a perfectly fine choice as our focus was comfort not speed. We encountered other tourers using full rack and panniers, trailers or bikepacking bags. Those bikepackers travelling light were envious of the quantity and quality of the food we produced out of our panniers, which they didn’t have room to carry. Gotta eat well to ride well!
Our respective setups:
Gary Fisher 29er hardtail mountain bike with a now outdated but eminently suitable 3 x 9 drivetrain; front and rear Axiom racks with front and rear Ortlieb Panniers; handlebar bag.
Otso Warakin gravel bike running 27.5 mountain bike wheels and a 2 x 10 drivetrain (26/36 chainrings and 11-36 cassette), set up with an Axiom rear rack and ancient panniers, locally made BroadFork custom framebag, 2 x Revelate Designs feedbags, Lone Peak Designs handlebar bag, Camelbak Mule hydration pack.
We both used Maxxis Crossmark tires. One set up was tubes, one was tubeless.
Bike Fit
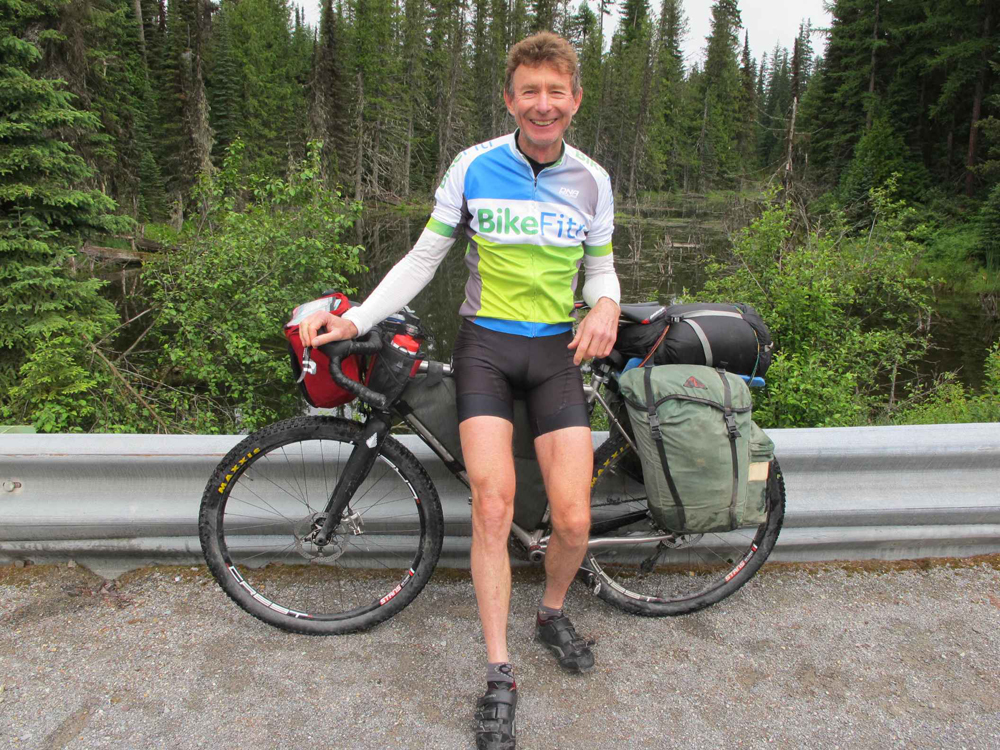
As a bike fitter I had an obvious interest in being comfortable and preventing cycling injuries during this trip. To this end I used a few of the products I recommend and sell including G8 2620 insoles, BikeFit SPD wedged cleats, Prologo saddle, and a Redshift Shockstop suspension stem. All worked out well.
Maps and Information
Cycling the Great Divide by Michael McCoy, published by Mountaineers Books, 2013. Available at adventurecycling.org
Great Divide Mountain Bike Route, Jasper, AB to Antelope Wells, NM, 7 Map Set (3083.8 mi.) overview and individual sections. Available from adventurecycling.org
John Higgins is a bike fitter, and owner of BikeFitr and Fit Kit Systems in Utah. He is a retailer for some of the products mentioned, but is not sponsored by any brands. His only sponsor is his wife. The trip took place June 20th to July 3rd, 2018. Contact john@bikefitr if you want any more details or trail beta from this trip.
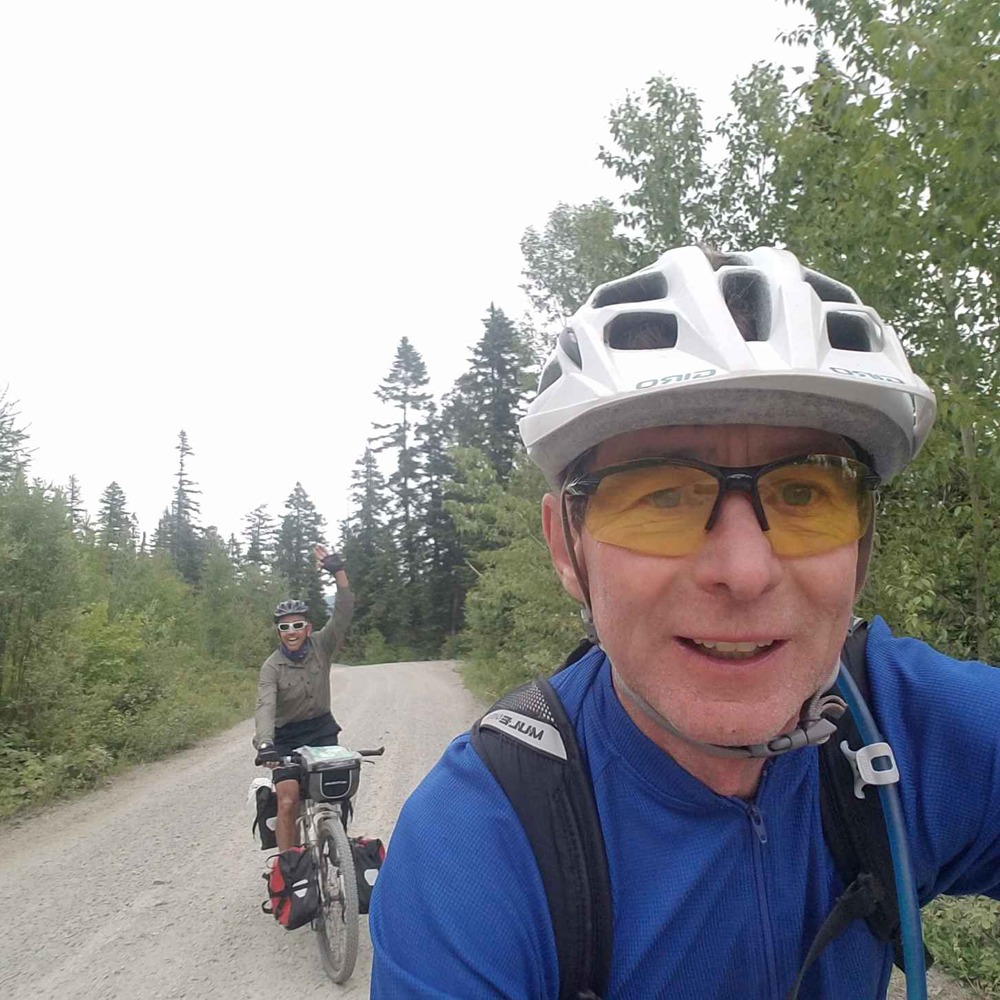
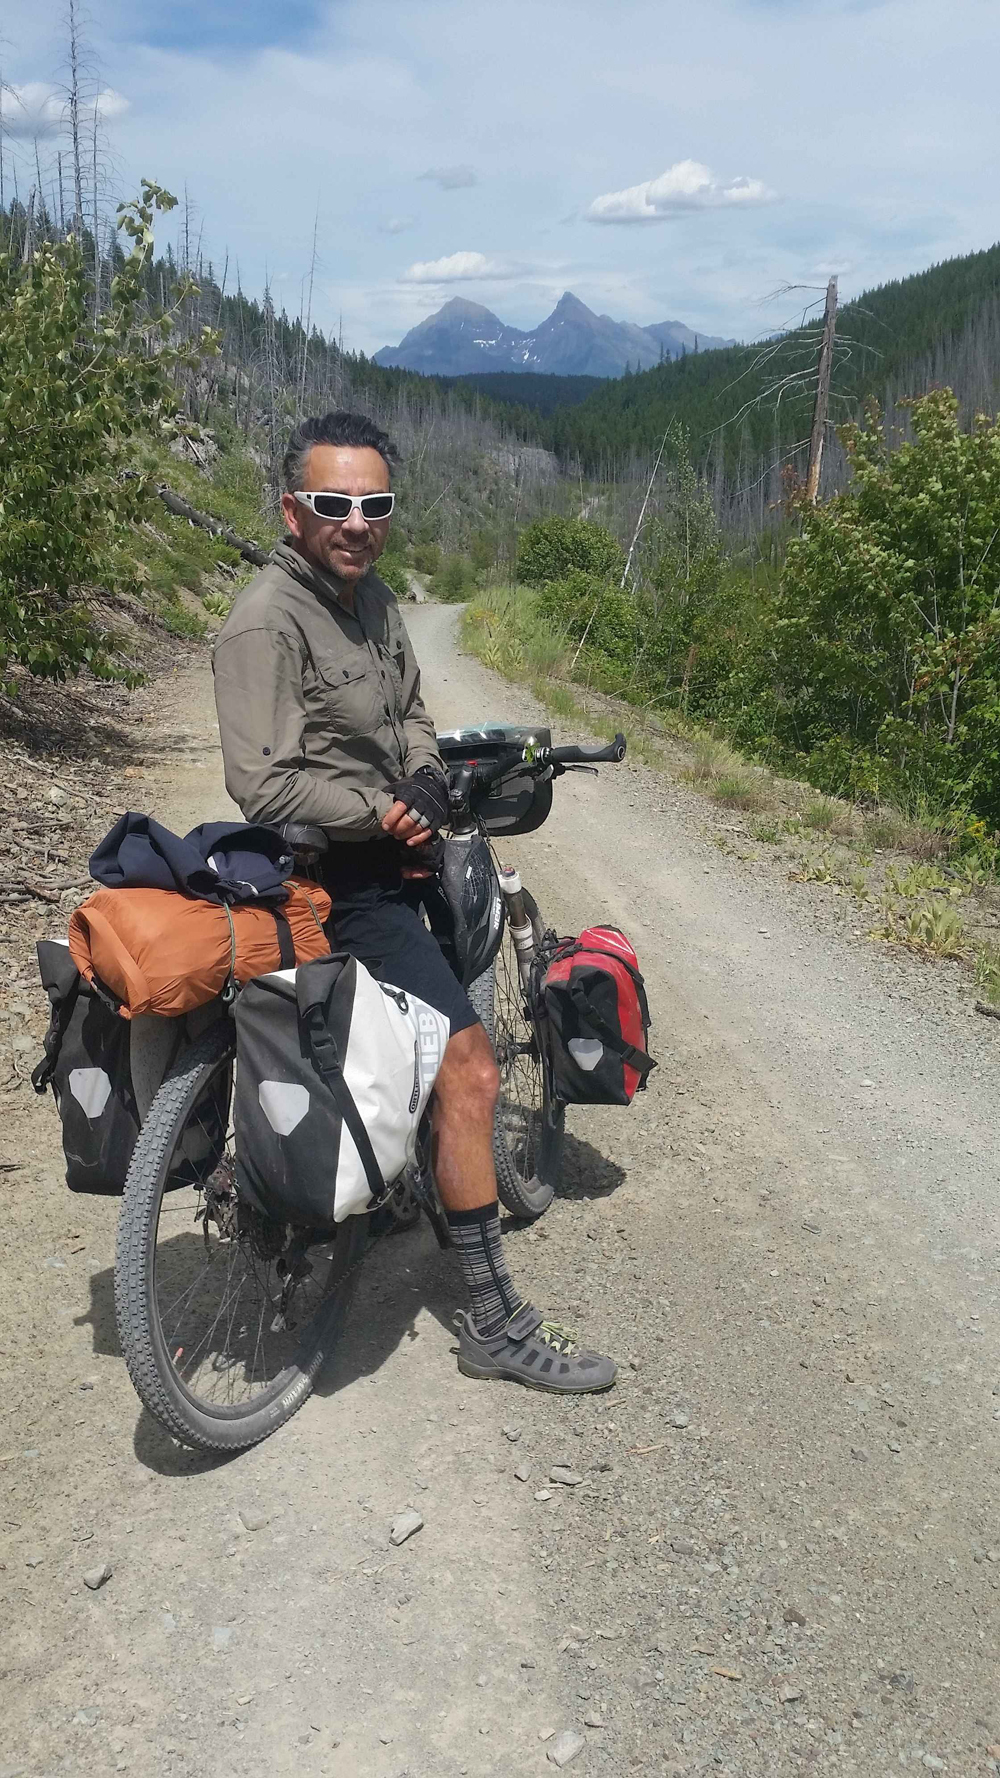
Rolling selfie somewhere on the trail. John is in the front, Tony in the backgound. Photo by John HigginsTony admiring the scenery as we descent from WhiteFish Pass towards Glacier National Park. Photo by John HigginsNow that’s a breakfast! Refueling with travelling Kiwis in Eureka. Photo by Tony MaynardTough to take trails and scenery. Photo by John HigginsJohn showing a bit of leg. Photo by Tony MaynardAdhesive mud on the way to Flathead Pass. Photo by John HigginsJohn ferry gliding his bike across the Flathead River where the bridge used to be. Photo by Tony MaynardLosing light along Spray Lakes Reservoir toward the end of the first day. Photo by Tony MaynardTony near the end of the long climb toward the Continental Divide crossing south of Lincoln, Montana. Photo by John HigginsLincoln, Montana also welcomes cyclists. Photo by John Higgins
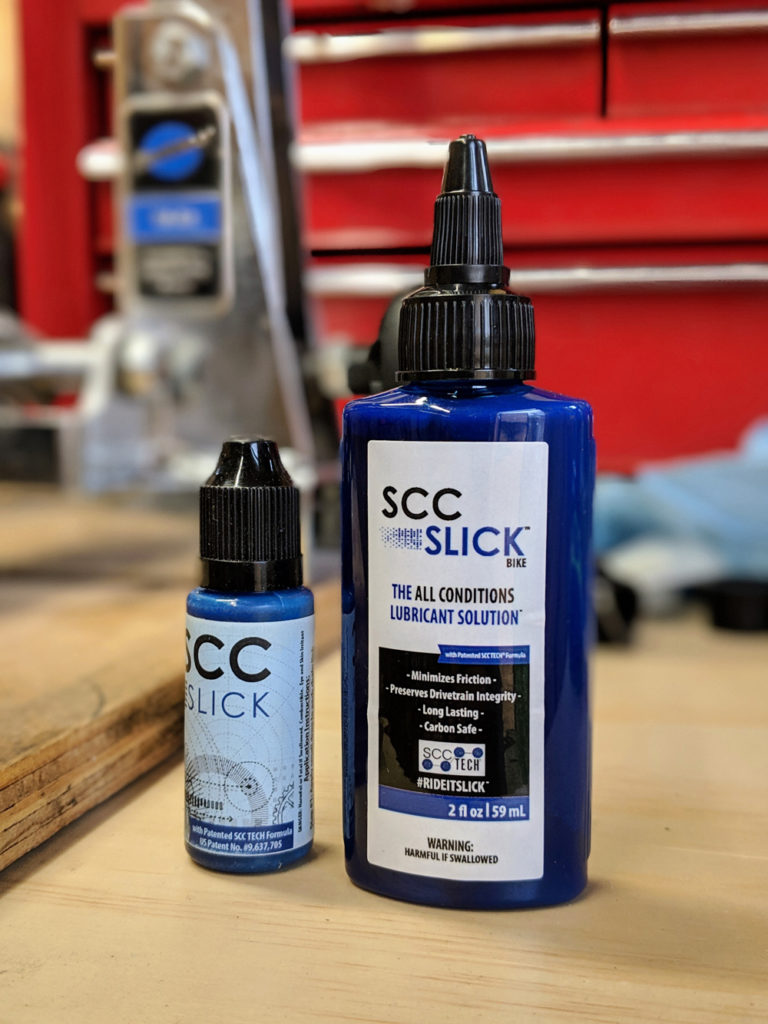
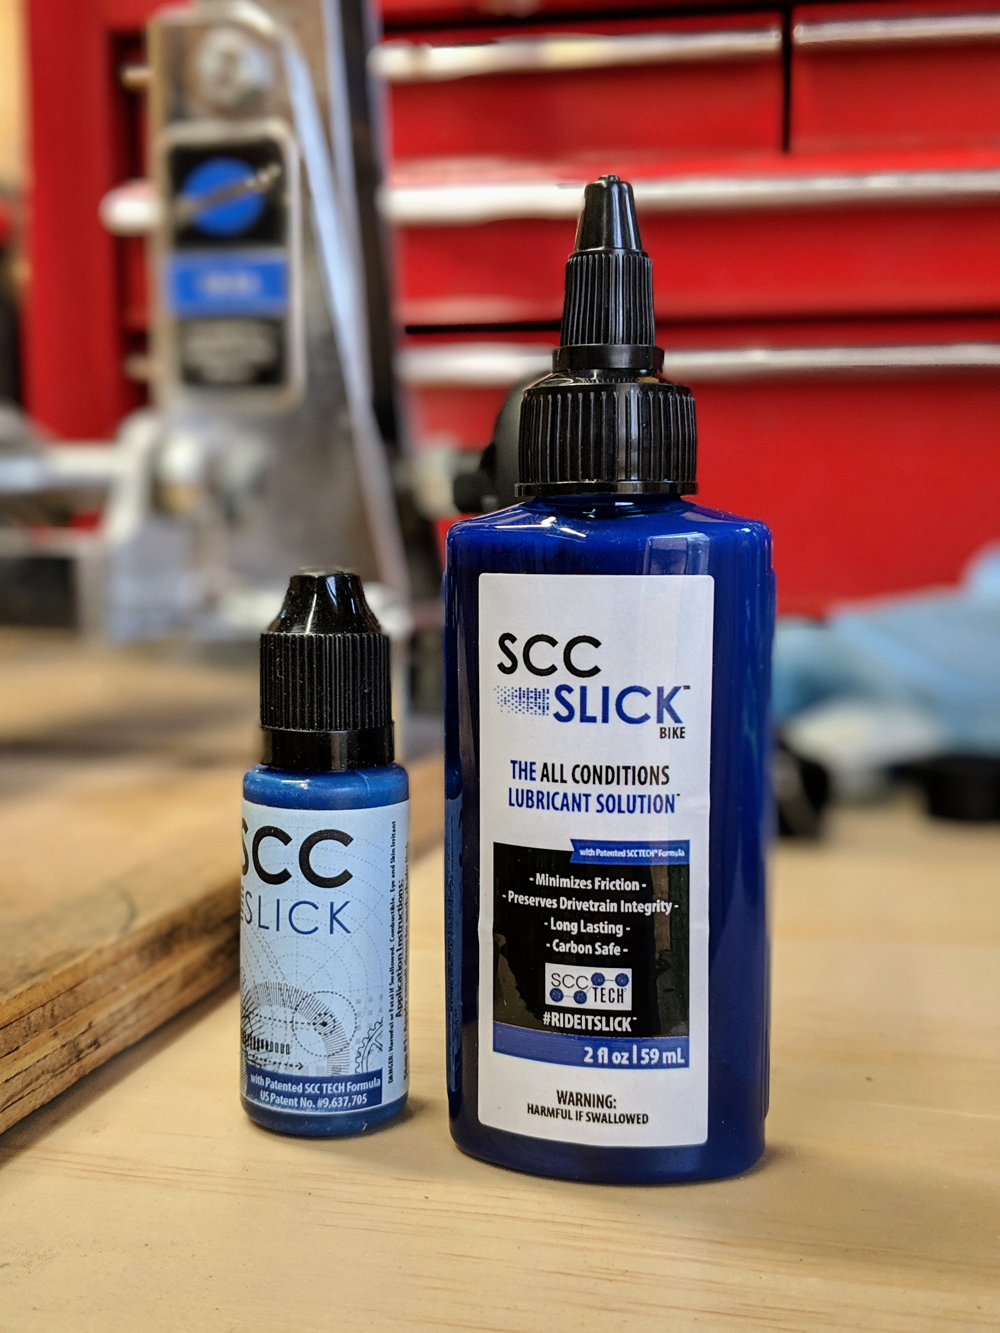
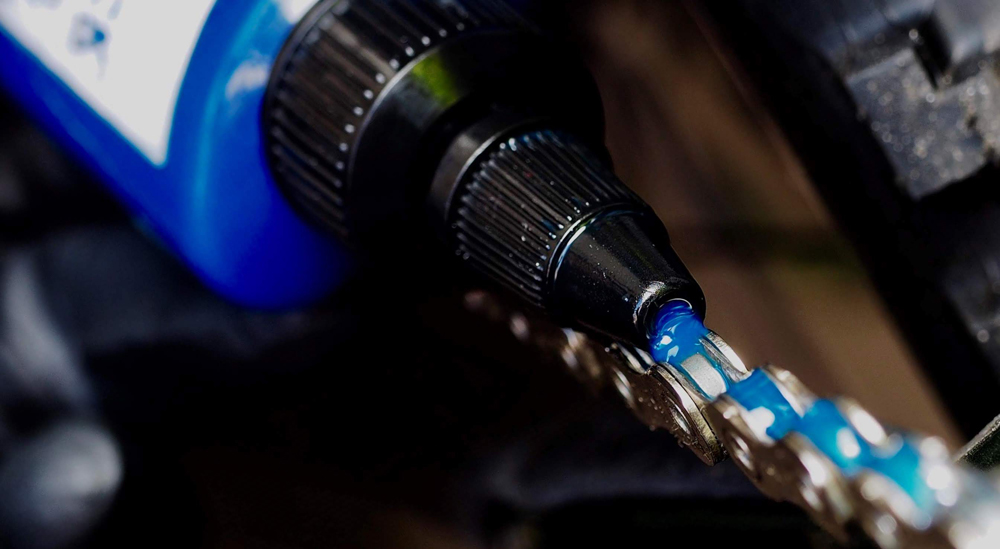
SCC Slick is a new chain lube. Photo by Eric Kramer
By Eric Kramer
When my buddy told me he had some new chain lube to try, I brushed it off. After years of trial and error trying to keep my drivetrain running smooth in Utah’s ultra dry conditions, I had a routine that worked.
Then one day I ran out of my usual lube, and since I had that tiny sample bottle of SCC Slick still laying around, I figured it was as good a time as any to try it. Being just a few ounces I figured I’d use it up in a few rides then go back to my usual lube. Fast forward an entire season later and I’m still using that tiny bottle of SCC Slick.
I’ll get to my impressions of the lube, but first, since they are a local company, a little about SCC Tech. SCC Tech was founded in Salt Lake City, Utah by Kevin Van Loon and Len Waldron. The genesis of the formula started many years earlier when Len was in the Army and grew frustrated with the lubes available for use with his rifle. They prevented rust but didn’t lubricate well under heat and pressure and didn’t do anything to prevent buildup and contamination, all things that can lead to a inoperative weapon which, unlike our high-end drivetrains, can be a matter of life and death. Len spent seven years perfecting that formula and came to the realization that it had great potential for bicycles, so he teamed up with Kevin Van Loon who used his 20+ years of cycling racing and industry experience to optimize the formula for the needs of bicycle drivetrains. They named it SCC because it’s designed to run Silent, Clean & Cool.
After applying SCC Slick, I immediately noticed a new level of quiet and frictionless operation. You can apply it by either a single drop on each link or carefully squeezing the bottle while spinning the cranks so each link ends up with a dollop of the blue stuff. Spin the crank a bit, let it settle for at least five minutes minutes, then wipe it down. The chain will feel slick to the touch, hence the name.
SCC Slick has many impressive qualities but the fact that I’m still using that original sample bottle illustrates perhaps its most defining quality: its longevity. My previous routine was to re-apply lube after most rides, but with SCC Slick, I was pleasantly surprised that I could get a week or two of heavy riding with smooth and quiet drivetrain performance.
Not having to apply lube all the time is surprisingly liberating. Just ask Joe Spataro who completed the six day Trans BC Enduro race on a single application of the stuff. Since you can go more rides between applications, you’re a lot less likely to have that sinking feeling at the start of a ride when you realize your chain is dry because you forgot to lube it (which is a pickle since most dry lubes take several hours to dry before you can ride them). If you do want to lube up before a ride, it’s no problem because it only needs five minutes to penetrate and settle.
SCC Slick’s performance in the dry would be enough to make it a standout performer, but where other dry lubes are nearly useless in the wet, SCC Slick performs quite well. Last summer I left the dry dust of Utah for the wet loam of the Pacific Northwest. I rode in driving rain on soaked trails and SCC Slick performed well and clung to the chain.
SCC Slick also acts like a degreaser. You don’t even need to clean your dirty chain before applying it for the first time. Just apply, ride, and your chain will clean itself, especially if you do a quick wipe down after each ride.
SCC Slick may seem expensive for a small bottle, but it’s actually far more cost effective than any lube I’ve ever used before. I use it on my mountain, cross and road bikes, and after a season of heavy riding, I still have some left in that original sample bottle. Everyone I know who has tried SCC Slick has made the switch because it greatly simplifies the cyclist’s most common maintenance task by allowing you to use one lube, sparingly, on any bike, in any condition.
Q and A with the SCC Tech Founder Kevin Van Loon
Without divulging any secret formulas, can you tell us a little about the science behind your lube and why it works the way it does?
SCC SLICK uses 4 major components:
A high-quality synthetic lubricant
A penetrant capable of reaching micro-crevices as small as a millionth of an inch
A detergent that floats contamination previously trapped in the micro-crevices of the chain to the surface to be wiped off post ride.
A dispersant that prevents re-adherence of contamination
We then incorporated a special addictive that both binds the 4 major components together and also has an affinity for metal (think of it as a chemical magnet), which helps SCC SLICK to adhere to the chain evenly, consistently and for longer periods of time.
This combination allows SCC SLICK to work its way deeper into your chain, resulting in improved performance over time. As one SCC SLICK user said; “3 rides in is when you start to see the real magic happen”.
Do you have any additional suggestions for how to apply it?
Applying SCC SLICK is not complicated, but it is different and can be summed up as:
Apply a small drop of SCC SLICK to each chain link, wait five minutes then proceed to wipe the chain thoroughly. Then following the first 3 to 5 rides, without reapplying, wipe the chain thoroughly.
We recommend reapplying every 25 hours of ride time, even if the chain seems to be running silent and smooth. We recommend this because noise prevention is only one aspect of what SCC SLICK does, its protective and lubricating properties do tend to fatigue, so to keep that smooth chain feeling going we’ve found it’s best to re-apply approximately every 25 hrs or in the instance you notice a decrease in performance or noise.
What’s it like starting a new company in the cycling industry? Any advice for someone thinking about jumping in?
It’s been fun, challenging and a lot of hard work. I personally love cycling and the cycling lifestyle and I firmly believe everyone should make riding a bike part of their regular lifestyle routine, so for me I’ve really enjoyed the opportunity to branch out and meet others who feel the same way throughout all the different sub groups of the cycling community. My advice to others is to be sure your capable of obsessing over every little thing that has to do with your product / service that comes to market be and be willing to recognize mistakes and come up with a process to recognize and reconcile, so you’re able to move past setbacks as quickly as possible. Personally the big thing I had to recognize was the importance of valuing people and relationships. As difficult as it might be to ask for you’re going to need it, so it important to demonstrate appreciation and gratitude, because those individuals offering up their help sure aren’t doing it for the money.
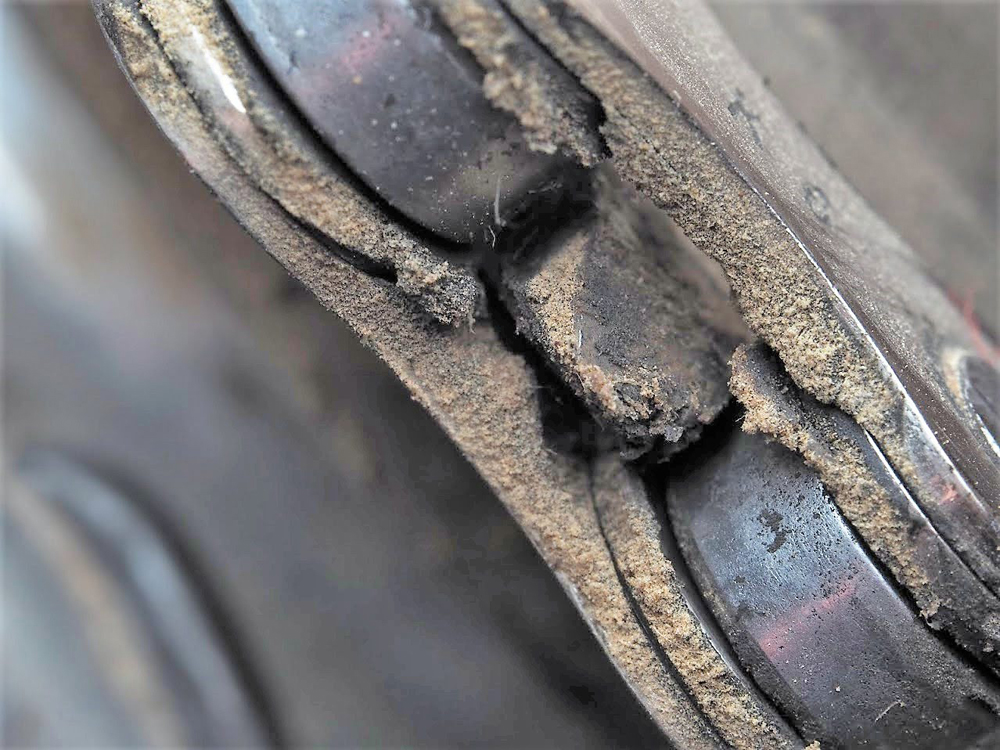
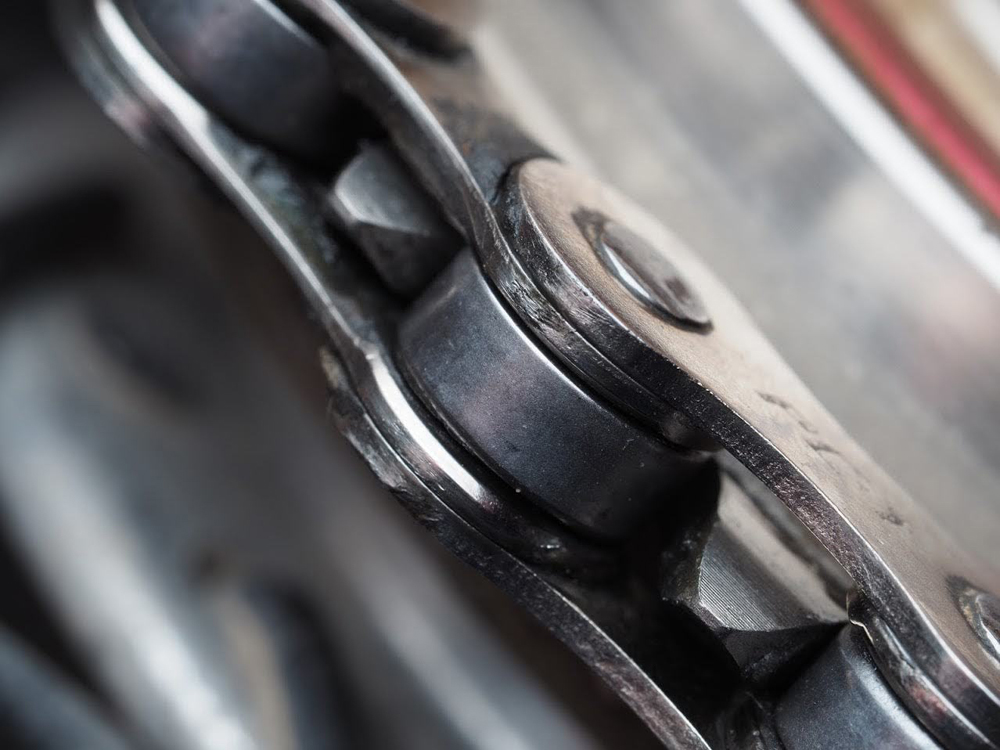
Before. Photo by Dustin Ott Applying SCC Slick. Photo by Dustion Ott After. Photo by Dustin Ott
Push into the wind, head down and grip those bars. Photo by Lukas Brinkerhoff
Have you ever been punched in the face by the wind?
It’s that time of the night between laying down and waking up. It could be 10 PM or it could be 3 AM. I don’t want to look at my watch because if it’s the former the latter is going to take forever to get to. The wind was ripping when I laid down and has increased ever since. The flimsy, nylon walls of our tent are no match for its gusts.
I’ve been listening to its ebbs and flows and slams whilst I attempt to fall asleep. It starts with a low hum that you can hear clearly as there is no movement where I lie. The hum grows to a screech and you can feel the anticipation of the air around you as it prepares to be ripped down the ridge in the impending deluge of air flowing from above. It hits the tent first as a negative force pulling the walls away from my face and then swinging them back and forth several times. Then the brunt of the gust hits pushing the wall in and down till I’m sure the aluminum poles will bend and maybe snap. And then it goes limp.
There is nothing in the in between. When the rage and screeching and motion subside, it’s like the air is taking a break. It hangs in the air. The silence is impregnated with waiting. It lasts just long enough that you think maybe things had stopped, but slowly, surely, that hum that cues the start of the wave begins to grow as a hint in the back of your head and then you can’t deny it any longer and the screech is barreling toward you again for the next round.
And just as I think I’m going to fall asleep the wind hits me with a right hook and I’m back at staring at the moving, nylon walls.
If you were to grab a dictionary and look to define wind, you would come up with several definitions that have to do with bodily functions and of course, the one that matters:
The perceptible natural movement of the air, especially in the form of a current of air blowing from a particular direction.
I’m sure that in certain areas of the world, and maybe even in this state, the wind blows from a “particular direction.” And guess that if the wind is blowing, it must be from a “particular direction” which as Microsoft Word has pointed out to me, is not very concise language. Thanks a lot dictionary.
I think you and I both know that the wind is a much more complex. In my experience, it blows from every direction and no direction all at once. You can be fighting it with all your might to go forward when it decides to stop throwing you off balance and then hitting you from the side and almost knocks you into traffic. And as cliché as it might sound, I have, more than once, gone on a ride that started with a horrible head wind only to have it decide to stop and change directions the moment I flip around and head for home.
Of course, anything that can push you back and can push you forward. That same hand of a jealous god that is whipping you into submission, can become the gentle nudge of a benevolent one carrying you when you were too weak to move on your own. I’m not sure why, but tailwinds feel more like kindness than their violent siblings that come from the front or pounce from the side.
You can only avoid this strange, natural force for so long if you a ride a bike. No one is immune and no one is blessed to always have tailwinds. It’s best to be prepared and learn how to smile in the face of a force you cannot see and quite often can’t predict.
If you ride one of those bikes that has drop bars, it’s best to be sure that those drops are within your reach and flexibility range because when that death grind of a headwind slaps you in the face, the first thing you are going to want to do is drop down. Putting your head into the wind and getting your body as flat and horizontal as possible as to create a smaller leading edge to reduce drag. This also keeps your center of gravity lower and will help keep you from being knocked sideways when your cruel master decides to suddenly change direction. I’m not sure it’s good advice, but this is the one scenario I feel like gripping the bars tightly is a good idea. For whatever reason, the death grip just feels right when the air is trying to rip you from your steed.
And most importantly, keep both wheels firmly planted on the ground. No bunny hopping. No wheelies. Certainly no drops. Pretend like you’re a NICA athlete with an overzealous coach who demands rules are followed in their absolute. It is almost guaranteed that leaving the ground will invite that one gust from just the wrong direction, catching you when there is nothing to keep you rooted to your position and slamming you back to the earth.
I wish I could say there existed a solution to this oddly violent natural force. Maybe someday, as technology progresses and we continue to try to conquer the world we live in, there will be some device or contraption that will eliminate the power of the wind. Until then, it’s best to keep your head down, both wheels on the ground and embrace the beating you are experiencing. Hope for a tailwind knowing it probably won’t come.
And when that gust suddenly dies and the world is perfectly silent, try to catch a few minutes of sleep because the wind is going to return in full force and slap you in the face.
Lukas Brinkerhoff blogs about mountain biking and life at mooseknuckleralliance.org.
The ridge had a killer view, but being constantly slapped in the face made for a long night. Photo by Lukas Brinkerhoff
New bike lanes will be included in the I-15/Payson Main Street Interchange (exit 250) project in Payson, Utah. The Utah Department of Transportation (UDOT) and Federal Highway Administration announced a final decision to go ahead with the project, unless anyone files suit to block it by August 5, 2019.
The project will include bike lanes along Main Street and Nebo Beltway, as part of the Payson City General Plan to increase multi-use trails around town and connect to regional trails. The bike lanes will connect to the planned Highway 198 Connector Trail. All told, 3.6 miles of new bike lanes will be added.